|
A supplement to the |
|
Website and eBook by Cyril J Wood |
|
A supplement to the |
|
Website and eBook by Cyril J Wood |
|
|
|
|
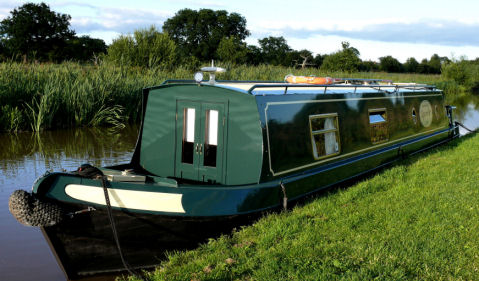
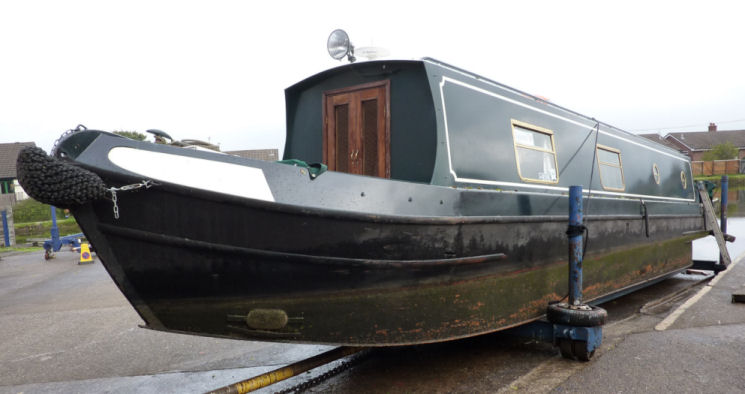
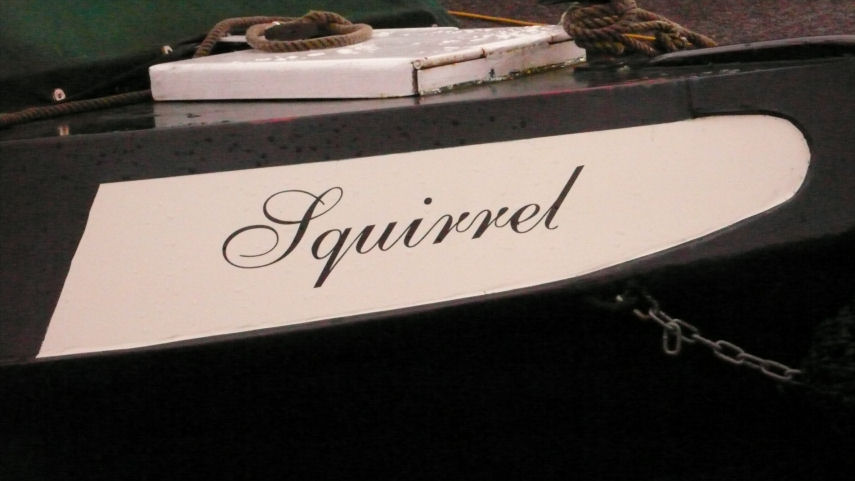
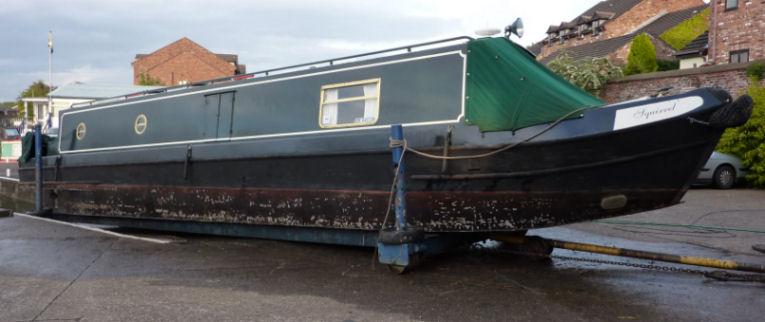
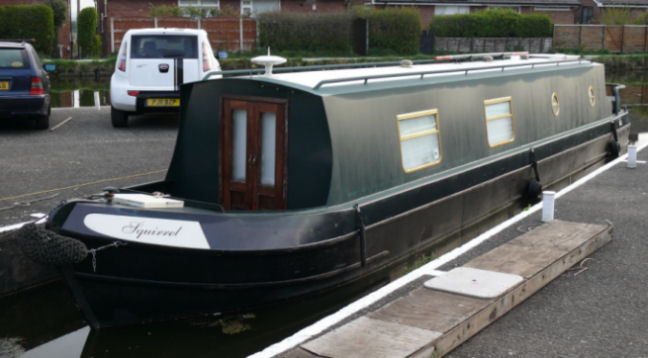
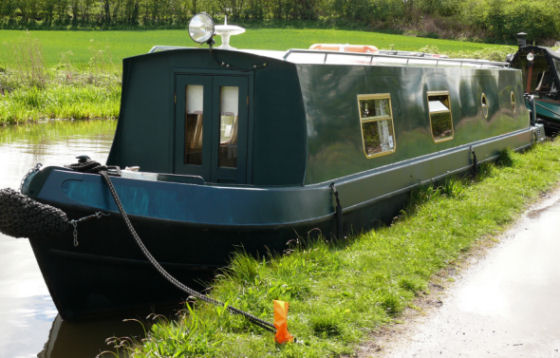
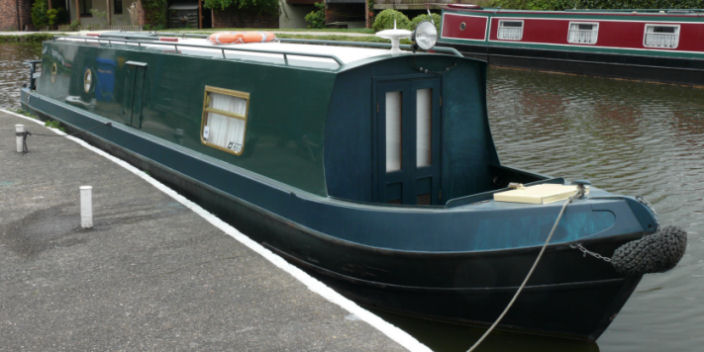
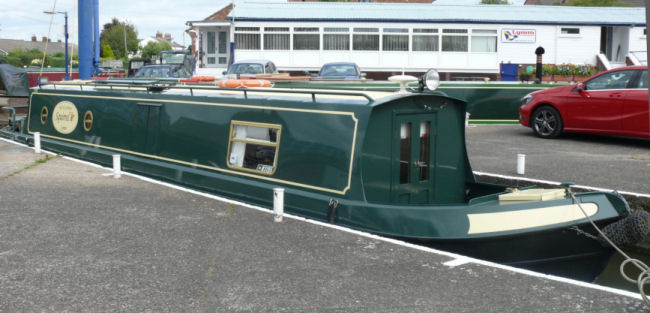
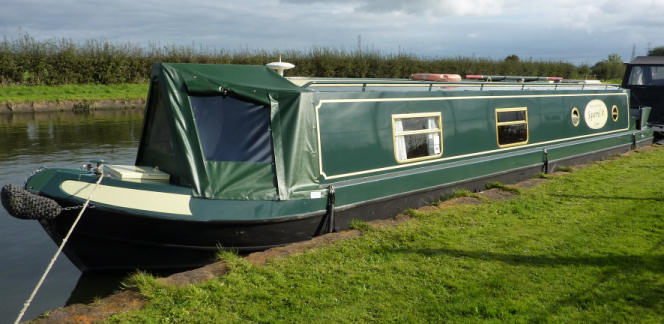
nb Squirrel
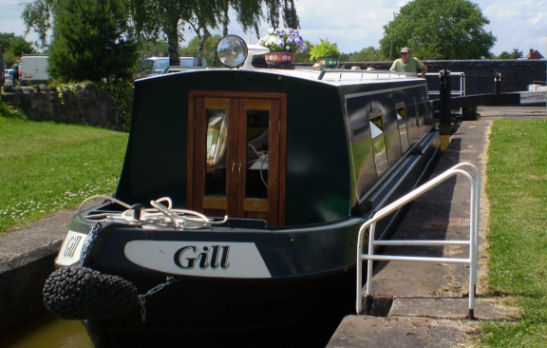
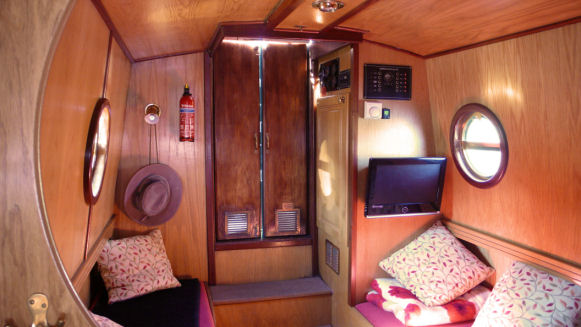
This part of the "Canalscape" website shares with you a little about our narrowboat and its history. nb Squirrel (previously known as Gill) is a 2002 Liverpool Boat Company 45 foot, cruiser stern narrowboat. How we came to purchase Squirrel started off when I went to view a GRP Norman cruiser for a friend's brother at Midway Boats located at Barbridge Junction whilst we were on our summer cruise (see Canalscape Book 9 - Chapter Three - Summer Cruise 2013). The lady in the boat brokerage gave us two sets of keys... one set for the Norman and the other set for the narrowboat moored next to it. I had a look at the GRP cruiser and as I had the keys for the narrowboat went to have a look on it as well. The boat was in better condition than our boat... Total Eclipse, which we had been experiencing a few problems with. The inside of the new boat was a revelation... more spacious, better layout, brighter and better equipped. The deciding factor was a framed photograph of a squirrel on one of the worktops. This was an omen and we were destined to have this boat. A little note of explanation is required here... my nickname since I was at school and used by everyone who knows me is Squirrel!
It's all his fault!
When I returned to our boat, which was moored around the corner on the main line of the "Shroppie", I told my wife Ange that I had a look on a narrowboat as well as the GRP cruiser. Ange asked what the narrowboat was like and would she like it? I told her that she didn't want to know as she would most certainly fall in love with it if she saw it. Next thing Ange took the camera and went marching to the brokerage to see the boat in question for herself. She was gone for quite a while and when she eventually returned Ange informed me that she wanted that boat. We went back to the office for another look and a chat with Steve Batty... the owner of Midway Boats, who informed us that they accepted boats in part exchange subject to a hull survey and that is the route we eventually decided to go down. We knew that if we sold the our old boat privately we would get more for her but the timing would mean that in the meantime Gill might be sold to someone else, so our minds were made up. Steve came and valued our old boat and a figure was agreed subject to a hull survey. Next came a juggling act of geography and chronology. To say that the next few weeks were traumatic would be an understatement. We eventually had to have the survey undertaken at Aqueduct Marina and when the results were known later that day (it passed with flying colours) I took Total Eclipse to Barbridge, the deal was made and Gill became ours on Thursday the 22nd of August 2013. On the following Saturday we transferred the remainder of our possessions from Total Eclipse onto our new boat and we were soon on our way back to Lymm. All was going well until we reached Middlewich. Whilst making the left turn out of Wardle Lock (Wardle Canal) onto the Trent and Mersey Canal the boat lost propulsion. The engine was running and the propeller shaft was turning but there was no power. The problem was traced to the absence of the propeller which had fallen off when reverse gear was selected whilst manoeuvring around the tight bend. The following day Steve Batty came to the rescue with a replacement propeller that was larger than the original but would be ok. The new propeller was fitted through the weed hatch by another Steve... from Kings Lock Chandlery who told us that he could not fit a split pin to lock the new propeller in place and that we should take it easy, especially when selecting reverse, until we could slip the boat out of the water and secure the propeller correctly. Bearing this in mind we were soon on our way home with the remainder of the voyage to our home moorings being uneventful except for the domestic batteries going flat.
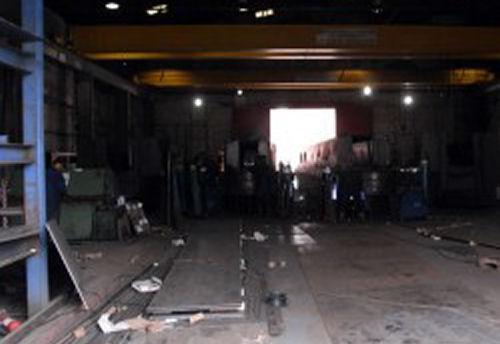
Inside Liverpool Boats' workshop... the birthplace of Squirrel
This Liverpool Boat Company narrowboat was built at their workshops in Townshead Street, Liverpool, Merseyside in 2002. The engine installed is a Beta 38 diesel unit based on a Kubota base engine and marinised by Beta Marine. It has a cubic capacity of 1498cc that produces 37·5bhp output and is coupled to a Newage/PRM 120 2:1 mechanical gearbox. The engine is keel cooled via a skin tank fitted to the port rear swim. Cooling water is also fed to a calorifier for heating the hot water stored in an insulated, vertically mounted dual coil cylinder. A steel fuel tank holding 50 gallons is fitted into the stern and a 150 gallon stainless steel fresh water tank fills the space in the bow beneath the foredeck floor. Two alternators... 80 amp and 40 amp units charge the three (originally two) domestic and one engine starting batteries independently. A Mastervolt 12/40-3 automatic charger manages the batteries when plugged into a land line and a Xantrex Pro-Sine 1800 1·8 kw inverter provides 240 volt electricity whilst out cruising.
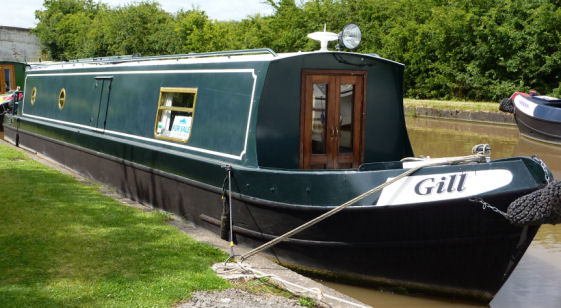
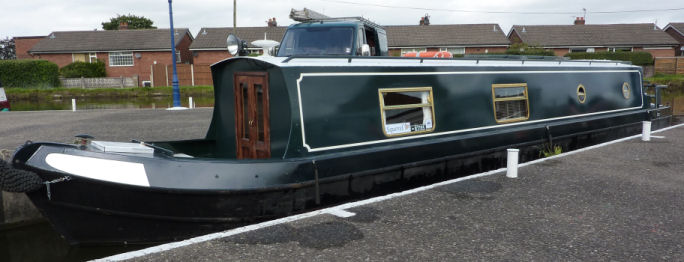
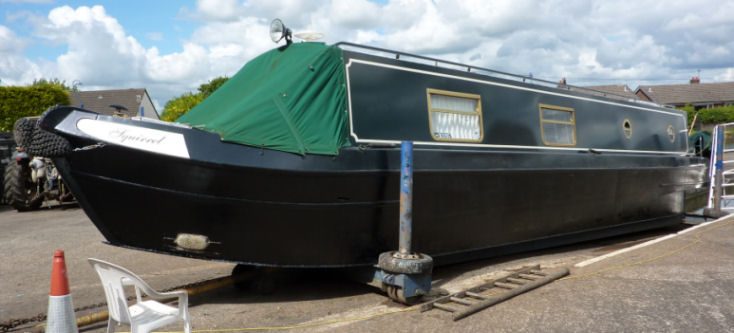
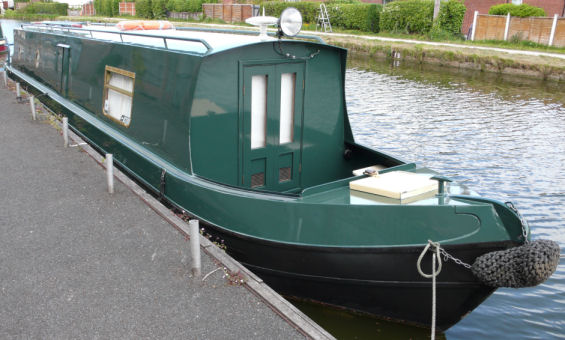
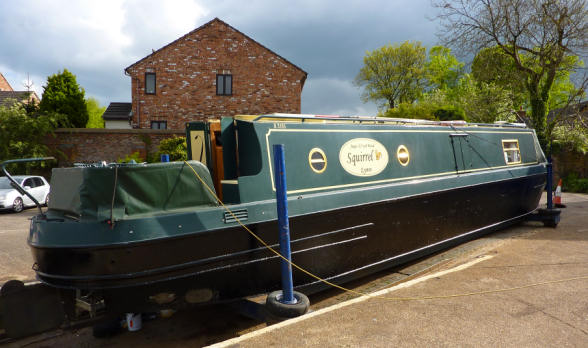
nb Gill (later Squirrel) at Barbridge Junction on the 28th July 2013 - when first viewed
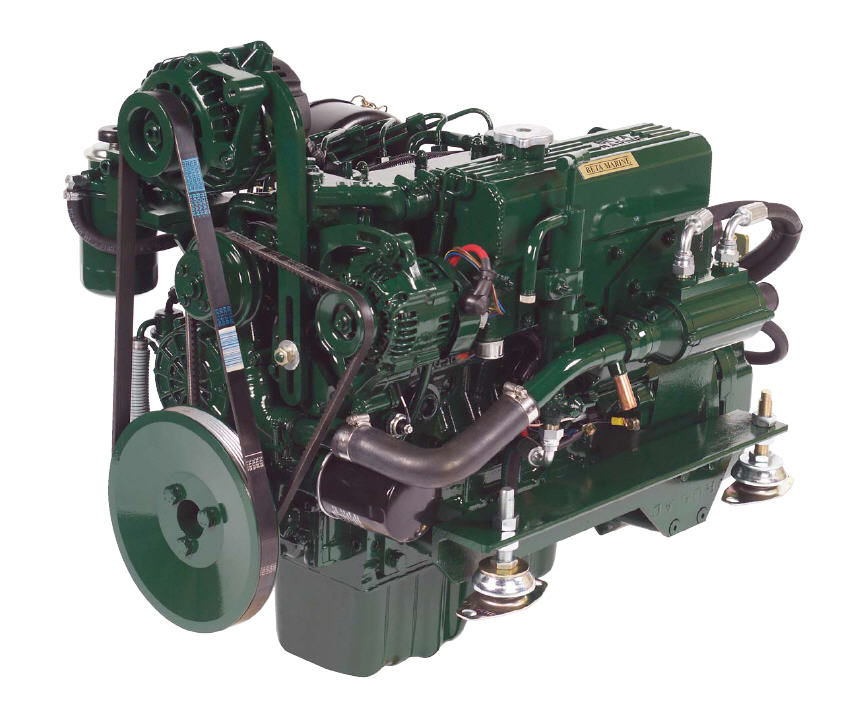
The Beta 38 marine engine fitted to nb Gill (later Squirrel)
(Photograph - Beta Engineering)
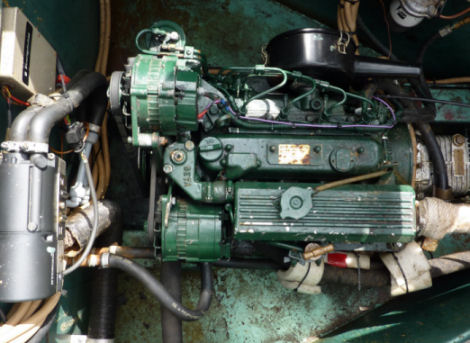
Squirrel's Beta 38 diesel engine
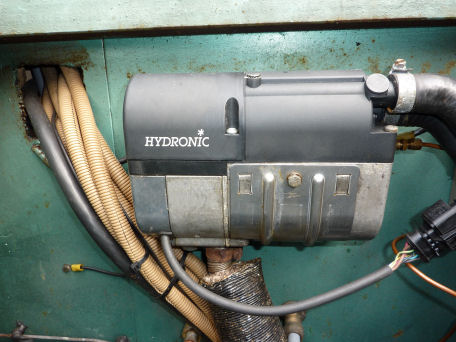
Eberspächer Hydronic 4 Diesel fired central heating boiler
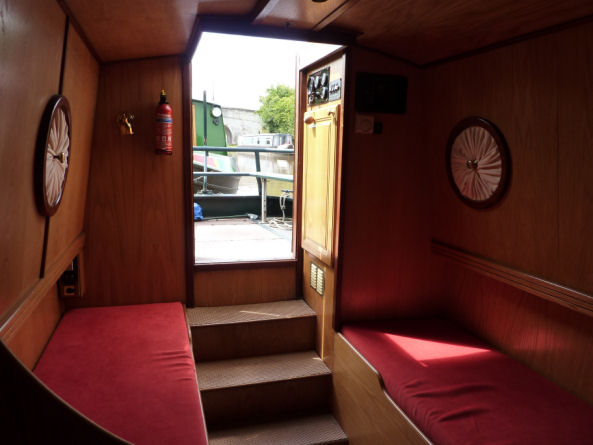
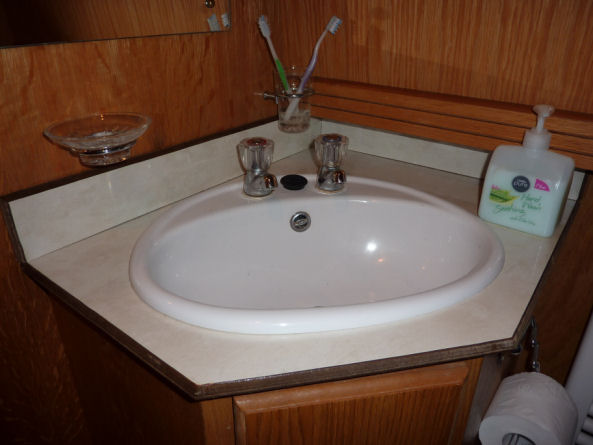
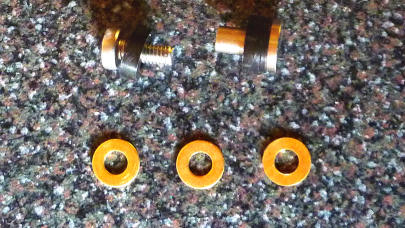
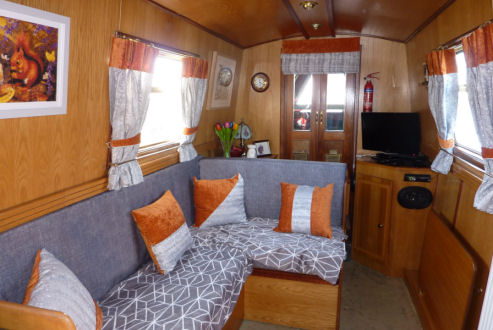
The gas supply is provided by two 13kg propane (orange) cylinders stored in a pair of self-draining lockers on the rear deck which supply the two gas appliances... a Stoves Vanette hob and separate oven/grill unit. A Thetford C200 cassette toilet is installed which features an electric flush with the water supply plumbed in alleviating the need for regularly filling up the flush top tank. Staying in the bathroom there is a wash basin and shower which has an automatic pump to empty the shower water overboard. Heating is by an Eberspächer Hydronic 4 Diesel fired central heating boiler that feeds two radiators, a towel rail in the bath room and the second calorifier coil in the hot water cylinder so that we can have hot water when the engine has not been used. Originally as built, she was a two berth craft with a double bed in the rear cabin. This was converted to two singles and the convertible double berth/dinette added later by Midway Boats of Barbridge Junction making it a four berth boat. The table converts the L-shaped seating in the lounge into a double bed supported by a movable seat that has an upholstered, removable lid... handy for storing drinks, etc.
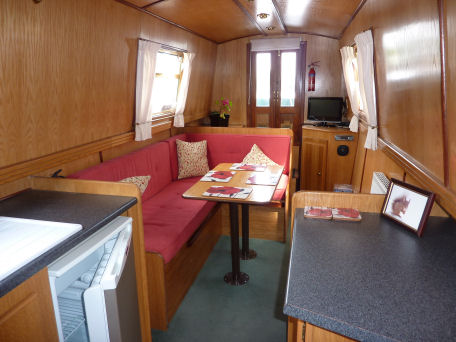
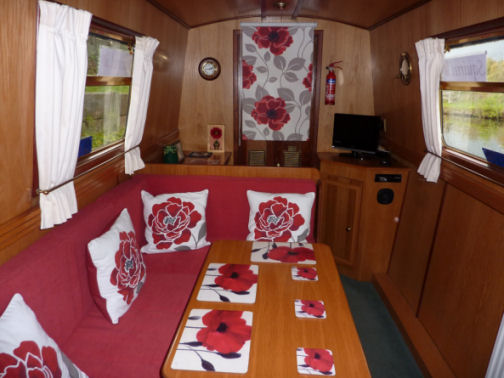
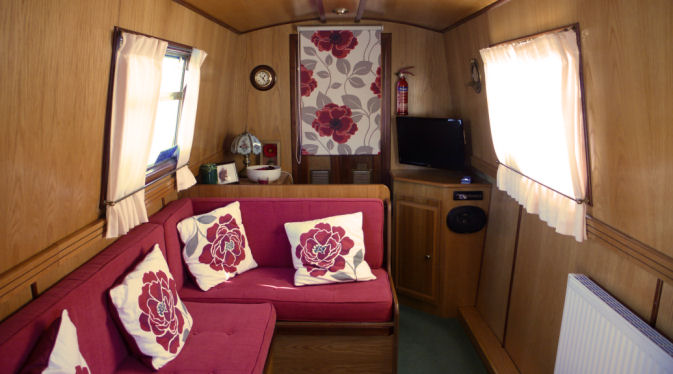
Lounge looking forward when first viewed - note the squirrel photograph on the right
(Photograph - Angela Wood)
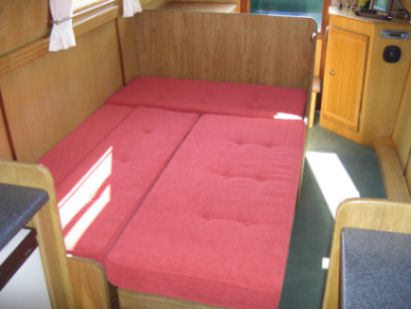
Dinette in the lounge when converted into a bed
(Photograph - Hilary & Alan Wiffin)
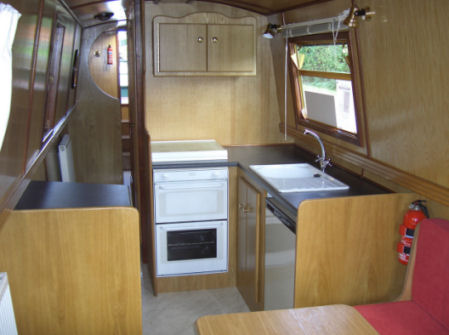
Kitchen after refitting
(Photograph - Hilary & Alan Wiffin)
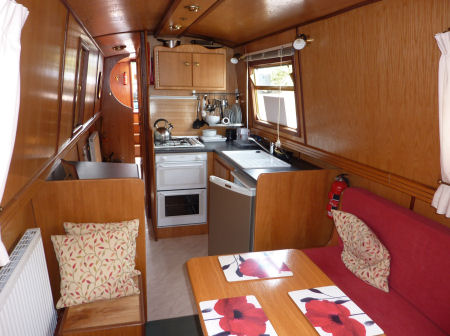
Lounge and kitchen looking aft when first viewed
(Photograph - Angela Wood)
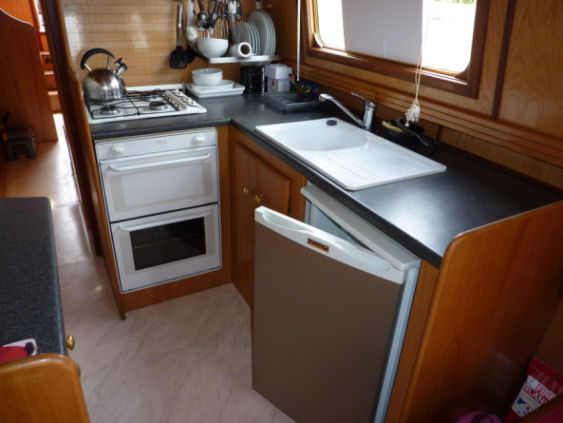
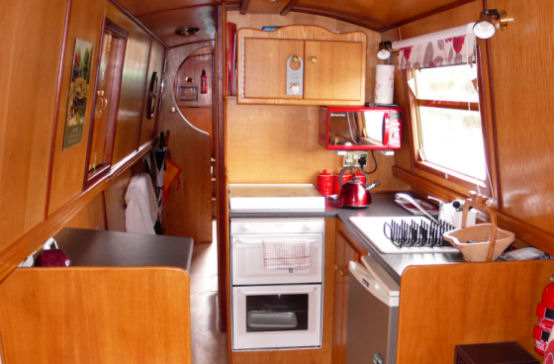
Kitchen when first viewed
(Photograph - Angela Wood)
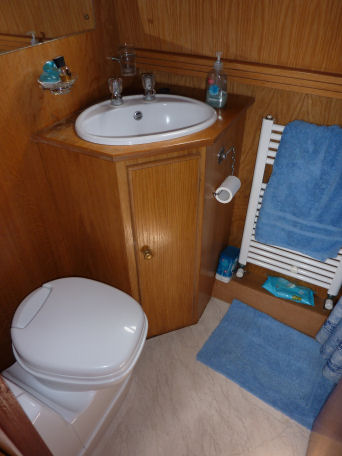
Toilet and wash basin when first viewed
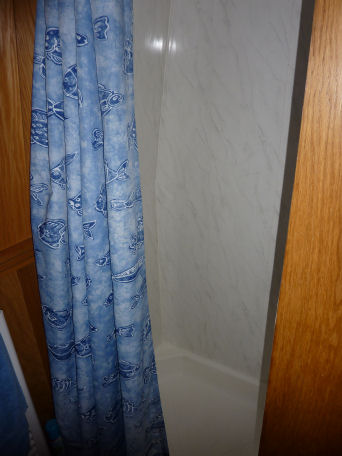
Shower compartment
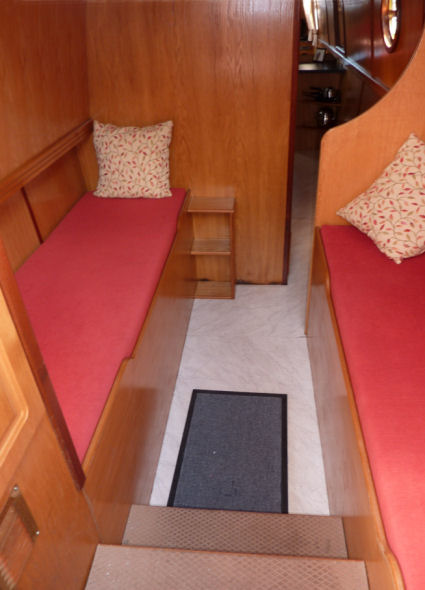
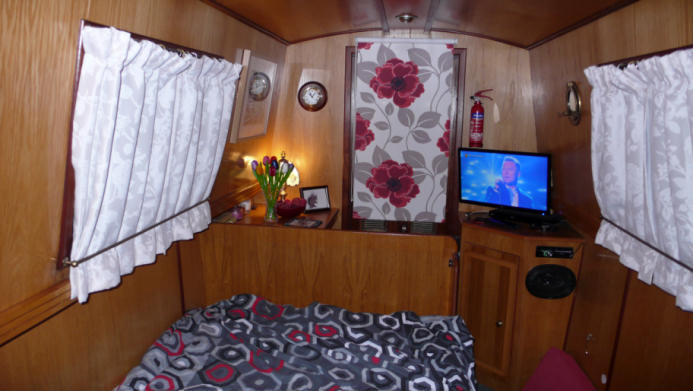
Aft cabin looking forward when first viewed
(Photograph - Angela Wood)
Aft cabin looking aft when first viewed
(Photograph - Angela Wood)
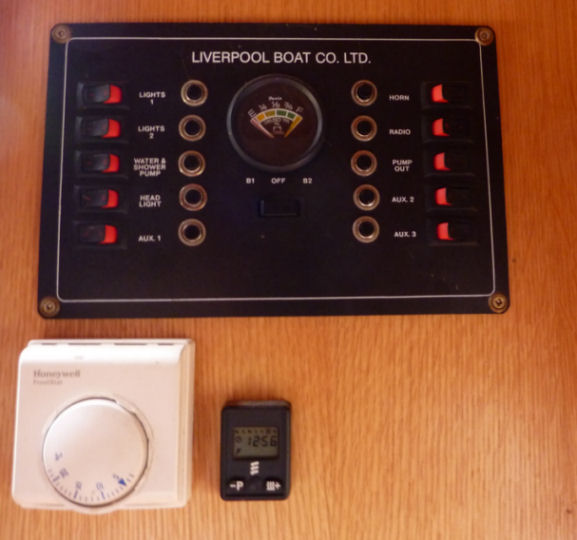
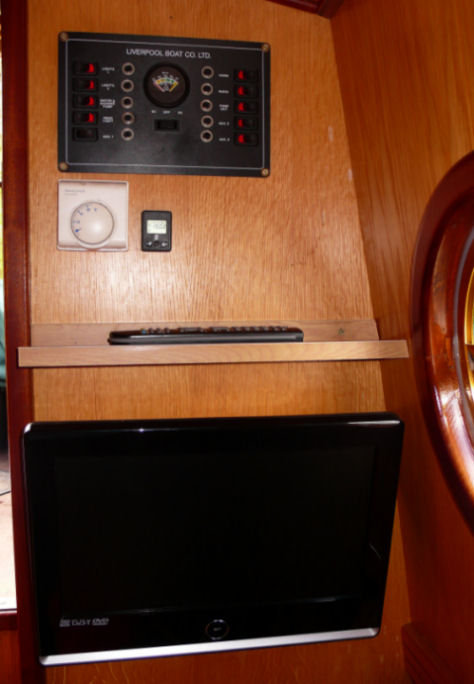
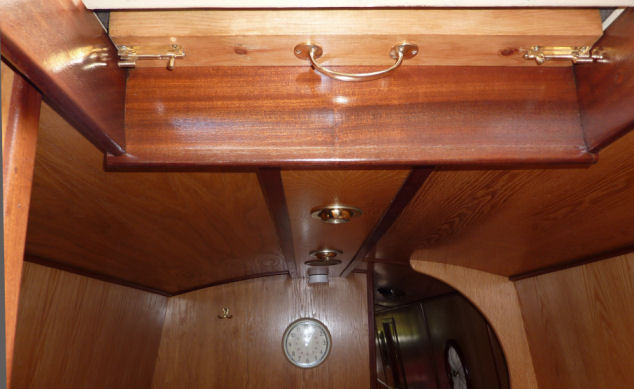
Electrical and central heating control panels

Calorifier and electrical cupboard
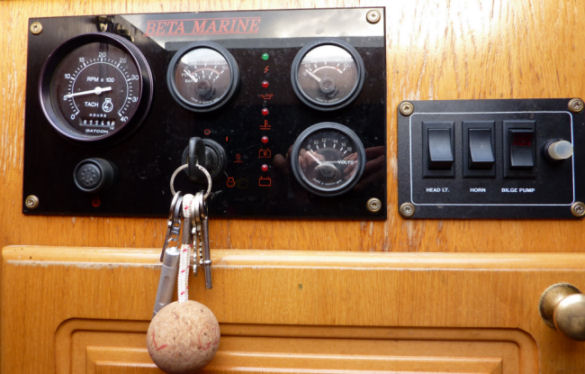
Engine and running controls
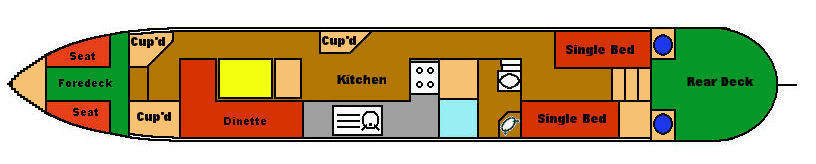
nb Squirrel layout
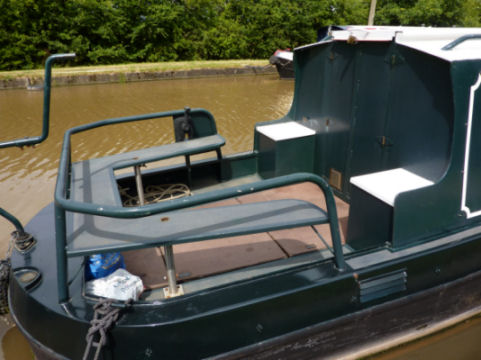
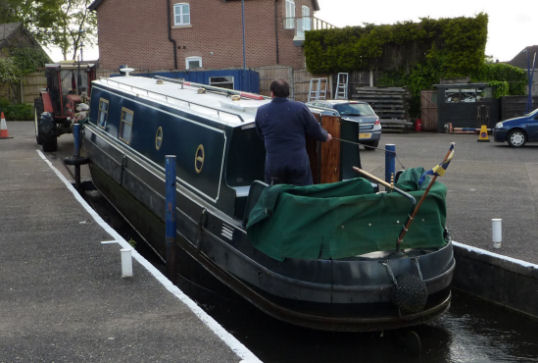
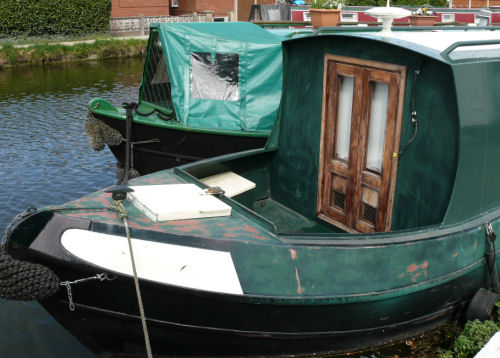
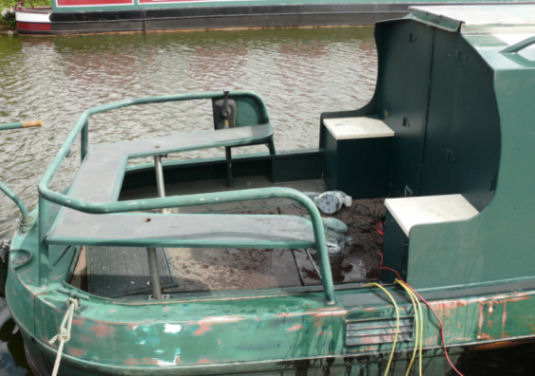
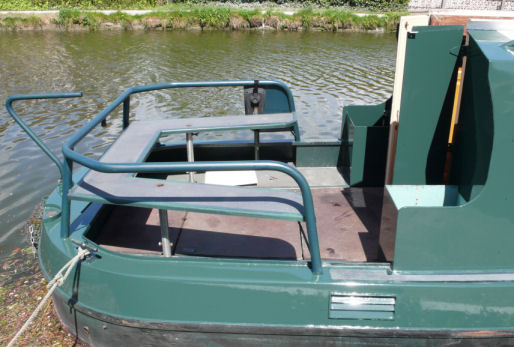
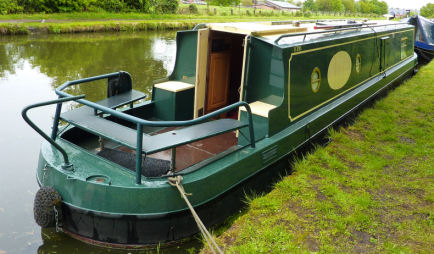
Spacious aft deck when first viewed
(Note the cranked tiller bar extension)

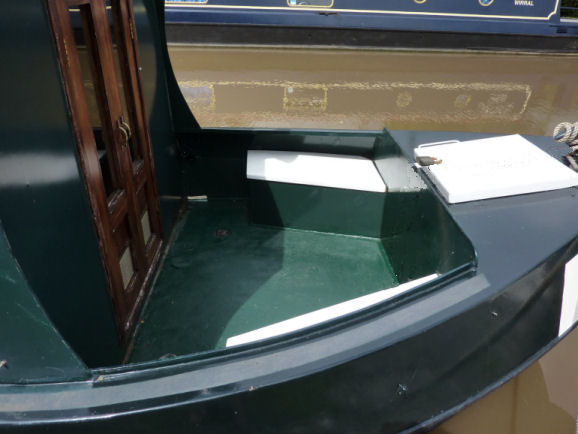
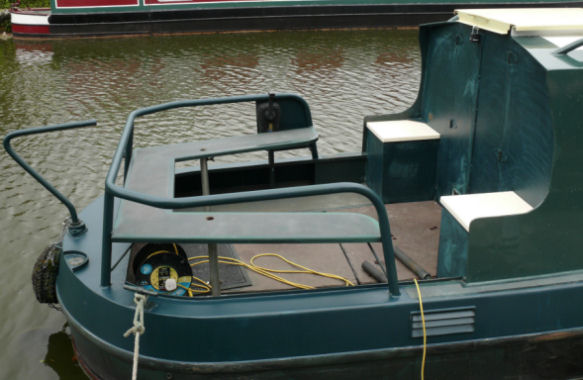
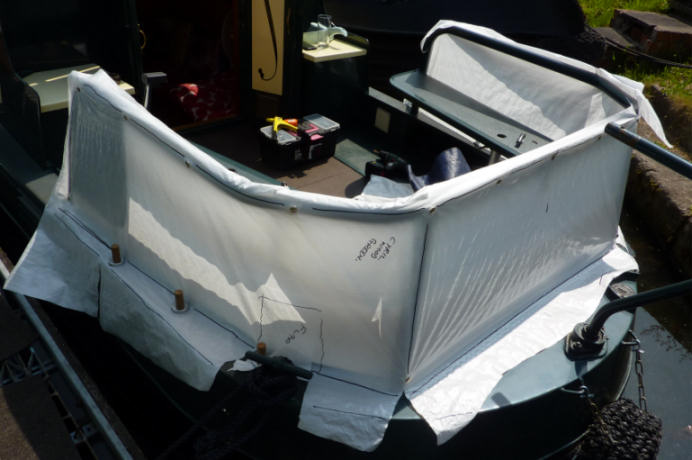
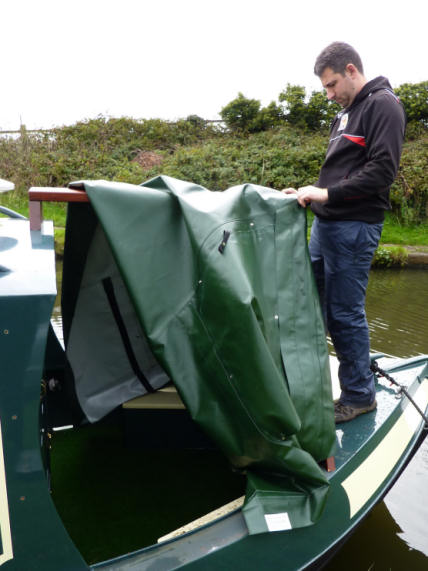
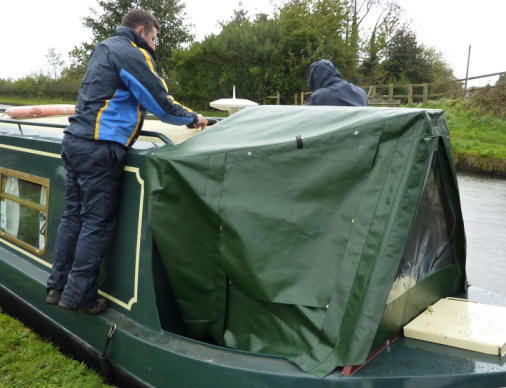
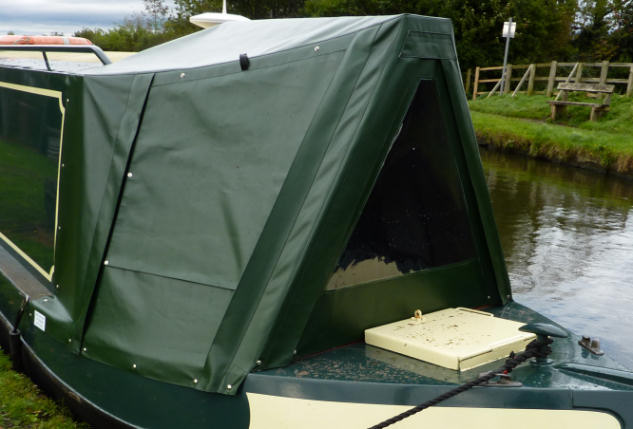
Canvas aft deck tonneau cover in place
(Note the cranked tiller bar extension now removed)
Fore deck when first viewed
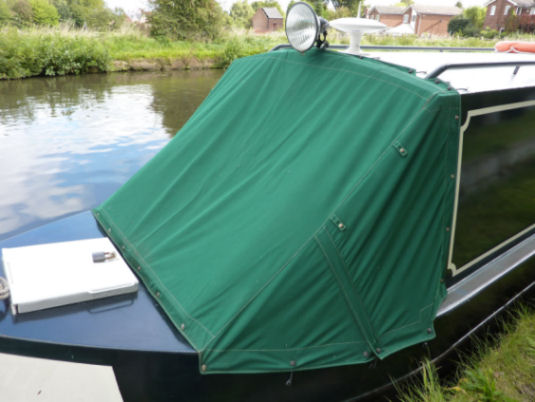
Canvas fore deck tonneau cover in place
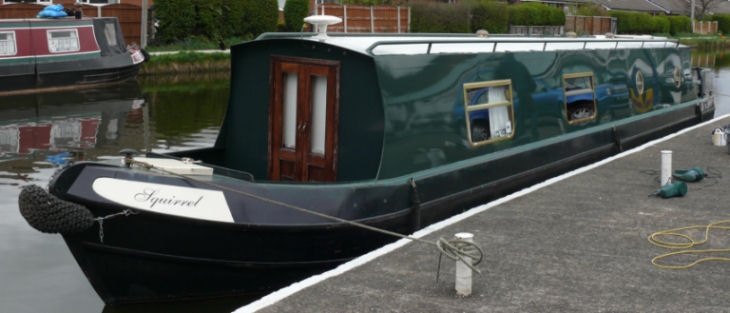
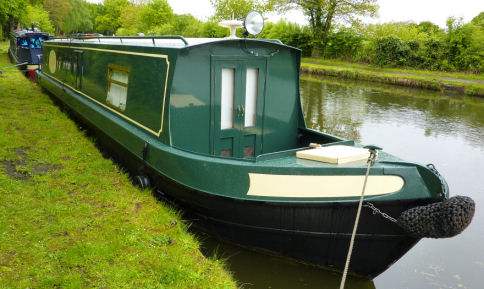
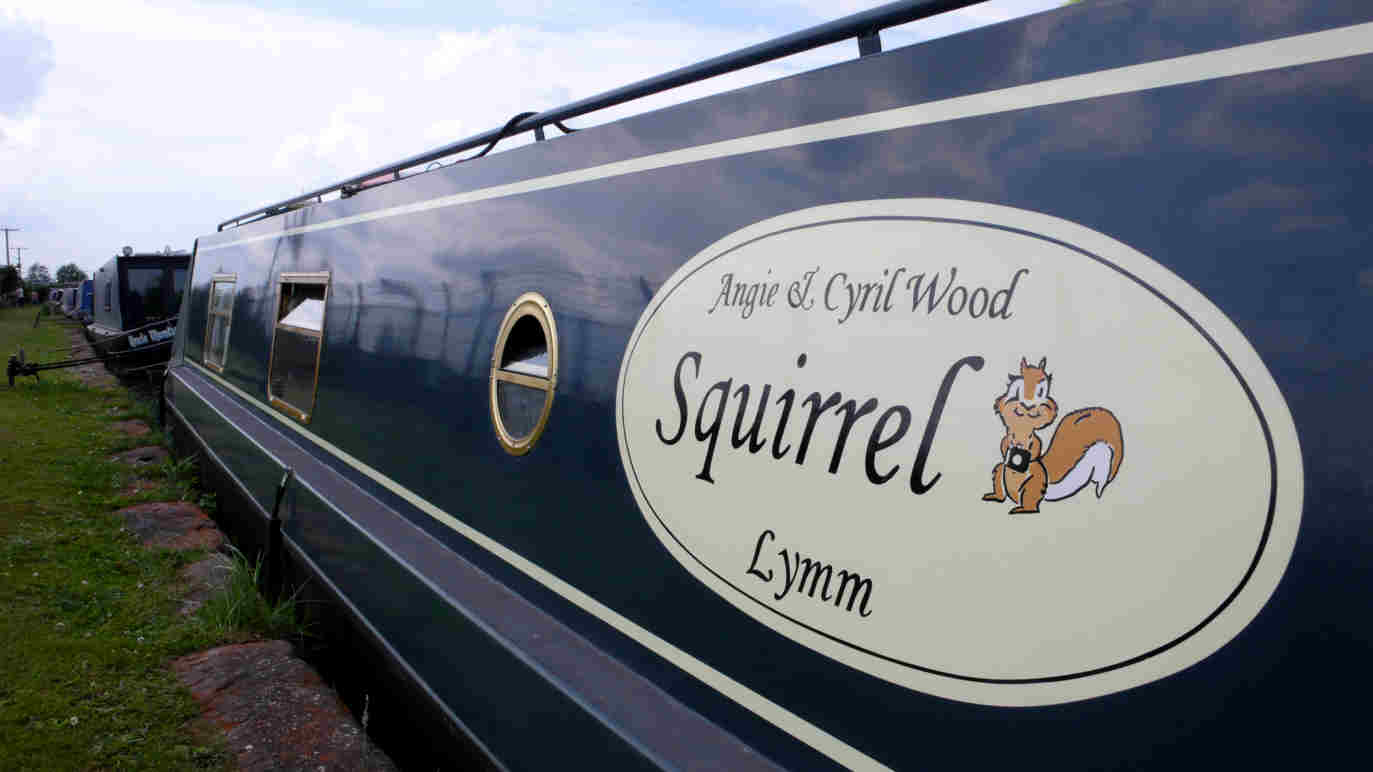
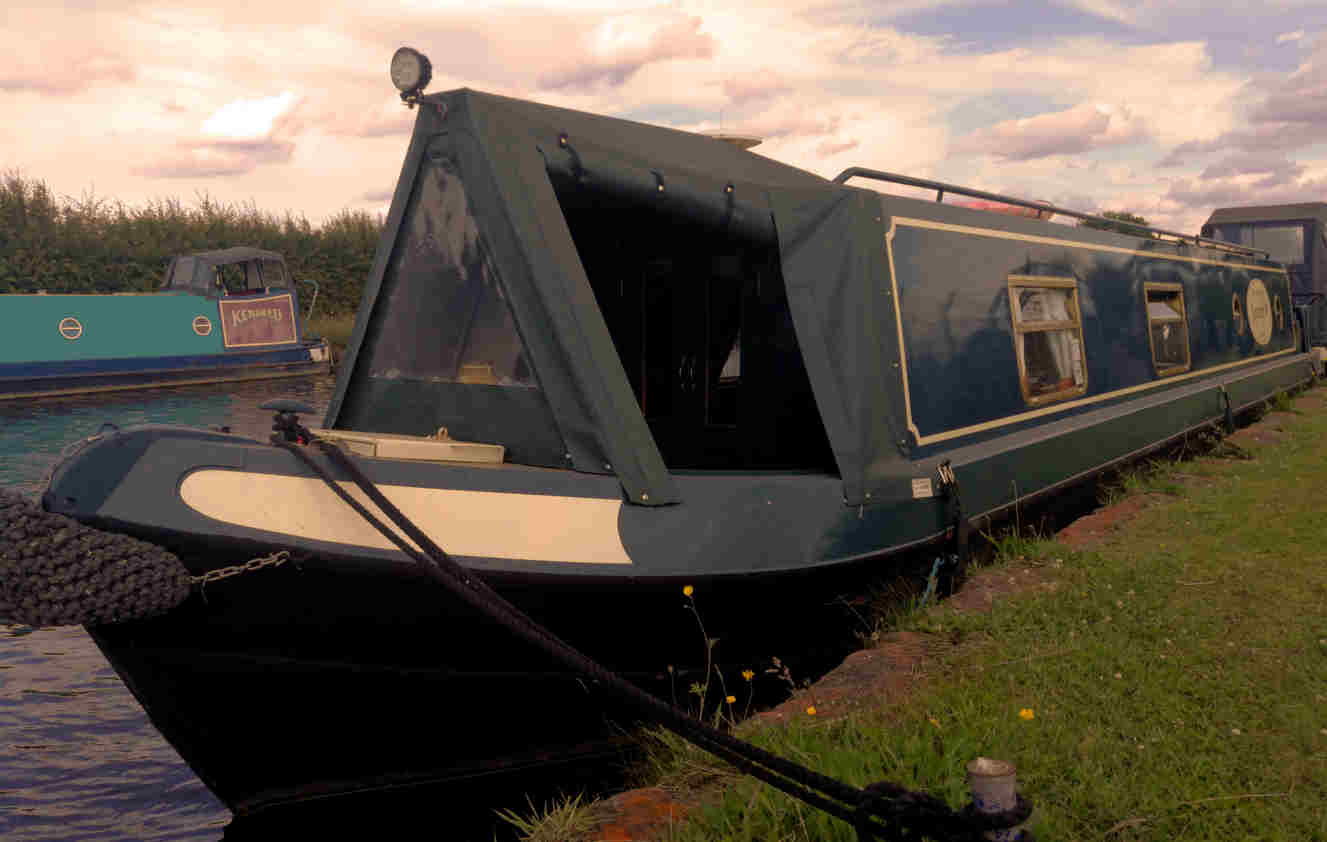
The boat's first owner was a Mr Tom Gillies (hence the original name Gill) who sold the boat in 2006. The second owner was Mr Alan Wiffin who moved to Australia and put the boat on brokerage at Midway Boats; Barbridge Junction. and then, on the 23rd August 2013... ourselves when it was renamed Squirrel shortly afterwards. The outward appearance of the boat has changed little from when she was built. The original dark green with white coach lines and white roof paint scheme replaced with the same basic green colour retained when the boat was repainted in 2015 but the green paint extended to the non-slip section of the roof which was originally white as were the hatch covers but are now cream.
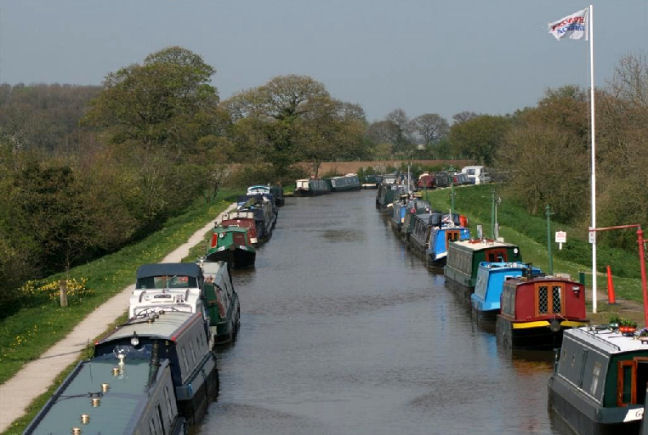
This photograph of Midway Boats at Barbridge Junction on the 17th April 2009 shows nb Gill on the bottom right
(Photograph - M Davies)
Alan Wiffin at the tiller in a Trent and Mersey Canal lock on the 23rd August 2009
(Photograph - Hilary & Alan Wiffin)
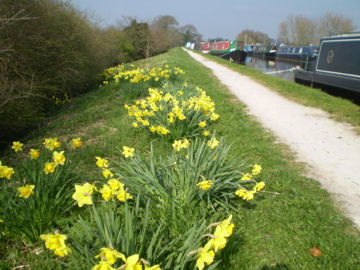
nb Gill on her mooring at Barbridge in Spring 2011
(Photograph - Hilary & Alan Wiffin)
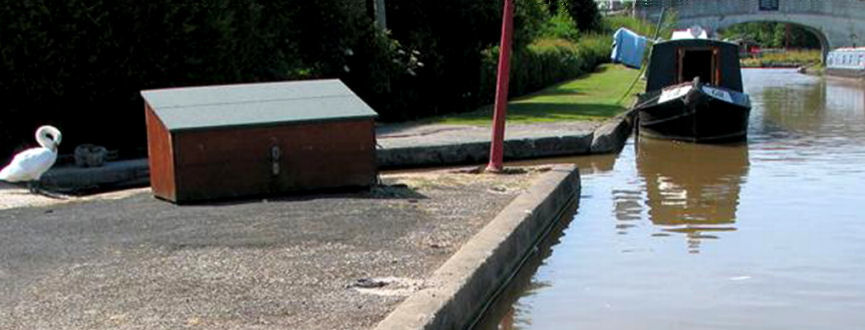
nb Gill can also be seen in this more recent photograph taken in 2013 at Midway Boats as well
(Photograph - www.boatlaunch.co.uk)
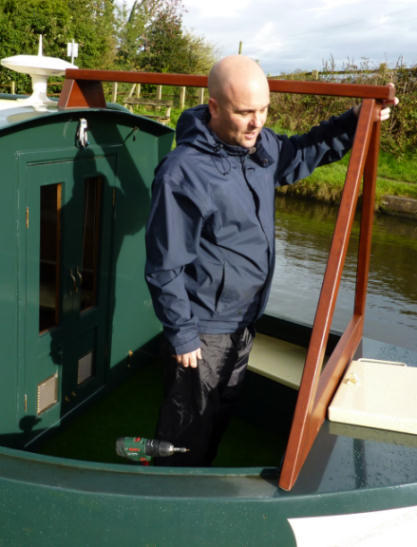
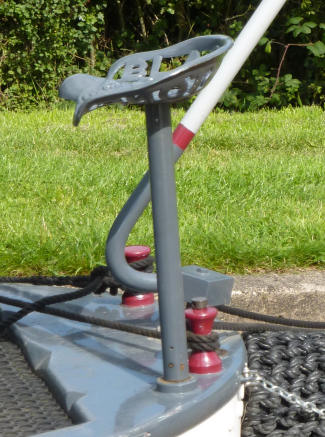
There was a "cranked" extension to the tiller bar fitted when we bought the boat but this made steering arduous due to the high angle and was one of the first things we removed after purchasing the boat. This extension bar was fitted to make steering easy from elevated seats that slotted into tubes fitted to the rear deck but were missing when we took delivery. We don't envisage replicating them at present hence the removal of the cranked extension tiller bar.
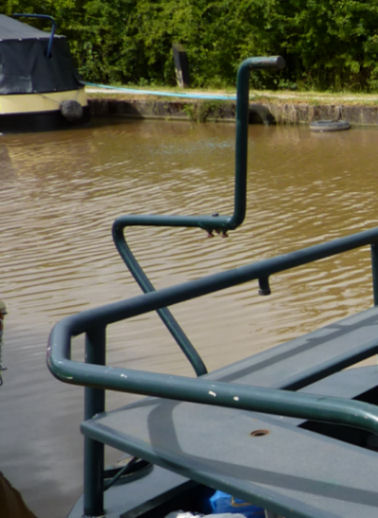
The cranked tiller arm was the first thing that was removed when we took delivery of the boat
There are quite a few reminders of our previous boat Total Eclipse with many pieces of equipment that we brought with us and even a couple of items from my parents' boat Phial including a small Buckby can and a painted container and lid used for sewing needles, cotton, etc. One of the items brought from Total Eclipse was the brass tiller bar and tiller pin. The pin is in the shape of a squirrel and given the name of the new boat is even more in keeping than it was on the old one!

The brass squirrel tiller pin used for best
When we bought the boat the paintwork was dull and badly in need of "cutting" to remove "dead" paint then buffing and polishing to restore the original finish. This was accomplished a month after we became her owners with a rotary buffer, Mer polish and lots of elbow grease. A couple of weeks later the paintwork received another coat of Mer which would last through the winter until spring 2014. Even though the paintwork looked much better after polishing we decided to have the boat repainted professionally when finances allowed.
Before and after buffing and polishing the paintwork
nb Squirrel gleaming after having the cabin side paintwork buffed and polished
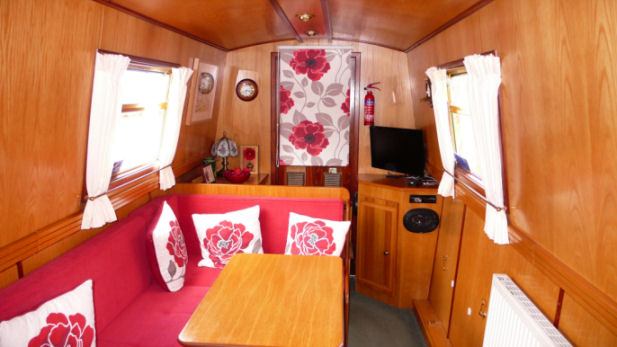
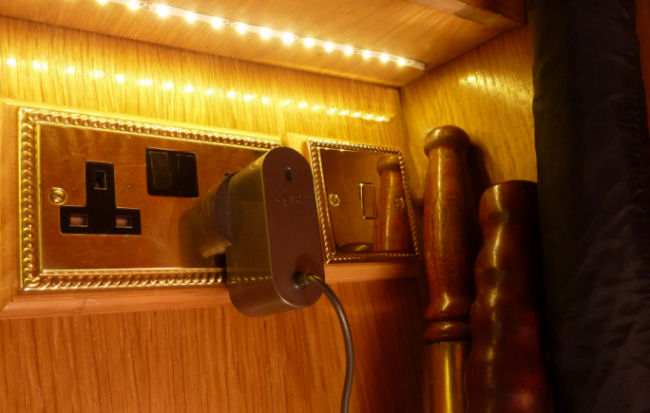
The current hungry tungsten halogen down-lighter bulbs were soon replaced with high power LED units which, even though were more efficient they were brighter than the original ones they replaced. Storage boxes were sourced from Ikea that fit exactly on the shelves adjacent to the front door, the original roller blind replaced and matching cushions bought.
The lounge looking good with new lighting, blind and cushions
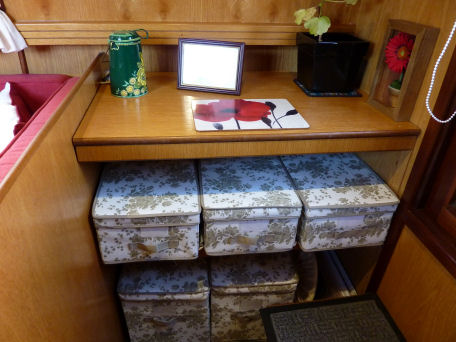
Storage boxes that fit perfectly on the shelves adjacent to the front doors
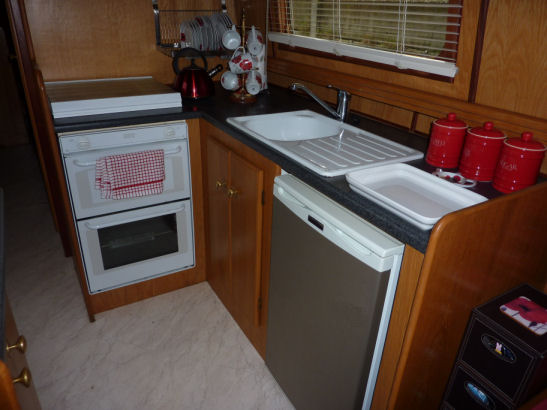
Kitchen
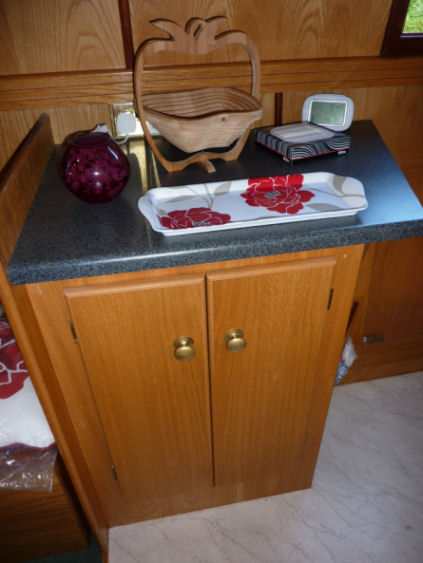
Cupboard and worktop opposite the kitchen
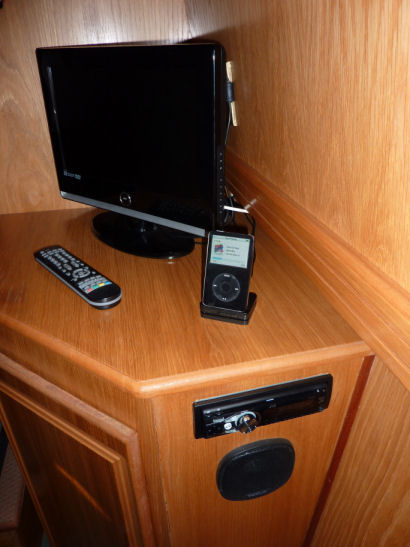
TV cupboard, stereo and iPod dock
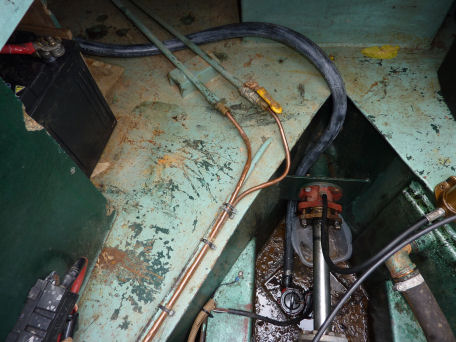
Replaced and re-routed bilge pump pipe
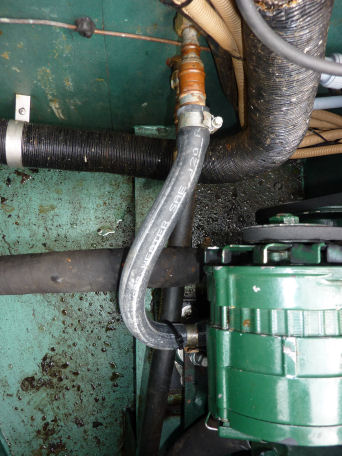
New, shortened calorifier feed pipe
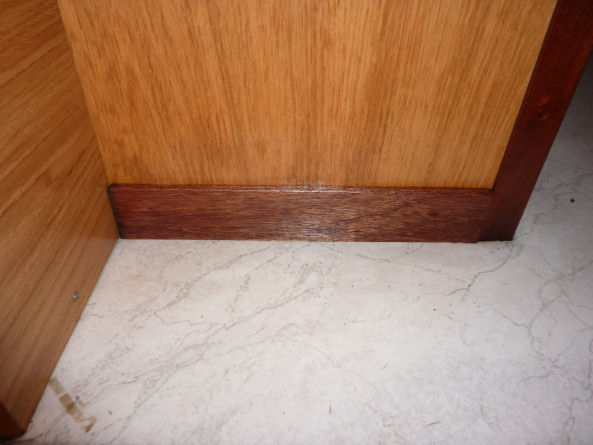
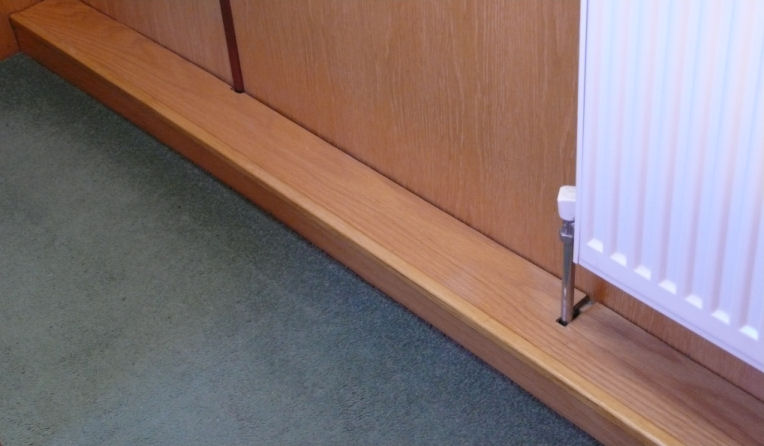
New skirting board on the bathroom/aft cabin bulkhead
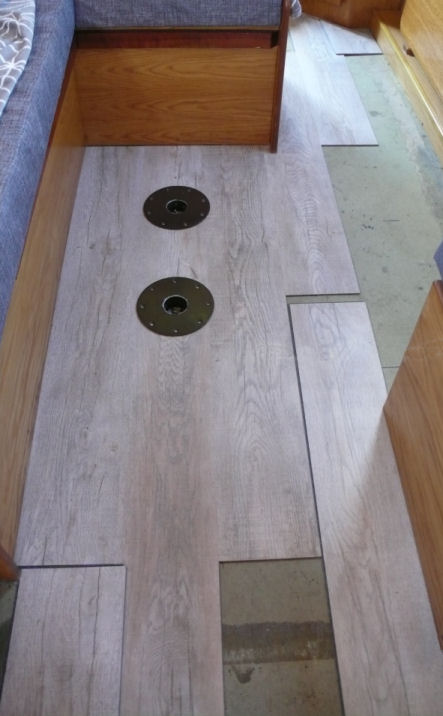
The worktop beneath the wash basin in the bathroom and surrounding woodwork was stained due to ingress of water from poor sealing of the basin. We planned to sand down the wooden worktop and re-varnish it but it turned out to be MDF with a wooden veneer on top which could not be sanded down. A replacement in a water resistant material was fitted and continued upwards to cover the staining of the bulkhead. The finished article looks cleaner and will be easier to clean as well as being more substantial.
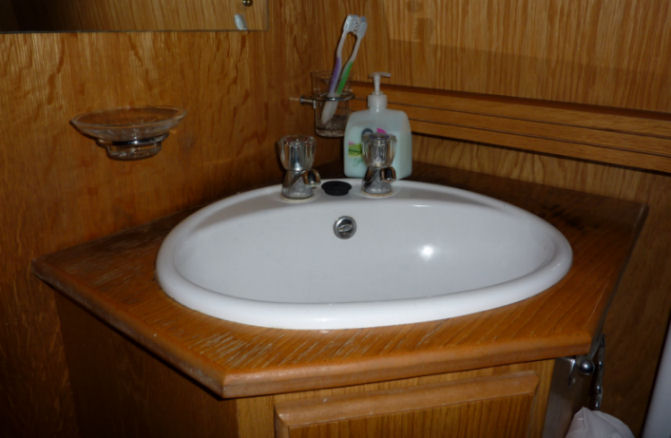
Stained vanity unit work top prior to replacement...
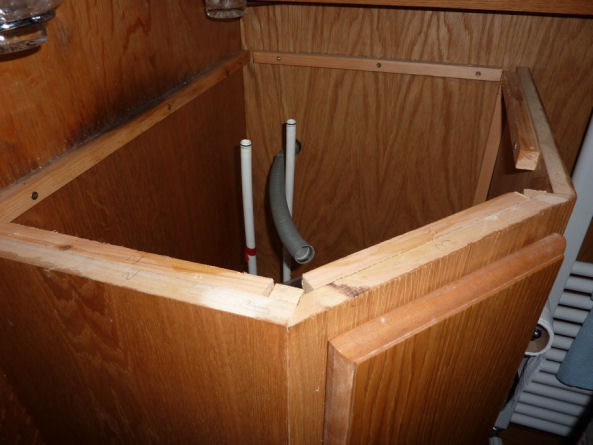
...with the work top removed showing the staining of the woodwork to the left...
...and the finished article with the new work top and splash-back
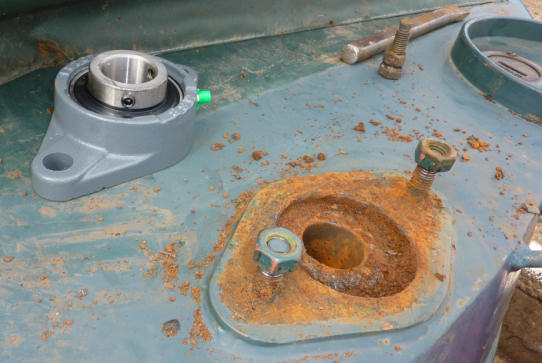
On the 19th October 2013 the boat came out of the water at Lymm CC in order to fit the missing split pin that locks the nut holding the propeller in place. On inspection the nut was not the correct thread and also there was no brass washer fitted between the nut and propeller. I know that Mike from King's lock Chandlery said that the nut he fitted the day we started to bring the boat back to Lymm was only temporary but I assumed that it was the correct thread. In his defence it must be difficult to tell if the nut is the right one when fitting it under water through the weed hatch. Anyway... the job is done now and I have no need to worry about it any more.
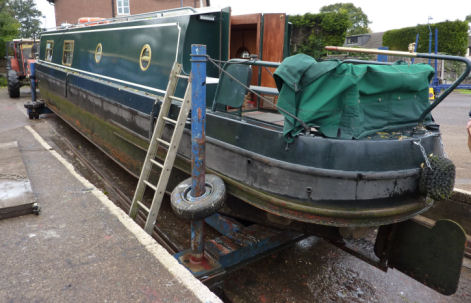
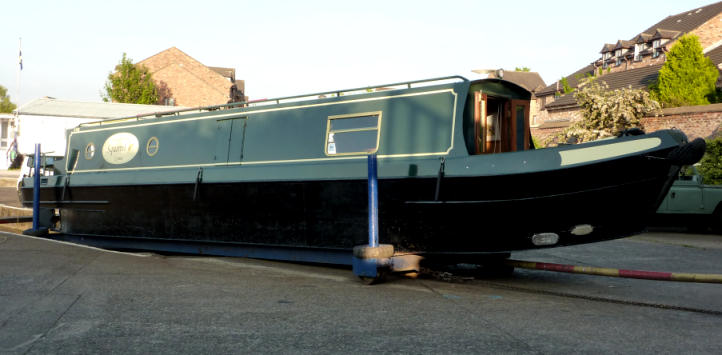
nb Squirrel on the slipway at Lymm CC on the 19th October 2013
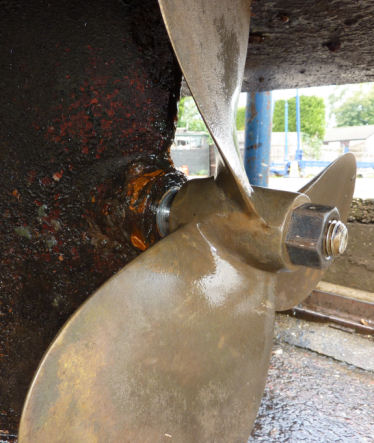
The offending article... the incorrect nut plus lack of washer and split pin
With the boat being out of the water I also had the opportunity to inspect the hull and sacrificial anodes, measure the fore and aft draft. The stern draft was quite straightforward to measure. From the waterline to the bottom of the skeg it is 28 inches. But with the base plate sloping upwards at the bow the measurements had to be taken from the end of the forward swim which is 18 inches. I also took some detailed photographs of the parts of the hull that are usually under water and shown below. The visual inspection of the hull did not hold any surprises except for their being quite an accumulation of freshwater mussels. The boat was scheduled to come out of the water again in May 2014 when it was pressure washed (and the freshwater mussels cleaned off), hull re-blacked, the missing fender loop welded in place on the port side and inspected and tightened the stern gland. The tiller/rudder bearing was also inspected and lubricated at that time.
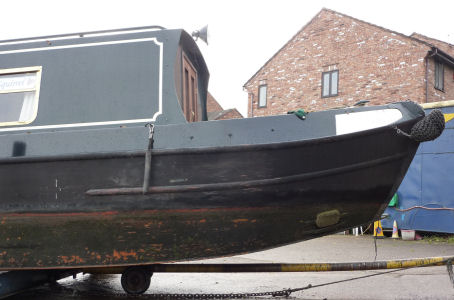
Profile of the base plate at the bow
The deep draft is illustrated in this photograph
The sacrificial anodes should last a few more years yet
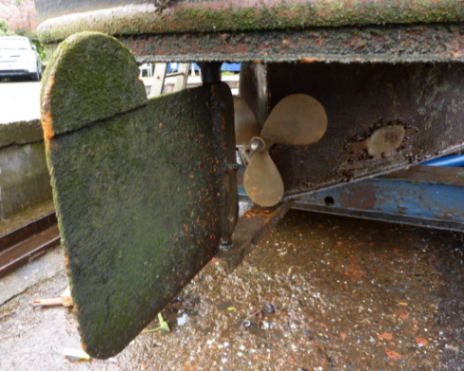
A closer view of the rudder, propeller and stern swim
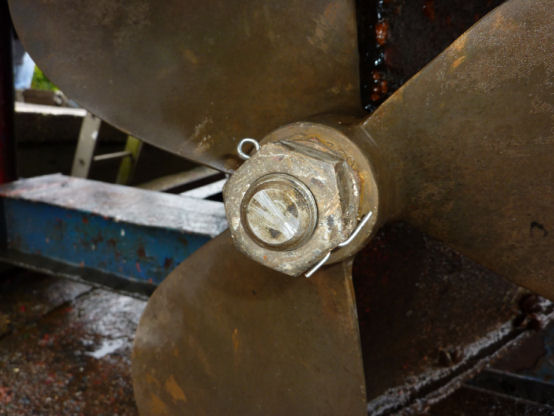
The new nut, washer and split pin fitted to the propeller shaft
We had contacted the boat's previous owners... Hilary and Alan Wiffin in Australia to see if they had any photographs of the boat whilst they owned it for the website and to confirm dates in the boat's history. They kindly replied with some photographs which have been added to the boat's history. I have fitted a "Water DeTek" water alarm at the lowest point of the rear bilge beneath the rear steps. If water is detected from a leaking pipe, etc the unit located inside the electrical/calorifier cupboard sounds an alarm. A Brolleymate umbrella holder has been fitted to the tiller bar and an additional tiller bar (for best - aka: posing) that used to be on Total Eclipse has been polished, the mahogany handle re-oiled with linseed oil and the shaft modified to fit Squirrel. All the original tungsten and halogen bulbs have all been replaced with LEDs, the television has been moved to the rear cabin on a fixed bracket for when our grandaughter Shannon visits and does not want to watch what we are watching on the new TV fitted in the lounge. A TV aerial feed from the Maxview Omnimax signal booster/splitter at the front of the boat was run down the length of the boat inside the central heating pipe trunking to the rear cabin. The mains electricity ring main has been extended into the electrical/calorifier cupboard to provide power for the additional television in the rear cabin. The threading of the cable in the gap between the cabin lining and the spray-foam was difficult due to the lack of space but we eventually managed it.
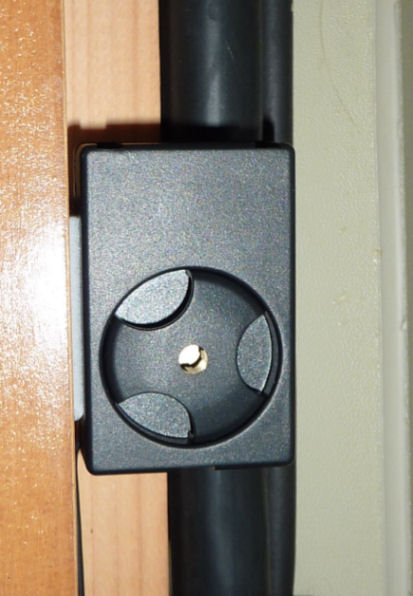
Water DeTek bilge alarm fitted in the electrical/calorifier cupboard
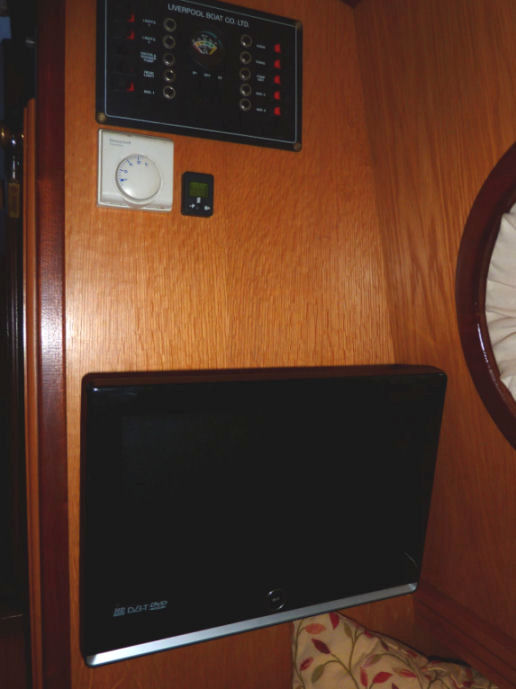
The original television relocated in the aft cabin
A new, larger television was installed on a bracket in the lounge and the ring main extended to inside the storage unit on the port side adjacent to the front doors for a table lamp located above it. This proved easier than the socket at the other end of the boat due to the cable run being shorter and more space between the lining and spray-foam. We installed a microwave oven on the kitchen cupboard worktop opposite the sink but it took up too much valuable space so we decided to relocate it adjacent to the gas hob and oven. We thought that if it was wall mounted on a bracket this would solve the problem, which it did. The only other problem being that the ring main had to be extended again to feed an additional 240 volt socket fitted below the microwave oven to accommodate it.
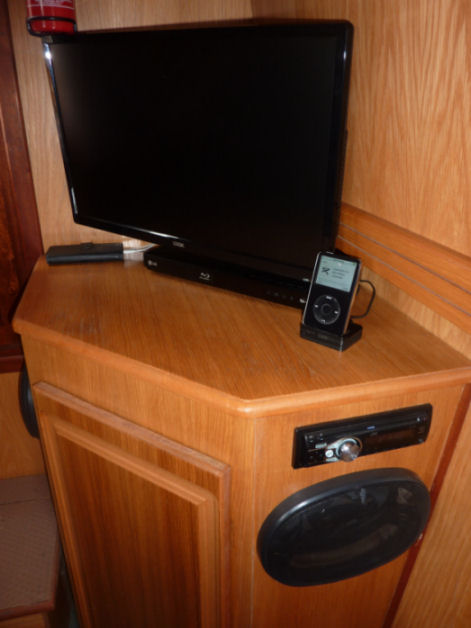
TV/DVD combo installed on a bracket in the lounge with Blueray player below and iPod dock to the right
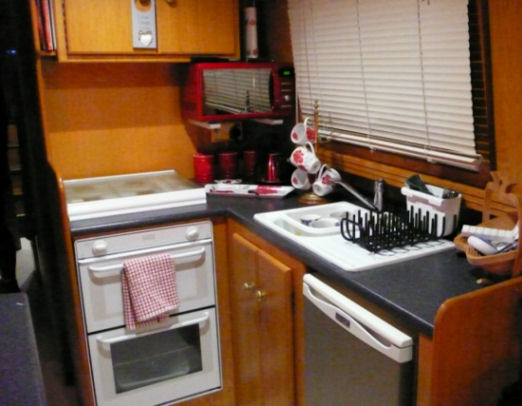
Kitchen complete with microwave oven
New name transfers applied to the boat's bow
The trunking that conceals the central heating pipes and electrical wiring had an unfinished edge which I have covered with "L" shaped moulding and treated with four coats of varnish. Such a small improvement has made a big difference to the look of the area. New 6 x 9 inch stereo loudspeakers have been fitted in the front cabin which give a much "richer" sound than the original small loudspeakers which have been relegated to the rear cabin and fed by four core cable which runs inside the trunking.
Lounge with the table down

Lounge with the bed made up...
...and cosy with the TV on and bed made up ready for use
Edging to the pipe trunking looks much neater
Aft cabin
With the fine spring weather in 2014 came the opportunity to sand and re-varnish the side doors. The gang plank and boat pole also received attention and then looked a lot better than previously. If the boat pole is inspected the red sections are different lengths. One section is 18 inches long and the opposite end is 28 inches long. This is a depth guide for plumbing the depth of water for the front and rear draft when mooring in shallow water... a trick that I learnt from my father. He had a similar line on Phial's boat pole. The port side front fender loop was missing when we purchased the boat and a replacement has been welded in place. There was no provision for storage of the table when not in use and a pair of oak "keepers" were constructed and attached to the central heating/cable trunking in the front cabin. When not in use the table is secured in place by a pair of brass cabin hooks mounted on the cabin lining behind the table.
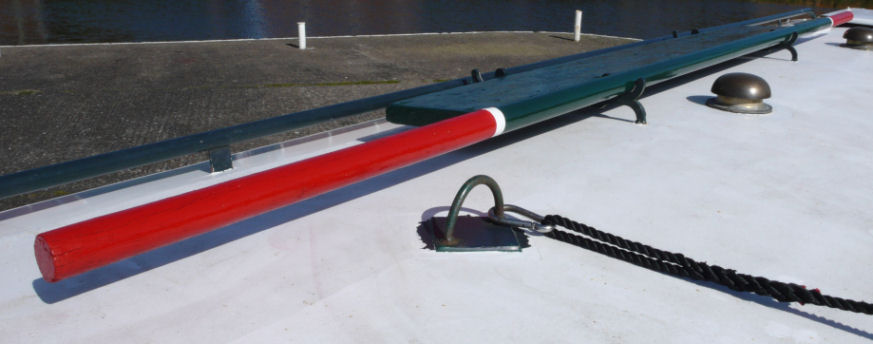
Repainted boat pole and gang plank
(Note the unequally sized red sections)
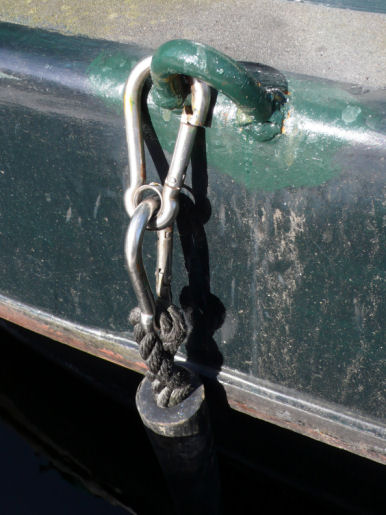
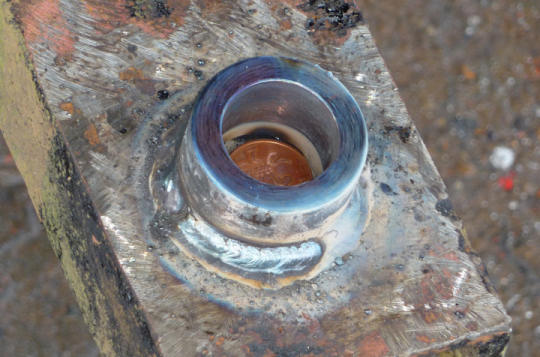
Replacement welded fender loop
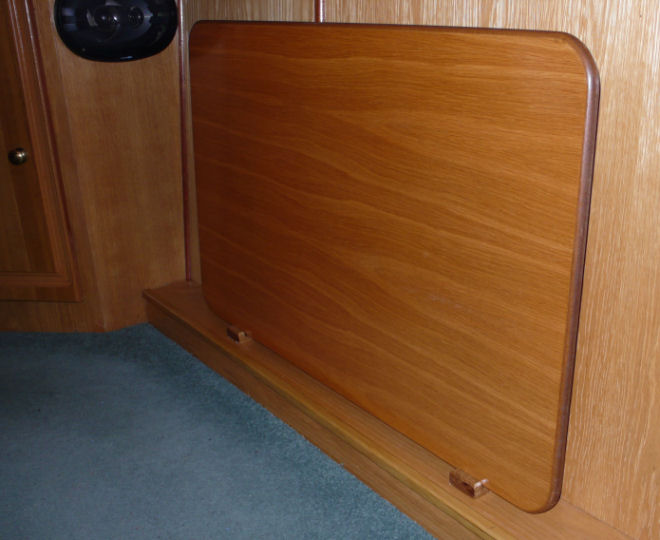
Table mounted on its keepers in the lounge
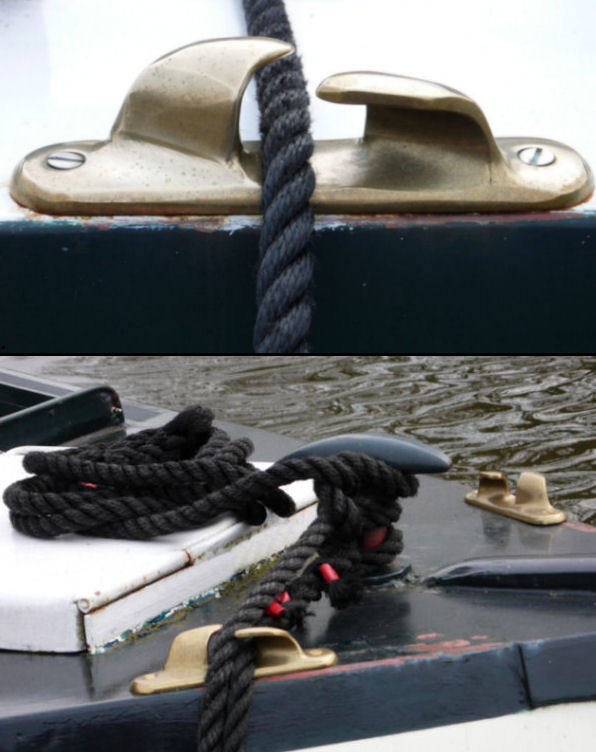
Mid-roof and bow fairleads
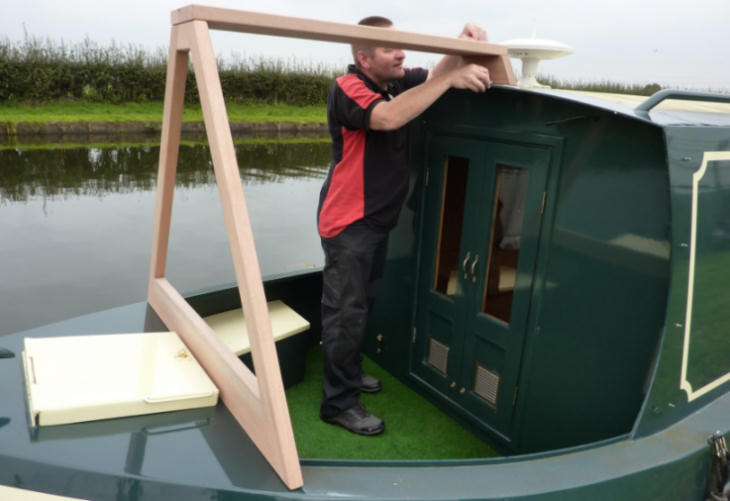
We have decided not to have a rear deck canopy as I did not like cruising with the canopy up on Total Eclipse and used to take it down at the first opportunity even though it was useful when moored up as it prevented rain entering the boat and gave somewhere to take off wet coats and hang them up to dry off... in essence an extra cabin. However a "dodger" (a wrap-around fabric windbreak for the rear deck) would be beneficial in reducing drafts when it is windy. We have canvas tonneau-style covers for when the boat is not in use so the rear and front decks are protected from the elements when we are not cruising and a "Brolleymate" for holding a large umbrella to the "everyday" tiller arm to keep the steerer reasonably dry when we are cruising. Waterproofs also help to keep the steerer dry if the weather is really wet.

The "everyday" tiller bar and "Brolleymate"...
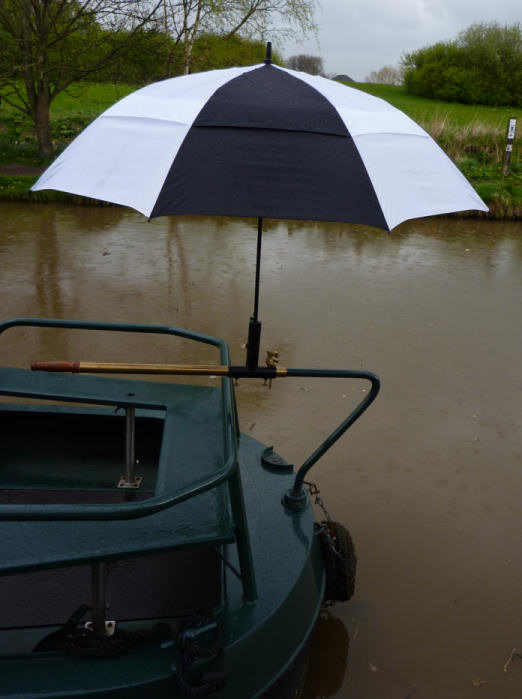
... and with the umbrella in place
The boat came out of the water at Lymm CC on the 9th May 2014 for hull cleaning and blacking with bitumen. Once jet-washed I was surprised to discover that there was no bitumen beneath the waterline with only red oxide primer in evidence. A few days later the hull had three coats of bitumen applied to it and the gas locker bottoms painted as well. It was noticed that the port-side gas locker was wet even though the boat was out of the water. The calorifier pressure relief valve overflow vented into the locker and coupled with the fact that the water pump had started to cycle for a second or so every fifteen minutes pointed to the fact that the valve was faulty. Accordingly, a replacement was purchased and fitted at a later date.
Coming out of the water at Lymm Cruising Club - 9th May 2014
(Photograph - Angela Wood)
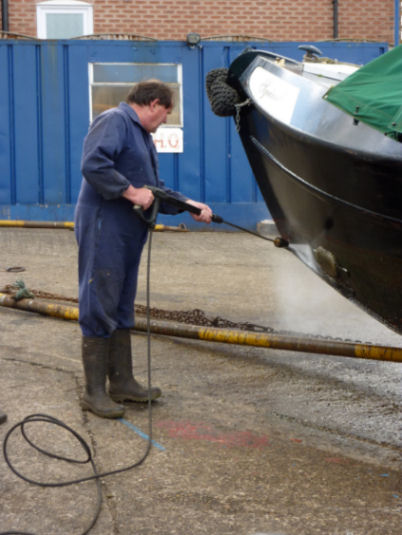
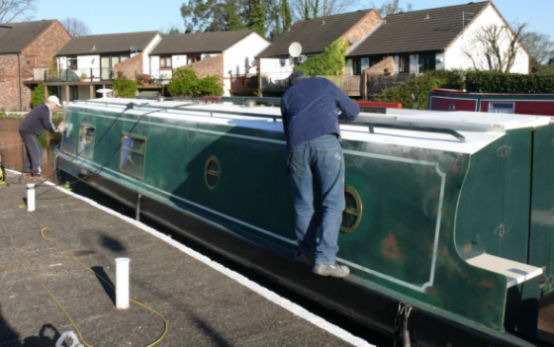
Yours truly jet-washing the hull - 9th May 2014
(Photograph - Angela Wood)
Jet-washed prior to hull blacking - 9th May 2014

Close-up of the jet-washed hull showing a lack of bitumen below the waterline
Hull blacking completed and ready for re-launching - 15th May 2014...
...from the front...

...and from the other side - 15th May 2014
When it came to replace the calorifier relief valve the water pump switched off and the taps opened to relieve the pressure in the water system. The old valve was removed but when I came to fit the new one there was a ½" BSP to ½" BSP male coupling on the original valve that could not be removed. An old isolation valve that was lurking in the bottom of the toolbox ((previously used on Total Eclipse when a calorifier fitting corroded and broke emptying the contents of the water tank in the engine compartment) was fitted temporarily whilst I found a replacement.
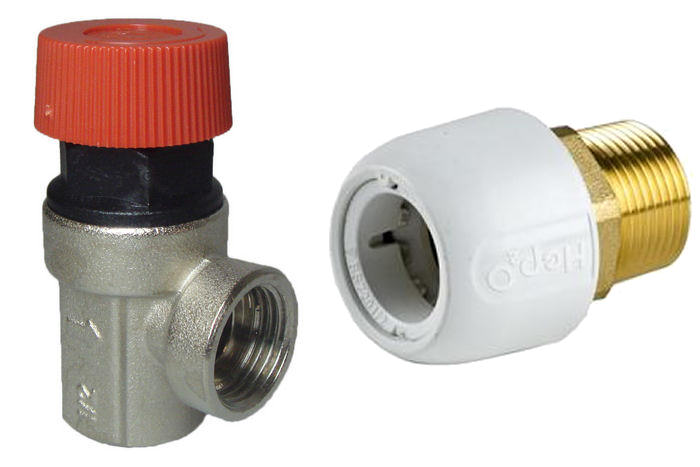
Calorifier Pressure Relief Valve and Hep2o to ½ inch BSP coupling
Thorn Marine didn't have the fitting required but they did have a solution in the shape of a ½" BSP to Hep2o coupling. I visited Embee's... our local plumber's merchant in Wallasey and bought the same coupling as on the original pressure relief valve. So I then had two solutions to the problem. I tried the BSP to Hep2o coupling first and this proved to be successful and the other fitting fitted perfectly so I fitted the new pressure relief valve to the calorifier. The alternative coupling was not required and relegated to the bits and bobs box along with the stop valve that was used temporarily.
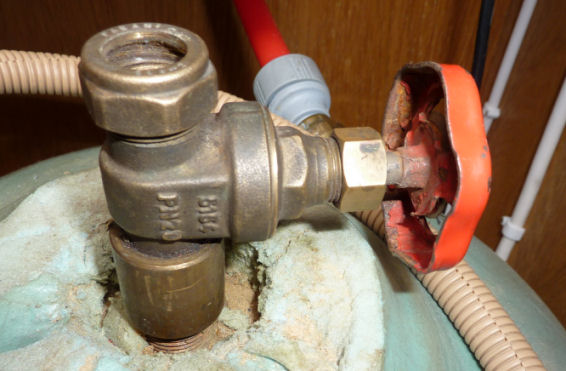
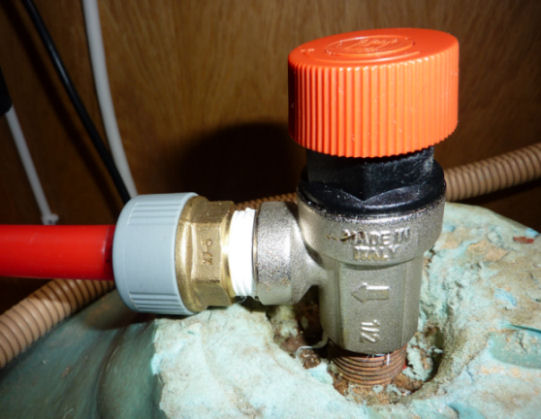
The temporary isolation valve and the new pressure relief valve fitted to the calorifier
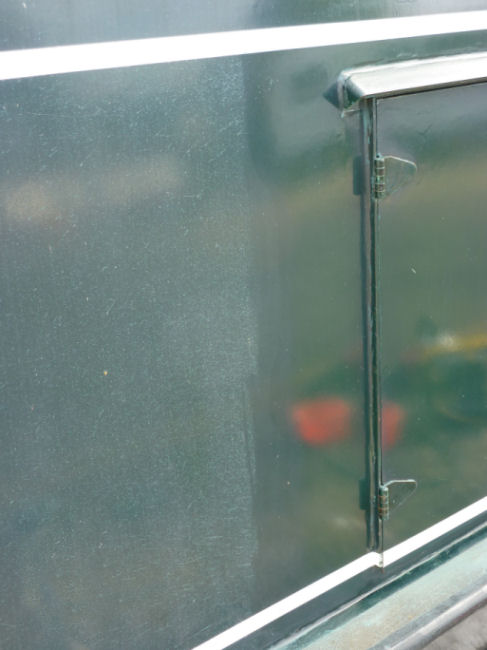
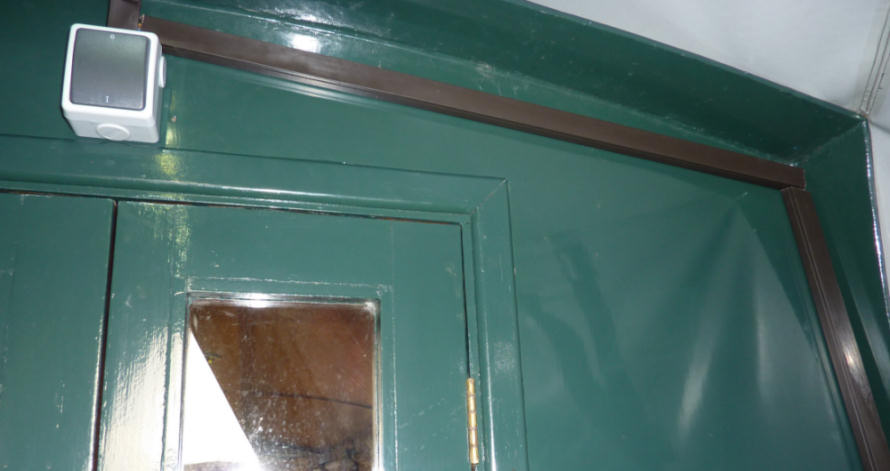
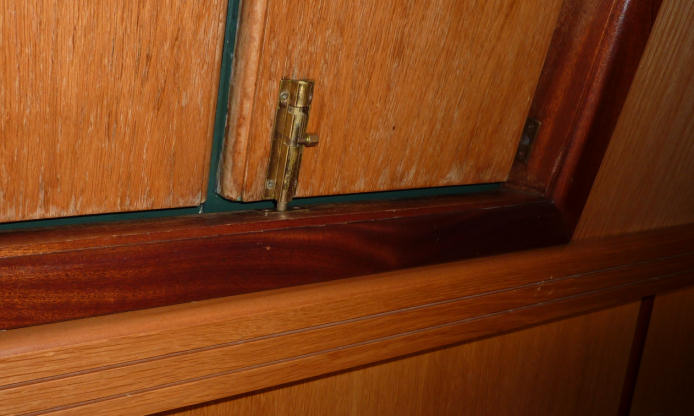
One problem we had with the rear doors and sliding-hatch is that when we are sleeping on the boat the padlock has to be fitted on the outside in order to lock them as there is no provision for locking the hatch from the inside. If the rear hatch was locked with the padlock and there was an emergency we couldn't exit that way so an alternative means of locking the sliding-hatch from the inside was needed. A piece of three by two timber was screwed to the underside of the hatch and tower bolts fitted to latch onto the hatch interior framework. This has now solved the problem. Another problem relating to the sliding hatch was the formation of condensation. This was cured by creating a thermal barrier in the shape of thin, rubber-backed carpet glued to the underside of the hatch creating a thermal barrier.
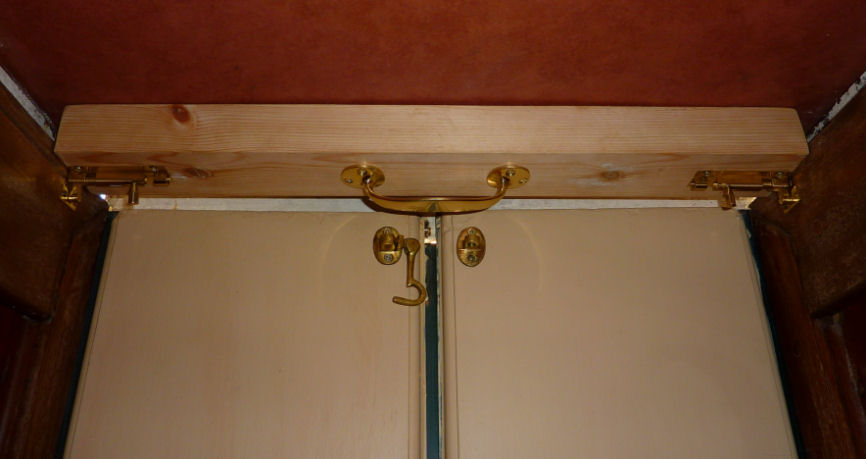
The bolts fitted to the timber beam on the underside of the aft hatch
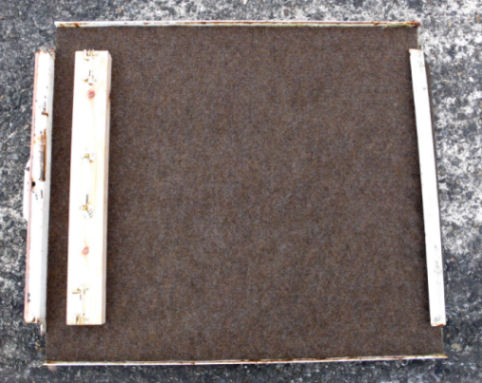
Underside of the removed aft hatch showing the anti-condensation carpeting
Whilst on our 2014 holiday cruise we saw a water colour print of the Worsley Packet House on the Bridgewater Canal for sale in an art shop in Whitchurch on the Llangollen Canal. We immediately fell in love with it and bought it planning to re-frame it and hang it in the lounge to break-up a large, bare area of varnished timber.
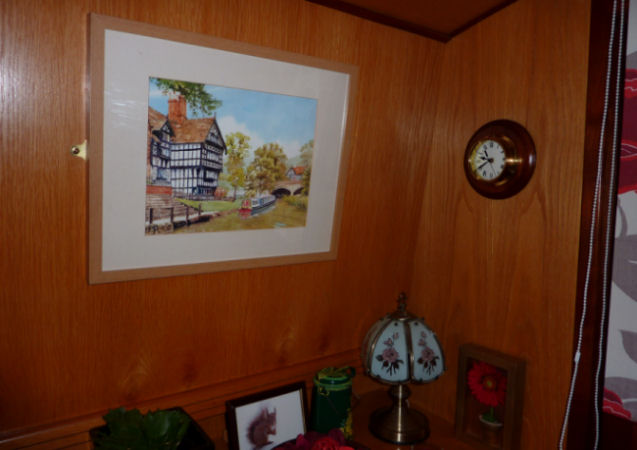
Worsley packet House painting hung in the lounge
Lounge in April 2015 with the table in place
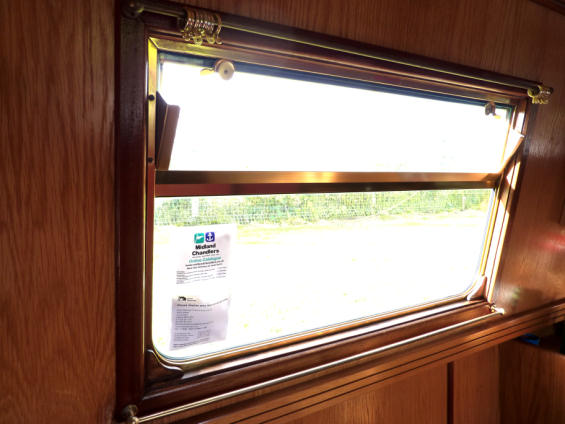
The Venetian blind over the kitchen window has been a pain to clean and makes it awkward to open the top hopper of the window and remove any condensation that may form. We replaced it with a roller blind that matches the poppy patterned one over the inside of the front doors.
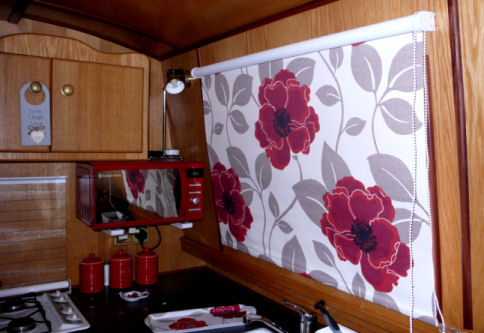
New roller blind fitted to the kitchen window
Kitchen in April 2015
For our wedding anniversary Ange bought me a rechargeable Beats Pill Bluetooth loudspeaker unit to use with my iPod and smart phone on the back of the boat whilst cruising. Due to the cylindrical shape of it I was afraid that it might roll off the sliding hatch when in use so I decided to make a cradle for it.
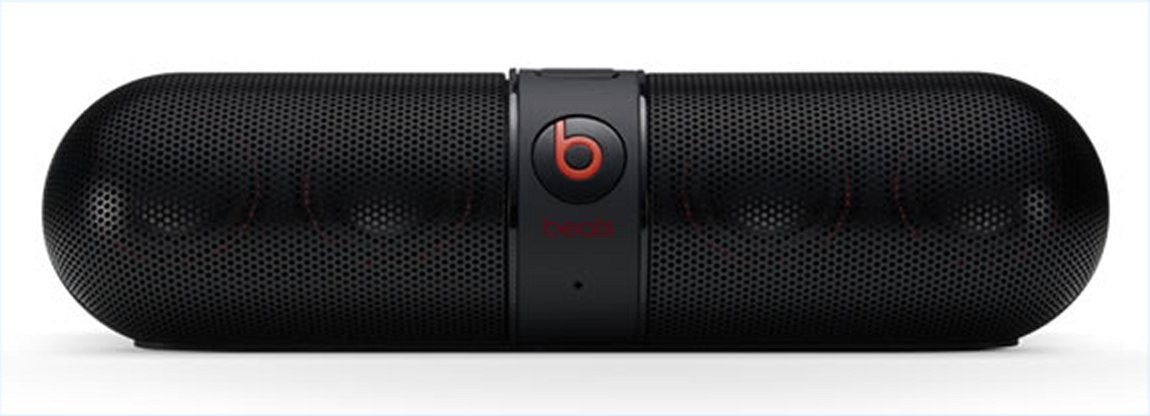
Beats Pill Bluetooth Loudspeaker unit
The cradle was made from oak that was suitably shaped by Neil Campbell... one of the Carpentry and Joinery lecturers at work. Once assembled and rubbed-down with fine sand paper I gave it eight coats of varnish. When this was dry I fitted self-adhesive feet to the underside and stuck felt onto the inside of the cradles to prevent scratching. The Beats Pill unit itself is beautifully neat, has a Bluetooth range of ten metres and is recharged using the same charger and Micro USB lead as the Huawei Mifi Wi-fi unit, Kindle and my phone. It is a far cry from the loudspeaker system that we used to have for the rear deck of Total Eclipse that had cables everywhere just waiting to be tripped over and took ages to set-up as well!
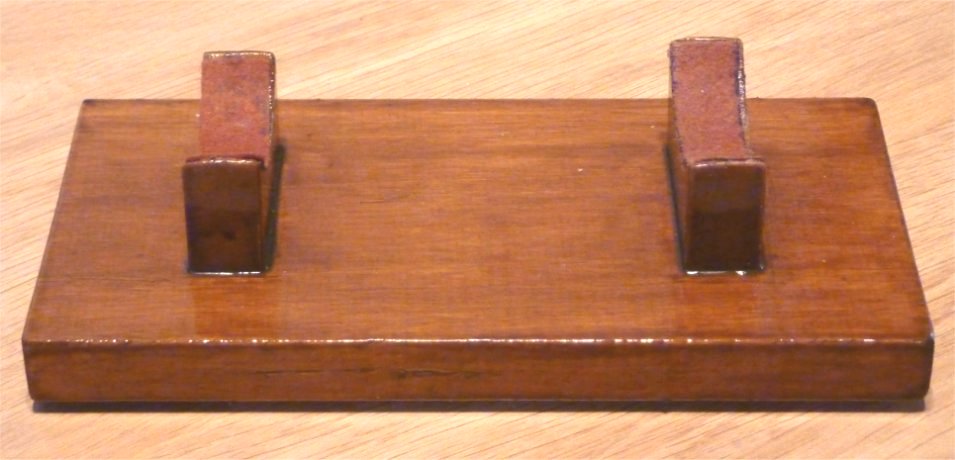
Wooden cradle for the Beats Pill Bluetooth Loudspeaker unit...
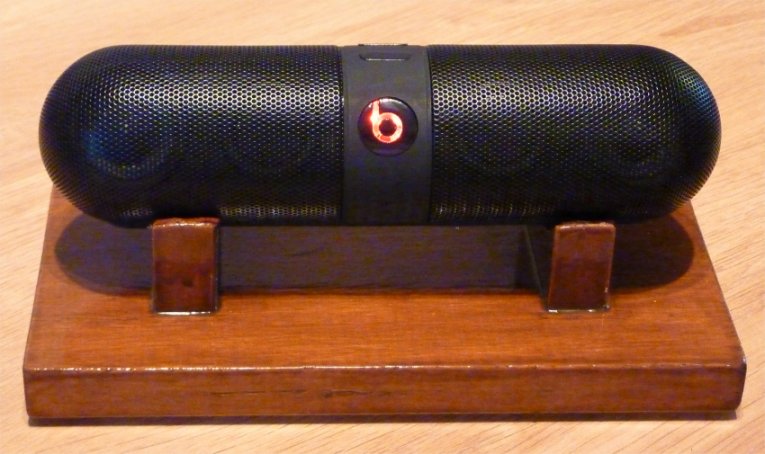
...and with the Beats Pill in place
I had previously had problems cleaning the non-slip coating on the cabin roof and gunwales. I had the greatest success by using a cleaner called "151 Elbow Grease" accompanied by a scrubbing brush but this meant scrubbing the whole roof whilst kneeling down causing back and knee pain (not to mention cramp). I tried out the Kärcher K4 Compact Pressure Washer that I had received as a combined Christmas and birthday present from my stepson Michael. I had been itching to try the K4 and had bought a water scavenge pipe off eBay at half the retail price. The water scavenge pipe allows me to use the pressure washer anywhere, regardless of whether there is a water tap close by or not. One problem that I encountered with the pipe was that it needed weighing down in the water so that it did not float to the surface and start to suck air. This was overcome by attaching an old steel shackle to the strainer/non-return valve end of the pipe with cable ties to weigh it down in the water. I had previously had problems cleaning the non-slip surface on the boat's roof and gunwales and the K4 took it in its stride, cleaning them without having to resort to chemicals or a scrubbing brush. I then turned down the delivery pressure at the lance and cleaned the rest of the cabin sides and hull paintwork with similarly excellent results. In April 2015 I fitted new shelves in the rear cabin... port side above the TV and on the starboard side adjacent to the fire extinguisher.
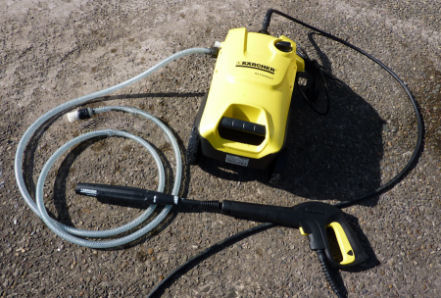
Kärcher K4 Compact Pressure Washer and water scavenge pipe
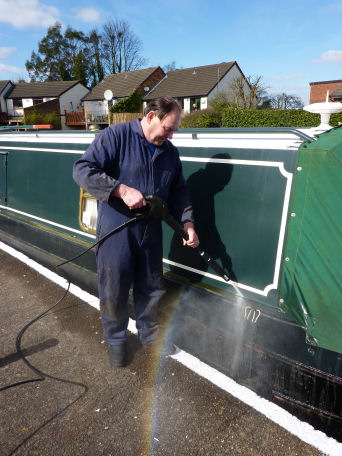
Yours truly using the Kärcher K4 pressure washer
New shelf in aft cabin port side
New shelf in aft cabin starboard side
As previously mentioned we had decided to have the boat repainted when finances allowed. One problem was identifying the colour that the boat was. When we bought the boat there were four tins of dark green from various manufacturers and none of them, even when fading was taken into consideration, matched the main colour of the boat. The term "Fifty Shades of Green" came to mind! Many colour charts from various manufacturers had been compared and the nearest appeared to be Black Green (RAL Code 6012). Rylard Paints' British Racing Green RAL Code 6005 was similar but too "warm". The original colour may have been Donegal Green before it faded darker (unusually). Rylard Paints are based in Litherland, Liverpool not a million miles away from where the Liverpool Boat Company so it seemed logical that this brand of paint may have been used when the boat was built.

British Racing Green - Donegal Green - Black Green* - Turquoise Green paint swatches
(*nearest to the current colour)
What was needed was a small pot for matching the colour and this is something that paint manufacturers don't appear to offer. We had previously received a good service from Rylard Paints when trying to match the colour of Total Eclipse as International Paints had discontinued the Deep Water Green and Pillar Box Red colours that it was painted in and were unable (or unwilling) to match. I sent Rylard Paints the lids from old tins along with samples of paint skin that had formed on the top of the contents of the tins which they matched the exactly. In the case of Squirrel we didn't have even this to go by so I contacted Rylard and sent them a couple of photographs of parts of the boat with reference colours. I received a telephone call from the Managing Director when we discussed my problem at length and ways to resolve it. I am sure that we are not the only people who experience this problem and I suggested that match pots could be ordered for this purpose. We would gladly pay for samples and in the end they sent a couple of small pots of British Racing Green and Dark Green to see which was the nearest, free of charge. Yet another example of outstanding customer service where manufacturers have "gone the extra mile" to satisfy the needs of their customers.
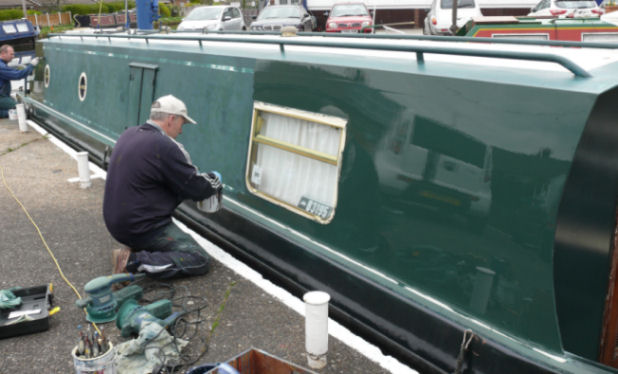
We were recommended to Mark Leatherbarrow and his associate Paul as they had painted quite a few boats in the Club (as well as painting the sign writing on Total Eclipse) and the quality of the finish they produced was second to none. When they came to give a quote for the painting they also matched the current colour which turned out to be Mason's Black Green and has a RAL Code of 6012. They also quoted to paint the sign writing on the cabin sides and the non-slip section of the roof beige to remove the glare from the original white paint. The repaint was planned for August when we had returned from our summer cruise but was postponed due to the previous painting job taking longer to complete that originally planned. Painting was due to commence in September but this had to be postponed yet again due to Paul being ill. On the positive side it is just as well as we would have a better finish if the boat was painted in the spring due to the weather being warmer which would allow the paint to dry to a better finish.

The name and sign writing we proposed to have painted onto Squirrel when the repaint is completed
Just after Easter 2015 we received a telephone call from Mark who told us that they planned to start the painting that weekend. We re-arranged our plans and I spent a day removing the canopy fittings, vents, etc (again) so that they could have more time for the painting without having to mess around removing them. I had made arrangements to leave the boat on the canal frontage at the Clubhouse and as our permanent mooring is at the far end of Oughtrington the painters would not have to carry their equipment as far and this meant that they would have access to mains electricity for rubbing down as well. Overhanging trees would have shed leaves and birds perched in the trees could have deposited droppings on their work. They arrived at 7.30 am on the Saturday morning and as we had planned to meet friends in Manchester we left them to it. On our return that evening they had completed rubbing down the cabin sides and the smooth portion of the roof and painted them with undercoat. They came the next morning and started glossing. By the time they had left in mid-afternoon the cabin sides and smooth portion of the roof had received one coat of gloss. Needless to say the finish looked stunning! Over the subsequent weeks the boys repainted the boat and their progress is documented below.
Mark and Paul flatting down the paintwork prior to undercoating
Later the same day with the undercoat applied
The difference was amazing and...
... even after one coat the finish looked stunning
The following weekend rain stopped play during the fore deck and bulkhead preparations
At Daresbury with the forward bulkhead and foredeck painted with undercoat
The aft deck sanded down ready for undercoating...
...a few hours later with the undercoat applied...
...and the following day fully glossed
The gunwales and fore deck with the undercoat applied...
...and also the following day fully glossed
Back on the mooring at Oughtrington with the bow detailing...
...roof, glossing and coach-lines completed

Bow detailing
Clean and shiny with the repainting and sign writing completed
The sign writing painted onto the cabin side...

... and a close-up of the squirrel - note the red dot on the camera representing the Leica logo
On the last day of painting Mark fell in the canal whilst painting around the rear deck but even so the end result is wonderful and exceeded our expectations. Mark and Paul's attention to detail was second to none... even down to painting a red spot on the camera being held by the squirrel in the sign writing to represent the red dot which is the trademark of the Leica cameras that I use. We had been advised not to polish the paintwork for a couple of months but I was worried about bird droppings from the trees overhanging our mooring at Oughtrington affecting the finish so the first coat of polish was applied in July 2015. This was supplemented with a second coat whilst we were away on our summer cruise later that month.

New LED headlight...
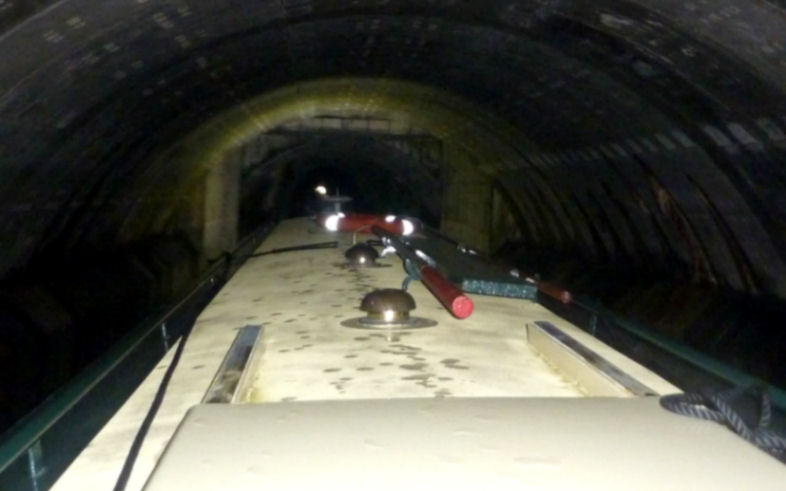
...and the illumination it provides inside Preston Brook Tunnel
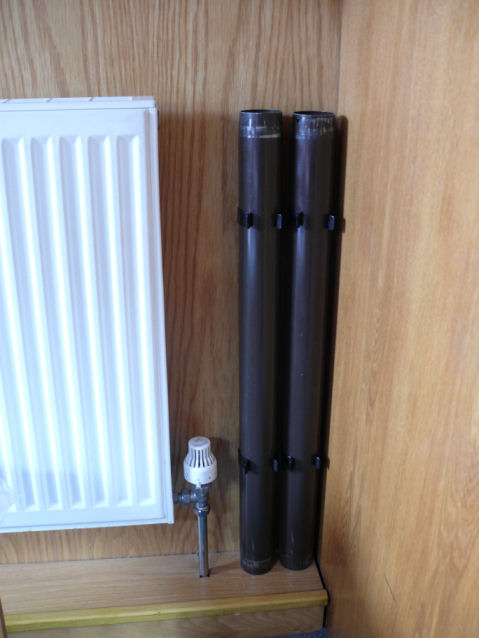
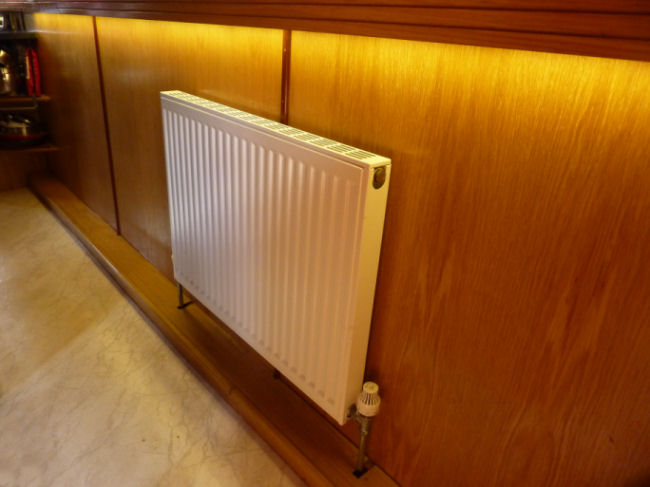
Desmo table leg storage clips
The original tungsten halogen headlight was replaced with a high-power LED unit making the boat 100% LED. Storage for the Desmo table legs has always been problematic with them usually being stored next to the front step in the lounge. This was cured by fitting purpose-made clips adjacent to the central heating radiator in the lounge.
Before the 2015 winter set in I decided to rub down and re-varnish the rear sliding hatch surround, the side doors and surround, the front/starboard window surround and the front door frame... jobs which I intended to do during the summer when there was less moisture in the atmosphere to mar the finish but didn't manage to get around to. At the same time I also fitted new mooring ropes to replace the old, brittle ones which came with the boat when we purchased it over two years ago.
The aft sliding hatch surround after sanding down and three coats of varnish

Rear doors and surround after sanding down and re-varnishing
The front/starboard window frame surround after sanding and re-varnishing
Dyson DC34 and docking station
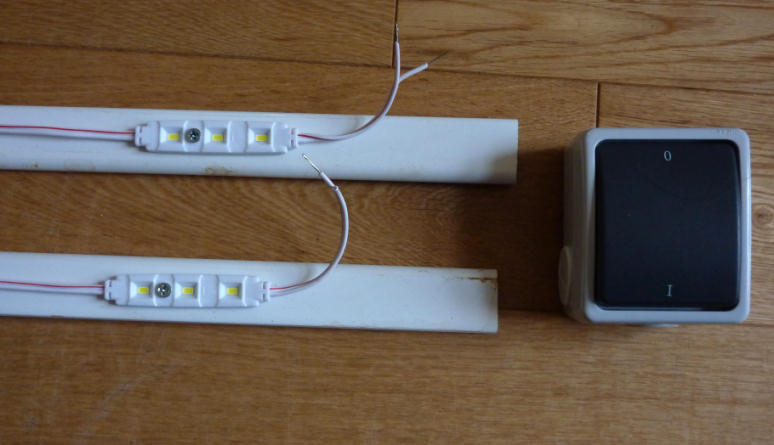
We planned to fit low drain LED lighting beneath the gunwales in the corridor from the aft cabin to the kitchen and lounge. As well as being a lighting feature it would provide background illumination at night when it is dark and with being LEDs they could be left on all night without any significant current drain on the battery bank. Very important when Shannon is on board in case she wants to use the toilet during the night as well as acting as a "night light". The newly installed 12 volt cables were connected to a junction box and switch to feed power to the lighting and the end result was most satisfactory.
The under-gunwale LED lighting in use
A close-up of the LED lighting and switch
When we bought Squirrel we noticed an additional Desmo table leg socket in the aft cabin and we had added to our "to do list" making a small occasional table to fit to the socket. We had previously bought a new table leg for this purpose and I had a couple of Desmo table sockets and a piece of ply wood stored at home (the plywood being originally one of the bunk lids on our old boat Total Eclipse). After marking the timber with the desired size and shape it was cut into an oval on a band saw at work. The leg didn't fit the floor socket correctly due to the bottom of the leg protruding through the socket and fouling the ballast beneath. It was also taken home and trimmed with my angle grinder fitted with a cutting disc. Once the table was cut to size and shape, the Desmo socket was fitted to the underside, the table top sanded down, cleaned and five coats of varnish applied. When the suitably trimmed leg was brought back to the boat it fitted perfectly and the resulting finish exceeded my expectations. As an occasional table in the back and front cabins it will, no doubt, be put to good use. A couple of spring clips were purchased from Midland Chandlers to store the leg beneath the gunwales when not in use as with the table in the lounge and the table top is stored in one of the bunks until required.
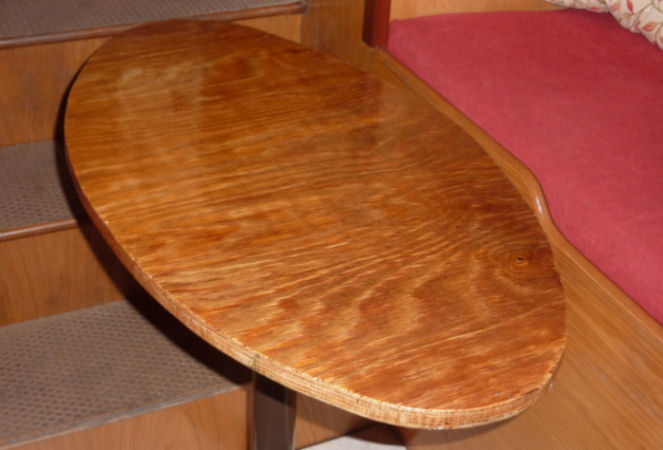
Our new occasional table after five coats of varnish applied and fitted in the aft cabin
The aft cabin with the new occasional table in place
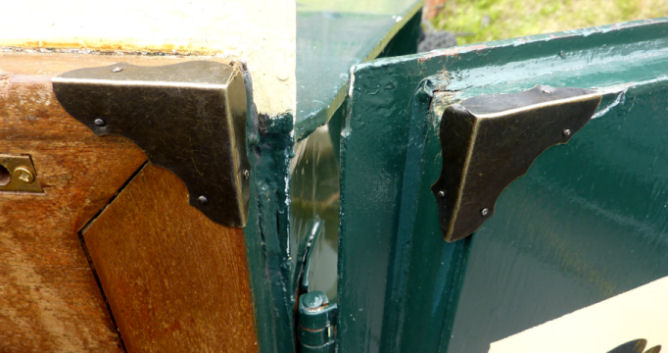
Brass corner protectors on the aft doors and hatch plinth
With the boat being so reliant on electricity we decided to investigate the possibility of fitting a solar panel to keep the battery bank "topped-up" when we were absent. After some research we decided that the best location on the boat would be on top of the rear sliding hatch. In the other locations considered there was a possibility that the panel's efficiency could be affected by shadows cast by the boarding plank and other roof "furniture" or if located further forward the longer cable runs would have produced a voltage drop even if a larger output panel or heavier gauge cable was used. Anyway, an 80 watt panel from manufacturer AKT had dimensions would be the closest to that of the hatch with no overhang. This panel only loses one amp of charging current against a larger 125 watt panel. The cables could be routed through the aft cabin ventilator and when the hatch is open the excess cable concealed is beneath the sliding hatch. After undertaking research into the subject we decided that the AKT eighty watt panel which utilises high quality Bosch cells was the one for us and was ordered.
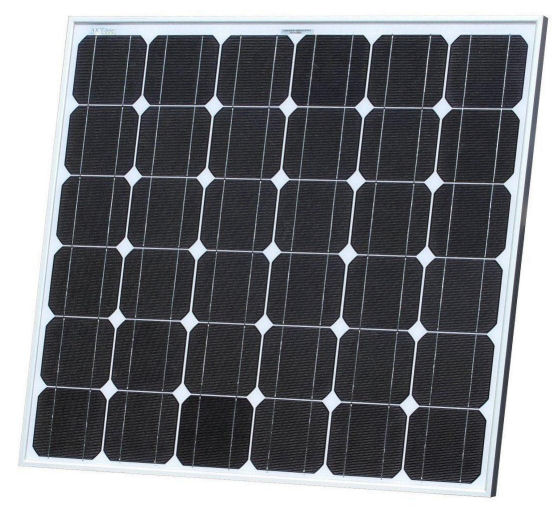
The AKT panel was available on Amazon either with or without a current/voltage regulator. Regarding current/voltage regulators... there are two basic types: PWM (Pulse Width Modulation) and MPPT (Maximum Power Point Tracking). The PWM is more basic in its specification and regulates the voltage and current produced by the solar panel. The MPPT type however, boosts the voltage in low light conditions albeit at a reduced charging current. It is a lot more expensive and gives minimal advantage over the PWM type for our size of panel, being more beneficial for panels over 150 watts or multiple panel installations. But back to our panel... we purchased it without a regulator and sourced a better specification PWM Domecool twenty amp (the panel has a maximum output of five amps) model from eBay and features a more comprehensive display as well as twin 1·5 amp USB charging ports plus two additional 12 volt sockets. Most of the regulators we looked at had the same layout, connection configuration and dimensions which lead me to believe that they all utilise the same circuit board and components, differing only in the facilities, display and connections offered as well as other minor design details... hence the choice of the Domecool model.

Domecool 20 Amp Solar Panel Regulator
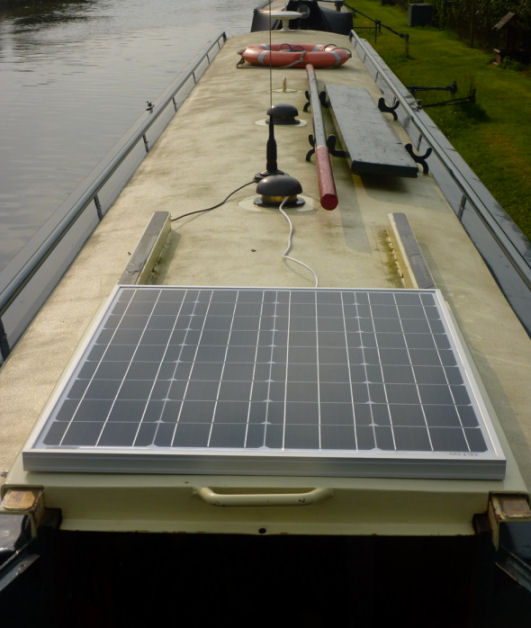
The AKT 80 Watt Solar Panel fitted to the aft sliding hatch
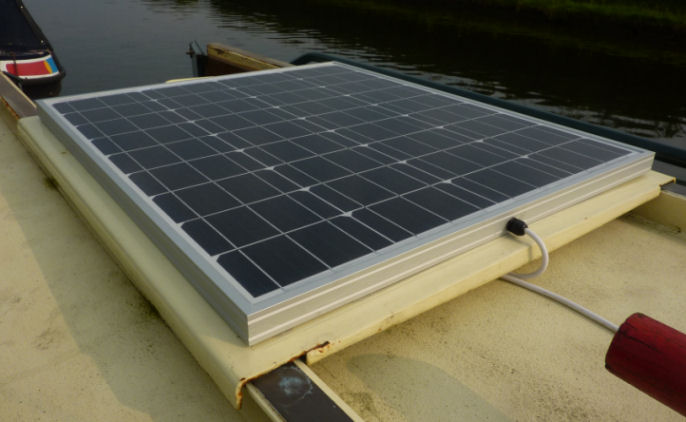
The cable coiling up beneath the hatch when slid open
Whilst we are cruising through locks or with another boat we often use walkie-talkie two-way radios for directing when passing through locks or to advise of on-coming boats, especially at blind bends and bridges. One problem we have with the walkie-talkies is that it is not always possible to hear the transmitted message whilst steering above the engine (quiet though it is). On solution would be to install a CB radio that uses the same frequencies as the walkie-talkies. Whilst talking about this subject to Arthur Malcolm... a friend at Lymm CC who is into radio communications, he mentioned that he had a CB radio transceiver and mag-mount antenna that was surplus to requirements and that I could purchase it from him. This we did and the radio transceiver (a Team TS) which is one of the smallest and neatest examples I have seen, was installed in the electrical cupboard (along with an SWR meter for matching the antenna and 12 volt/USB sockets to supply the power) with the microphone and extension speaker located on the back deck for ease of use whilst under way. The antenna is of the magnetic mount variety with a soft rubber coated base to protect the paintwork on the roof.

The Team TS CB radio transceiver we have fitted to the boat

The CB radio transceiver and 12 volt/USB electrical sockets fitted in the aft cabin electrical cupboard
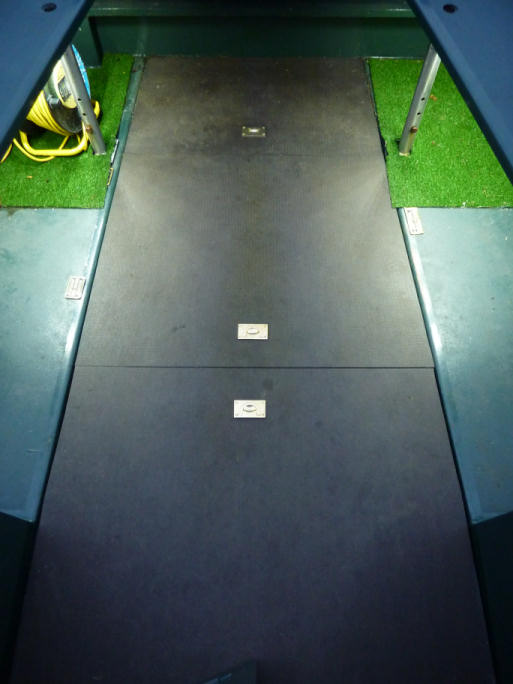
The rear deck boards had been showing signs of wear for quite a while and I had investigated several sources of the boards. The underlying problems being transporting the new, uncut boards from where they were purchased and the subsequent cutting to fit the unusually shaped apertures. Whilst we were on our 2017 Easter Cruise we called into King's Lock Chandlery to see if they stocked the boards. The plan was to purchase them from King's Lock and transport them back to Lymm on the boat and have a joiner that we know cut them to size. Whilst enquiring at King's Lock we asked if they could cut and fit the new boards which they said that they could. A price was quoted and we decided to go ahead. An appointment was made for a couple of days hence and we returned on the allotted day for the boards to be fitted. Once completed we were initially very pleased with the job but after a day of rain one of the boards expanded and bowed preventing the rear doors from being opened. As we were stuck for time we carried on to our moorings and returned the offending board a week later for a replacement to be cut. The replacement was slightly narrower which prevented it from bowing and we were completely satisfied with the job.
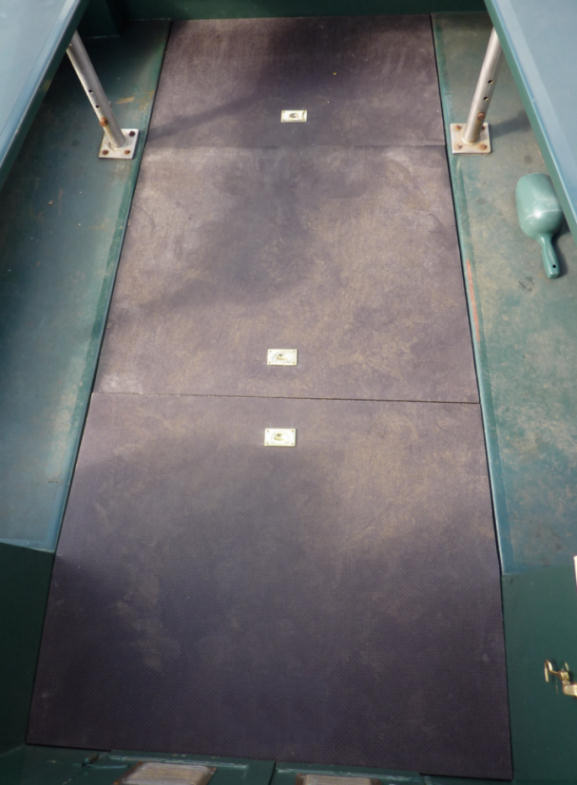
New aft deck boards fitted
In May 2017 the boat was due for its bi-annual slipping to have the hull cleaned, inspected and re-blacked. I suspected that the sacrificial anodes would require replacement so Phil Savage was booked to weld the new ones on the day that the boat was slipped. Whilst he was there he opened up the kitchen sink drain which had always been slow to empty due to being damaged at some time in the past (I hasten to add... not by us). The hull was in good condition although there was some play in the rudder top bearing and it will require replacement at some time in the future. The hull received four coats of bitumen and was re-launched a few days later when the bitumen had cured.

Phil Savage welding on new sacrificial anodes
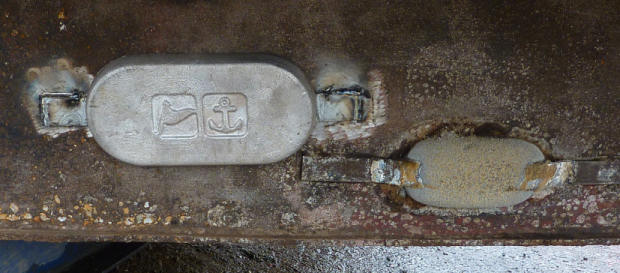
Old and new sacrificial anodes
With four coats of bitumen applied and waiting to be re-launched

Back in the water
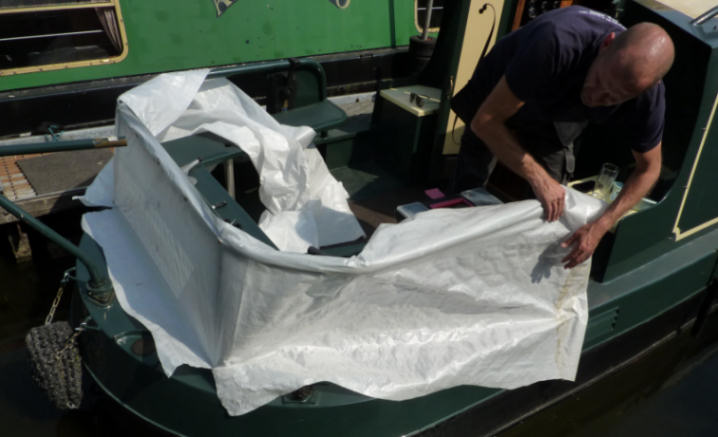
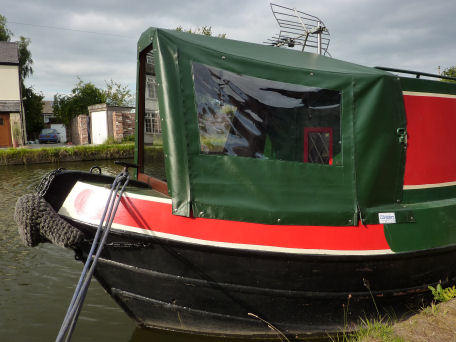
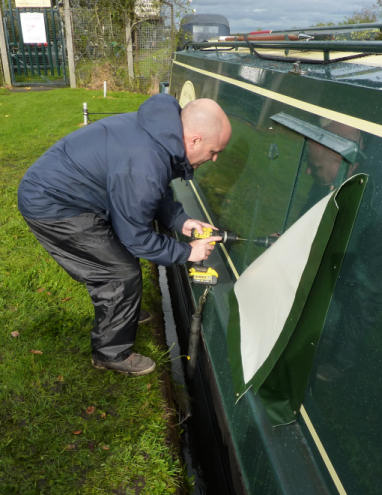
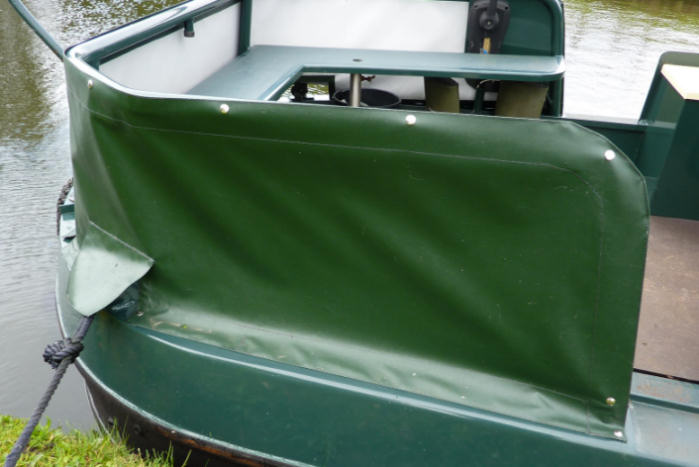
On the 20th June 2017 Steve from The Cover Company measured the rear deck handrail for a dodger and made a template from which the finished article will be made from. The completed dodger was fitted a couple of weeks later on the 4th July in good time for our 2017 Summer Holiday Cruise. It had a couple of creases in it but Steve assured me that they would fall out in the heat.
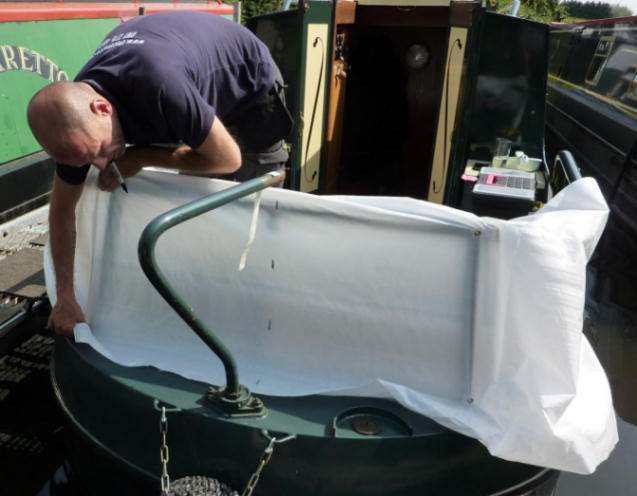
Steve from The Cover Company measuring up for the dodger template...
...fitting the template to the new fixings...
...and the finished template from which the dodger will be made
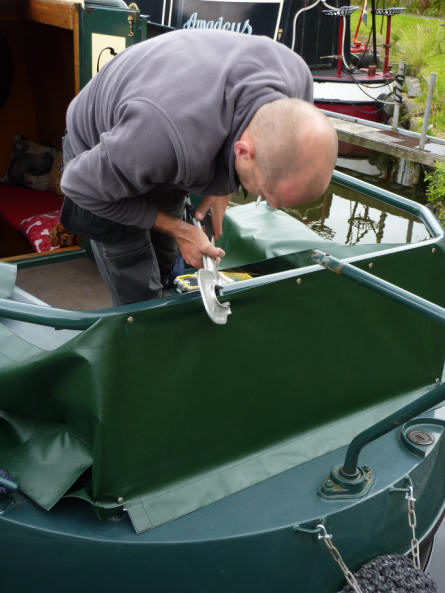
Two weeks later Steve fitting the dodger

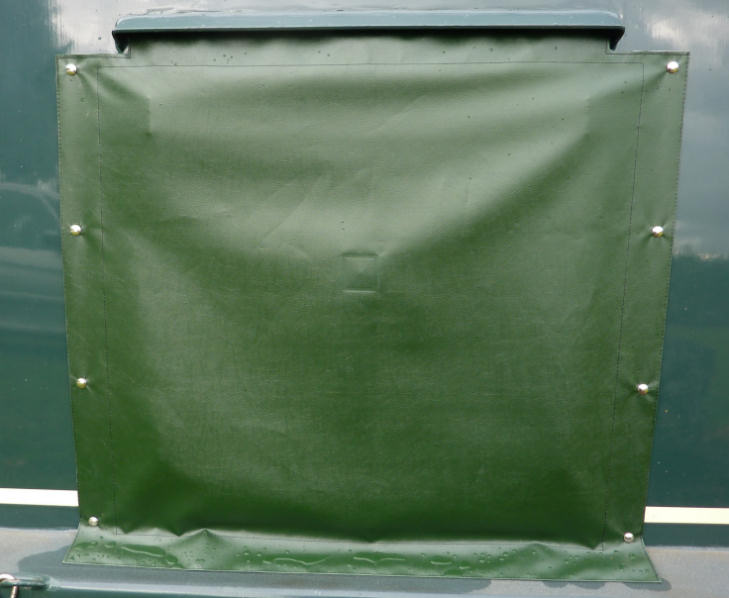
The completed dodger...
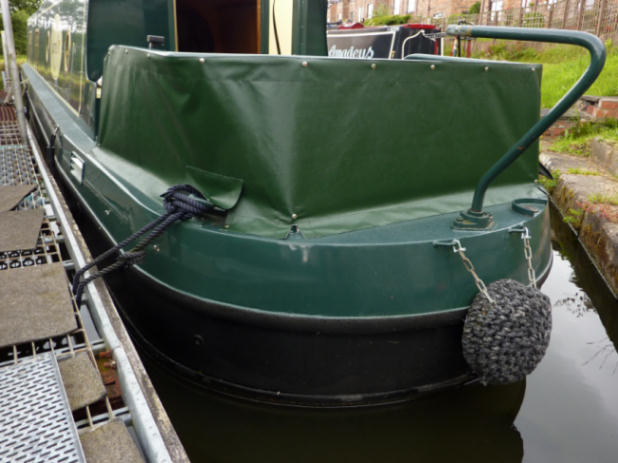
...and from a different angle
The foredeck was being frequently visited by Ruby who liked to lie out on it but we were aware that the steel decking became very hot in direct sunlight and we didn't want her to damage her pads. There was previously plastic matting on the deck but it was not comfortable either for her to lie on or for us when walking on it. Ange suggested some form of covering similar to artificial grass that had drain holes to allow rain water to drain away might be a solution. I had previously seen something like it in Aldi but they had since sold out. A similar product in the shape of exterior carpet similar to artificial grass but without the strands was in stock at our local B & Q and after inspection, a four foot by six foot six inch length was purchased from them (£20).

The fore deck covering prior to fitting...
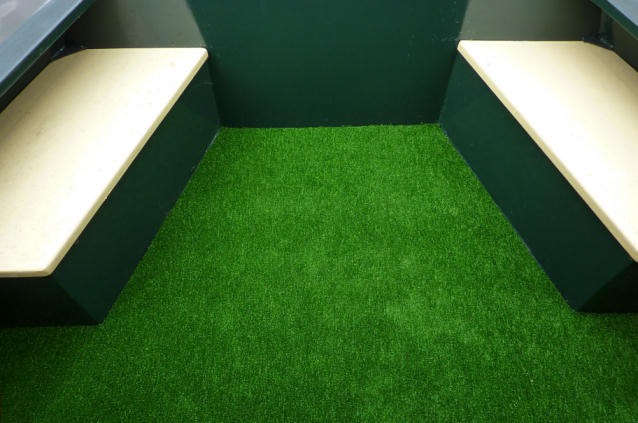
...and fitted
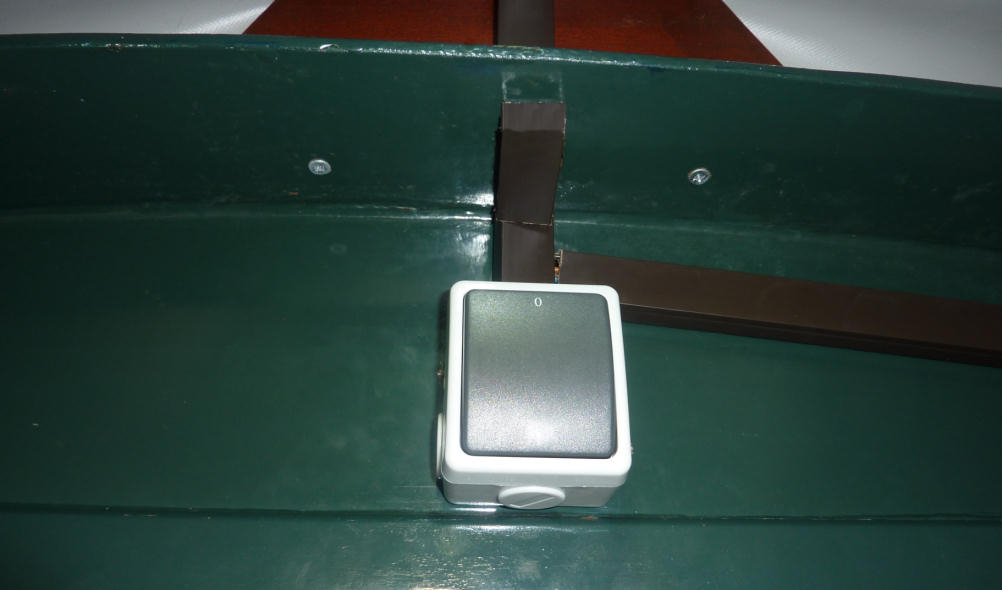
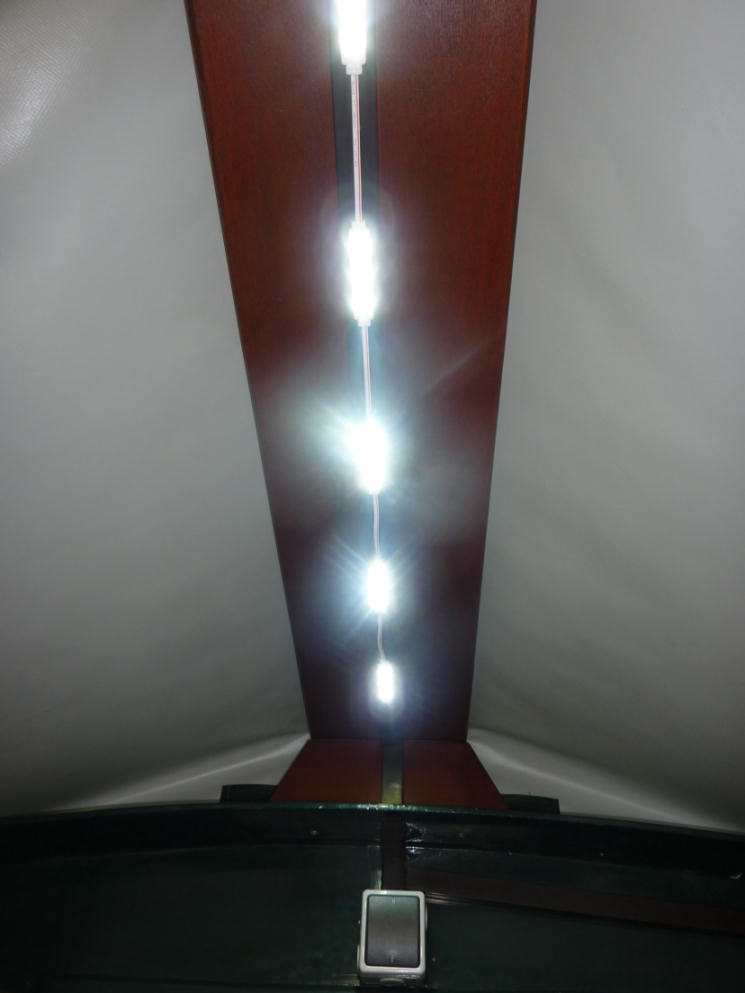
As we now had a dodger fitted it made the aft deck a bit on the dark side at night so I fitted weatherproof LED lights beneath the seating on the aft deck. I also fitted weatherproof switch to control them. I had mounted the lights on lengths of plastic moulding which were attached beneath the steel seating with epoxy resin adhesive. The switch is screwed in a convenient location adjacent to the engine control lever but beneath the seating with the electrical cabling being fed through the gear change/throttle cable tube, through the engine compartment to the electrical cupboard. The electrical feed is separate from the main electrical system so that the engine compartment is illuminated when turning on the power when it is dark.
Weatherproof LED lighting and switch prior to fitting to the aft deck
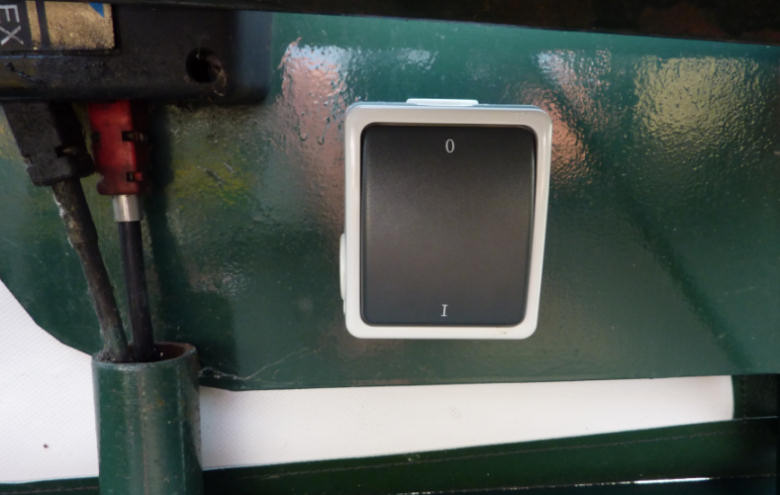
The waterproof switch for the aft deck lighting fitted
Aft deck lighting installed
In the October of 2017 we had a cratch and cover fitted by All Seasons Boat Covers to the fore deck similar to the one we had fitted to Total Eclipse. One difference to the cratch frame itself is the omission of a glass window. Instead we had a transparent PVC window fitted to the canopy that can be un-zipped and rolled-up to allow access to the rope locker. The headlamp and horn needed to be relocated and All Seasons Boat Canopies provided a suitable bracket to accommodate both and even made a cut-out in the cratch frame for it. There is LED lighting identical to the type fitted to the aft deck, fed by the lounge interior lighting circuit and controlled by a waterproof switch mounted on the bulkhead above the front doors. Instead of mounting the LED lights directly to the hard wood beam of the cratch frame they are screwed to brown, self-adhesive, plastic cable trunking attached to the underside of the beam. In addition to concealing the foredeck LED lighting cables, the trunking hides the headlamp cable. Also, a hinged, narrow, drop-down table is planned to eventually be attached to the foredeck bulkhead that folds up when not in use.
The cratch and cover fitted to Total Eclipse
Garry from All Seasons Boat Covers making an initial fitting of the cratch
Friday the 13th October 2017 was the date arranged to have the cratch, side doors cover fitted and they had also agreed to re-fit the dodger which was creased since new. On the day the work was to take place the weather was far from ideal as there were intermittent showers but that did not deter Ray and John who did an excellent job that should last for many years to come.
Ray from All Seasons Boat Covers fitting the side doors cover...
...and the finished article
Ray fitting the cratch frame
John spreading the cover over the cratch frame
John and Ray fitting the press-studs that hold the cover in place
The finished article
The re-fitted dodger
Looking resplendent on the mooring with the new cratch fitted
Re-varnished port-side lounge window frame
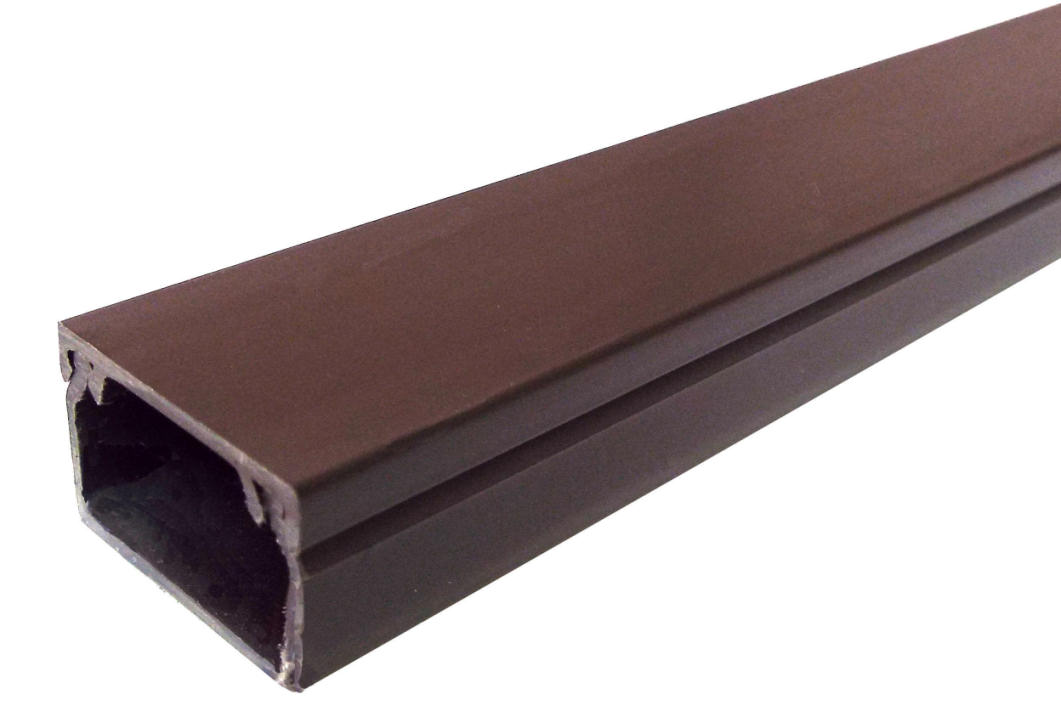
Brown cable trunking as fitted to the underside of the cratch beam
Regarding the previously mentioned headlamp and horn bracket, I had taken it home along with the headlamp and horn to be cut to length and have an additional hole cut into it for the horn. On inspection the horn looked as though it was coming to the end of its life and should really be replaced. A while ago I bought an "oooghaa" klaxon type horn to fit to Total Eclipse but had never got around to fitting it. Now seemed the ideal time to dig it out and replace the original horn with it so the headlamp/horn bracket could be modified accordingly and painted before fitting to the cratch where there is a cut-out especially to accommodate the bracket. The cable trunking can then be fitted to hide all the cables with the exception of the horn cables which will need to go via a different route if it is to remain hidden.
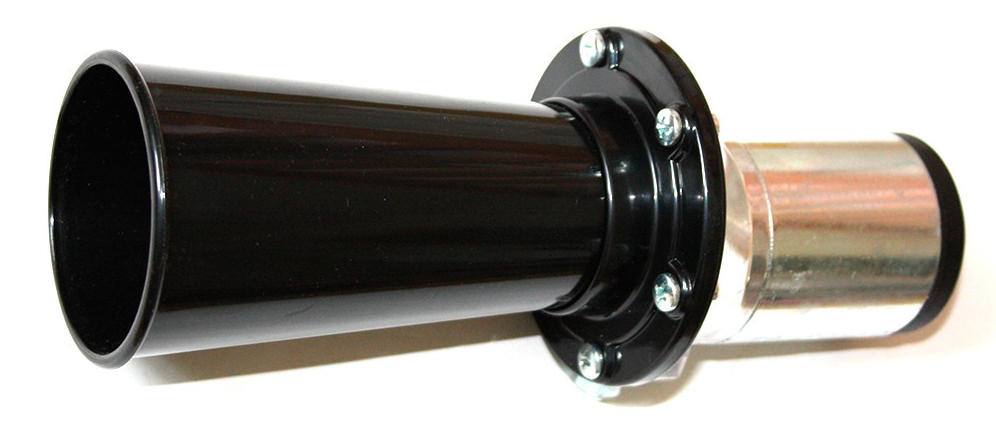
Klaxon horn to replace the original ageing car-type horn
At the end of the 2017 boating season the fresh water system was giving concern. When a tap was turned on "water hammer"... a banging in the water pipes could be heard. The flow of water through the taps was of a diminished pressure as well. These symptoms lead me to believe that there was a blockage in the water system. At the start of the 2018 boating season, instead of filling the fresh water tank completely I put a small amount of water in it, turned on the boat's fresh water pump and opened the tap to get rid of any airlocks, By a process of elimination I discovered that there was a blockage in the pipe-work between the tank and the pump. I remembered that we had a similar problem when we first bought the boat. Even though the tank is made from stainless steel a small section of pipe (socket) between the stainless steel outlet pipe and the plastic pipe-work union was made of steel.
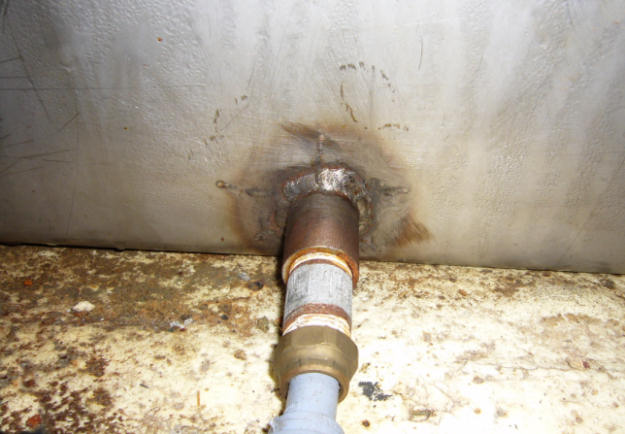
Close-up of the fresh water tank outlet pipe... the centre section of pipe is the one I suspect is blocked
Due to electrolytic action caused by dissimilar metals being in contact with each other I thought that the blockage lay here and corrosion had blocked this small section of steel pipe. I tried blowing through the pipe with a length of flexible hose but this was to no avail. The only other alternative was to empty the tank completely, remove the individual pipe-work fittings and replace the offending section of pipe. In preparation for this I left the tap and pump running for a while to empty the small amount of water in the tank but, due to the low trickle rate this would take quite a while and as I had to leave for home I put this task off for another day. The night before I was due to do this I awoke at 3.30 am with a "light bulb moment". Instead of waiting for hours whilst the fresh water pump struggled to empty the tank I thought why not insert a length of hosepipe into the tank through the filler and connect it directly to the pump. Accordingly, whilst packing the car with the tools that I might need a length of hosepipe was also packed. I had previously purchased a small pipe wrench specifically for this job due to the confined space that I would be working in. When I tried my "light bulb moment" solution to emptying the tank it worked perfectly and saved quite a lot of time.
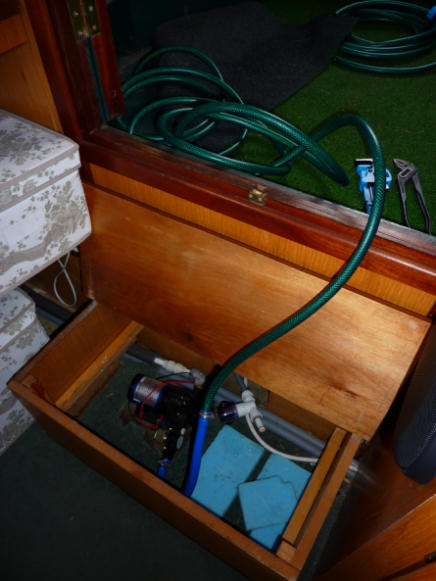
The hosepipe fitted into the water filler and attached to the fresh water pump
Once empty I re-attached the original pipe to the pump to empty the "dregs" out of the tank. Next I started to strip-down the offending pipe work. I assembled my tools including the new pipe wrench, disconnected the pipes from the pump but as soon as I touched the tank outlet pipe it came away in my hand, Closer inspection proved that the offending fitting was indeed corroded internally which was preventing the full flow of water to the pump. The corrosion had affected the inside of the fitting and could not be seen until removed. Part of it remained in the output pipe from the tank which I cleaned as best as I could and started to reassemble everything but using a flexible hose between the remains of the socket and the tank. I was relieved when the pipe work was completed. The hoses were a tight fit but I did not have any Jubilee Clips of that size, but at least the bulk of the work was completed. When I later fitted the Jubilee clips I partially filled the fresh water tank and there was a small leak from an elbow just before the isolation valve which was cured with silicone sealant. The water tank was then fully filled, water system bled and the job was completed. The water hammer and low water pressure problems were now cured. One more job to tick off the list! With having to work in a confined space was challenging. I am grateful that the socket broke in two as it did instead of happening when the water tank was full. This could have flooded the interior of the boat and would have done a lot of damage. I had scraped my knuckles and arms in numerous places and working through such a small hatch made me feel a bit like a gynaecologist!
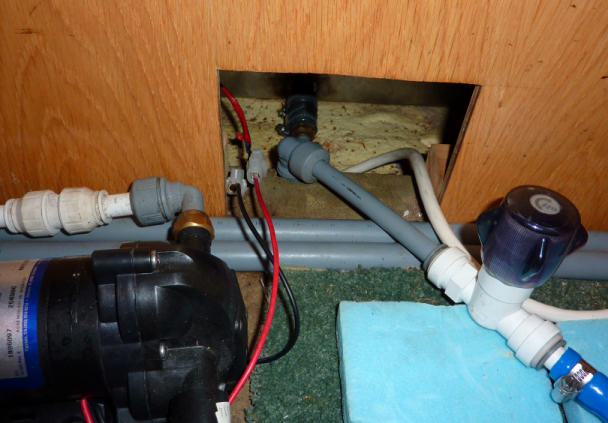
Water pump and water tank pipe work

The completed flexible hose coupling the tank outlet to the pipe work
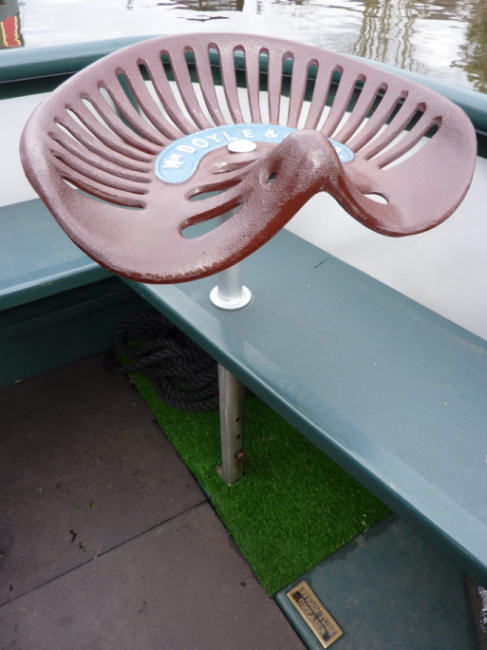
Due to not being able to see over the cabin roof when sitting on the aft deck seating whilst steering I planed to purchase two cast iron tractor seats and attach tubing to them which would slide into the apertures and tubing already fitted to the fixed seating on the aft deck by the previous owner.
Cast iron tractor seat similar to the type we have fitted
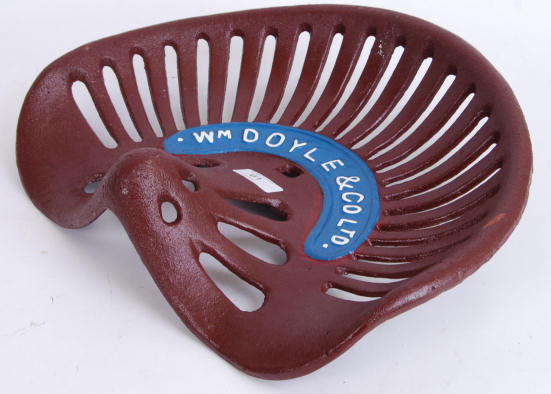
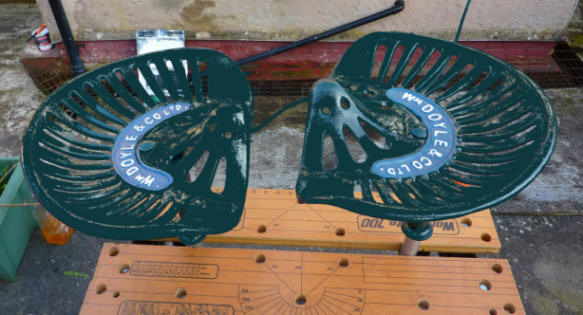
A closer view of the William Doyle Cast Iron Tractor Seat
I received a seat as a Christmas/birthday present and a fitting to attach the seat to the tubing was fabricated. Once this was temporarily fitted to the boat and deemed successful a second seat was purchased and both of them were taken home for painting. I mounted them on my Black and Decker Workmate to ensure a convenient platform to work on them. Once they had a couple of coats of paint to match the boat they were refitted permanently. These cast iron seats do not look comfortable but in use they have proved extremely comfortable. This has been confirmed by various other boaters who have expressed an interest and tried them.
The port side cast iron tractor seat mounted prior to painting...
...mounted in the Workmate at home during painting...
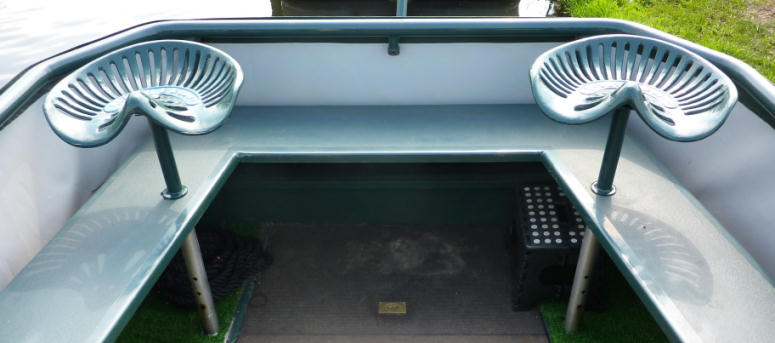
...and permanently mounted in position on the aft deck
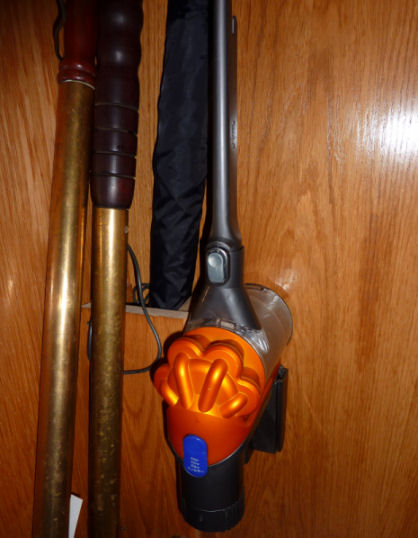
Our Kärcher Window Vac was normally stored in one of the bunks but I thought that a mounting bracket would ensure that it was always ready for use. Kärcher do not make a bracket but a suitable unit is manufactured by Beldray and one was ordered from eBay. It was fitted next to the Dyson vacuum cleaner mounted in its holster and even though only cost a few pounds it is a worthwhile addition to the boat.
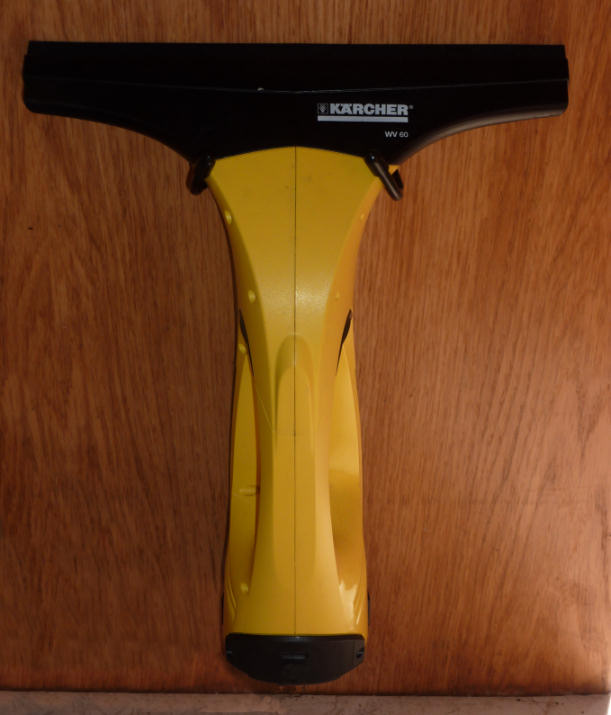
Beldray Bracket for Kärcher Window Vac
With the cratch and foredeck cover fitted the headlamp and horn had to be relocated. As the original horn was not cosmetically pleasing the opportunity to replace it with an "oooagaagh" klaxon-type horn was taken. The electrical feed to them both was concealed in plastic trunking attached to the cratch beam which also incorporated LED lighting identical to that fitted on the aft deck.
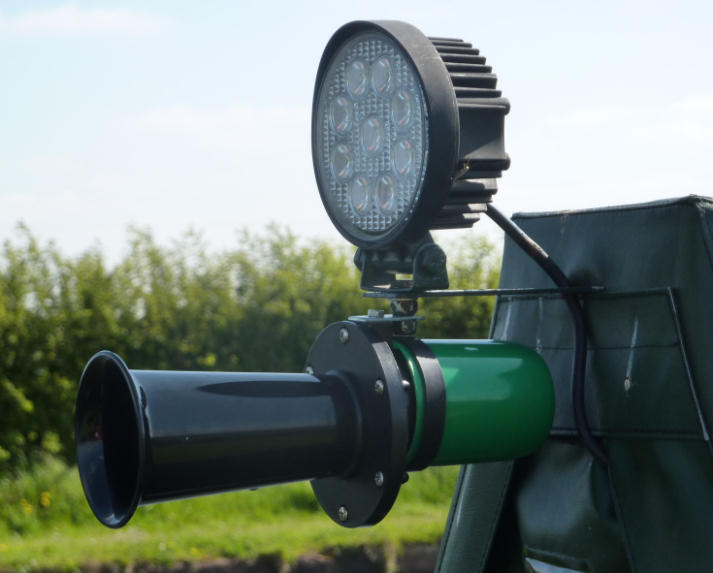
The New horn fitted and headlamp relocated
The foredeck lighting switch and cable trunking
Foredeck lighting screwed to the cable trunking lid on the cratch beam
Cable trunking for the headlamp and horn cables in position
Whilst moored at Venetian Marina, Cholmondeston on our 2017 Summer Cruise Ange saw a boat with a windmill and solar lamp fitted to it. She was captivated by it and on our return I bought one for her. It was put in our back garden until a suitable bracket was made for it by Alan Savage and then fitted onto the boat's roof aft of the radio/TV antenna. One problem that was soon discovered was that when the vanes turn at night the noise is transmitted through the roof's steelwork and required acoustic isolation. This was achieved by a mounting the windmill on a neoprene block which was, in turn, screwed to the roof.
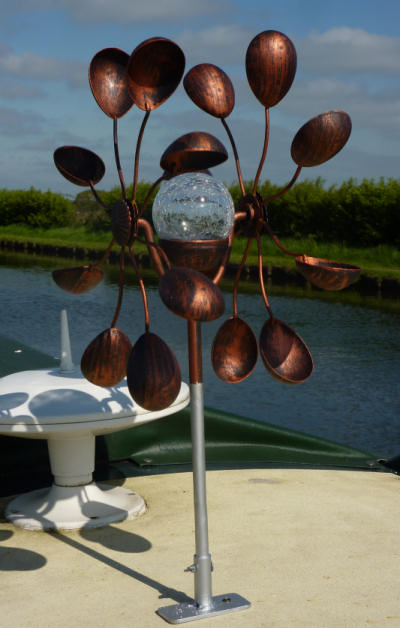
Angie's solar lamp and windmill fitted to the roof
The dado rail below the side doors had always been stained due to a rain water leak whilst being in the previous owner's ownership. I initially planned to swap the rail with the forward/port side rail where the staining would be hidden. It turned out that the two lengths of dado rail were slightly different in length by a few millimetres and so I decided to cut out the stained length and swap it with an identically sized piece from the other length which would then retain the original length of the dado rails. This process worked perfectly and have included photographs to illustrate this below.
The stained dado rail can be seen below the side doors to the right...
...with the replacement piece in place...
...and the hidden stained length
The first job in 2019 on my "To Do" list was fitting new window catch screws to the lounge windows. I had obtained the replacement screws from Caldwell's Windows and had sufficient to replace all the loose screws. Having previously tried to replace some of the screws I had difficulty obtaining the same amount of friction on the catches as when they were new. This time I experimented by adding thin brass washers to the assembly and when satisfied, I ran cyanoacrylate adhesive (Superglue) into the threads to ensure that they retained the friction setting and didn't come unscrewed.
The replacement window catch screws and brass washers for the Caldwell's windows
Whilst returning from our 2019 Easter Cruise the gear selector cable broke. A replacement was fitted but there was insufficient shortening adjustment on the fitting screw at the gearbox end to allow correct operation. Accordingly, the locking screw was left on the threaded portion so that after one centimetre of the threaded adjustment part of the cable was cut off and so shortening the cable. Before cutting the locking nut was screwed off and screwed back on again to ensure that the thread had not been damaged by the hacksaw. When the quick-release fitting was refitted there was sufficient adjustment was for correct operation.
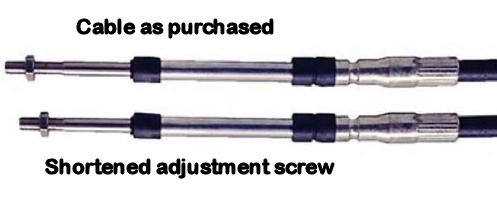
Modification to the replacement gear selector cable
One small, inexpensive but useful addition was a 4G remote antenna for the Huawei E5573C 4G MyFi WiFi receiver and router. The antenna was sourced from eBay, cost less than a fiver and is attached to the starboard lounge window by Velcro pads. It works well and, up to now, we have always been able to obtain an Internet signal... even at Agden where the signal is "variable".

Huawei E5573C MiFi Wireless Router
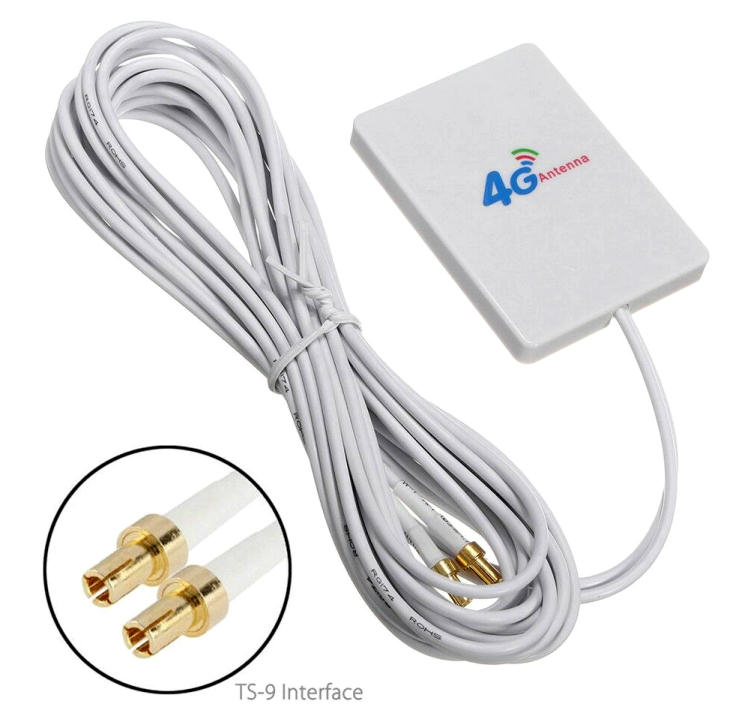
MiFi antenna as advertised on eBay
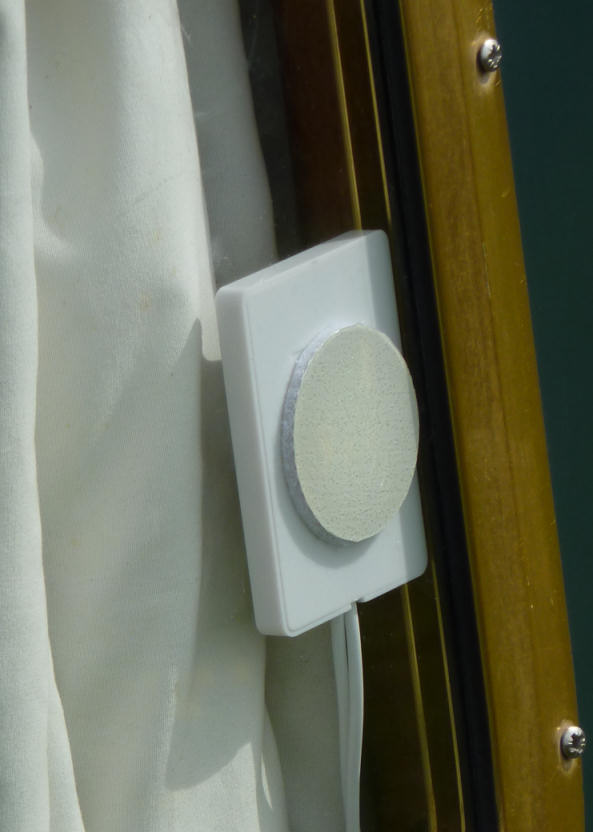
MiFi antenna as viewed from outside
On the 4th May 2019 the boat was slipped out of the water for its bi-annual hull cleaning and re-blacking. Whilst it was out of the water the top tiller bearing was replaced by Phil and Alan Savage who also replaced the rudder lower cup bearing on the skeg.
The tiller bearing removed and the replacement ready to be fitted
New rudder cup installed complete with two pence packing pieces
On the slipway, May 2019 ready for re-launching
During our 2019 Summer Cruise the shower sump pump developed a fault and was staying on when the sump was empty. This indicated a faulty float switch When we returned home from the holiday cruise a replacement was sourced from Amazon. The unit ordered was not exactly the same as a new Johnson unit the same as the one fitted originally would cost in the region of £130 + £34 delivery from the USA but the unit by Seaflow from Amazon was priced at £46 with free next day delivery which should rectify the problem. I removed the faulty shower sump and pump assembly ready to install the new one. What I hadn't planned for was the new assembly was larger than the one it replaced. Not a bad thing but before I could fit it I had to make the aperture in the floor larger to accommodate it. The shower pump sump and pump are located beneath the wardrobe floor and the space I had to work in was too small to use a tenon saw so I used a junior hacksaw. Not the best tool for the job but, after drilling holes where I wanted to cut did the job. Once in place I tidied-up the electrical wiring as it was not to my satisfaction and planned to fit an isolation switch at some stage in the future. When this was completed the new unit was tested and worked satisfactorily... a job well done!
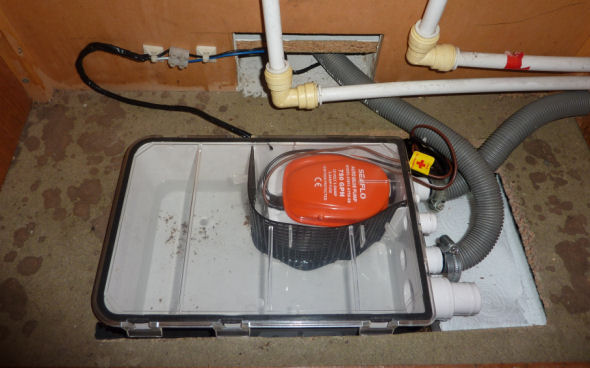
The new shower sump and pump assembly installed
We have replaced the seating cushions/mattresses and backrest cushions with five inch foam from DV Foam Ltd. in Middlewich which was cut to size and Wendy Savage made covers, matching curtains, blinds and cushions. The material was a different colour from the original red and necessitated changing the colour of various items in the kitchen to match such as the microwave oven, kettles and storage jars/bread bin.
New bunks, cushions, curtains and front door blind
At the same time the original green carpet was removed, along with the cream cushion floor-type floor covering the rest of the boat's interior floor and replaced with Natural Oak Effect Luxury Vinyl Click Flooring from B&Q. The flooring is predominantly grey with a hint of brown to match the soft furnishings. This type of flooring is a better value alternative to the Karndean "posh vinyl" we would have liked if money was no object. It is also thinner and required no alterations to doors, etc. unlike Karndean.

Natural Oak Effect Luxury Vinyl Click Flooring
The new floor covering being laid
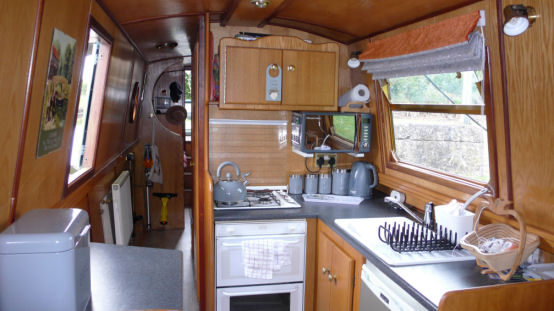
Grey themed kitchen in June 2020
We purchased a Black and Decker air cooler/humidifier and a Rotec mosquito "zapper" both of which require USB connections. The existing USB sockets in the lounge were not of sufficient current rating for the air cooler and the mosquito zapper partially obscured the TV when charging. Accordingly, I purchased a twin USB socket which had a higher current rating and installed it beneath the port-side gunwale in the lounge. The electrical feed came from the refrigerator circuit so that the cable run was only four metres... preventing undue voltage drop. The USB socket is so good I am thinking about replacing the other sockets in the lounge as well.
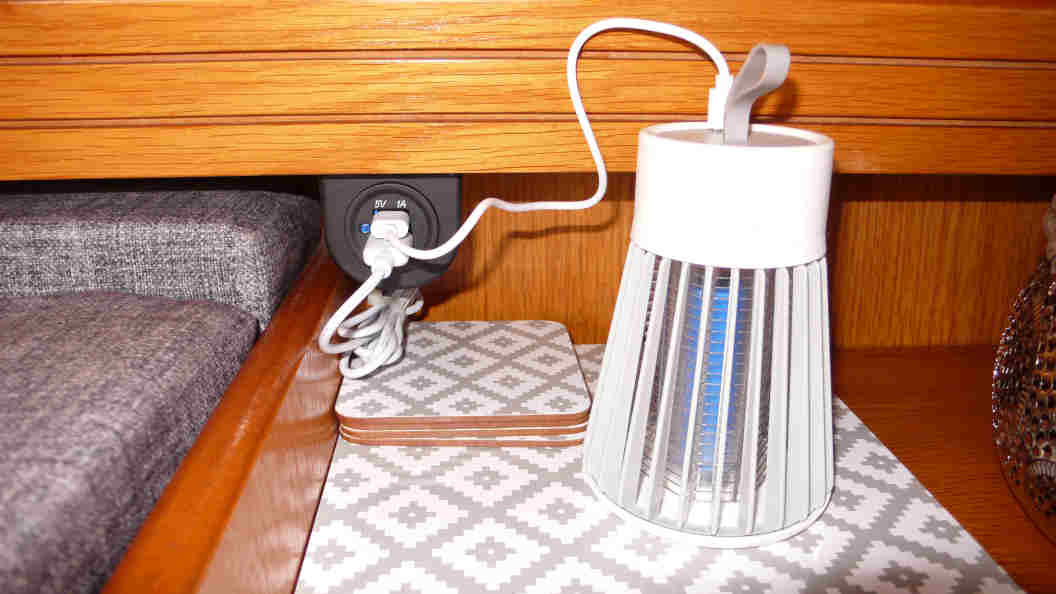
The new USB sockets beneath the port side gunwale in the lounge and the mosquito "zapper"
In May 2021, the starter battery required replacement. A new one was sourced from Alpha Batteries in Rochdale. With the new battery and connections installed the Eberspächer central heating unit refused to operate. I checked the electrical connections & fuses but it still refused to operate. I put this down to a possible controller lock-out as I had tried to turn it on more than five times both before and after replacing the battery. I researched local agents that would re-set the unit and the only one local was Anderton Marina. I arranged to take the unit there so removed it and took it to them. They also serviced the unit and replaced the glow plug. A couple of days later I returned to Anderton to collect the unit and reinstall it. On start-up there was a lot of white smoke but it soon settled down. I noticed that the exhaust coupling was leaking slightly so when the unit was cold I "jiggled" (technical terminology) it and it went into the correct position although it was still seeping a little. A good application of car exhaust sealant cured the problem.
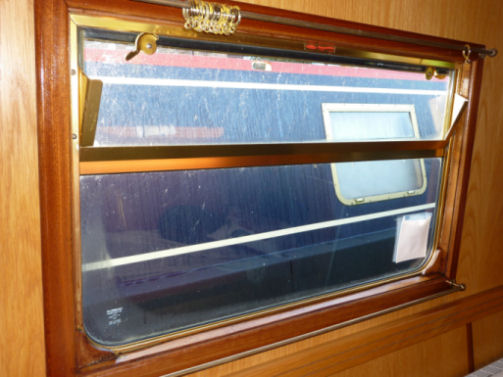
I noticed that the front/port side window was leaking so after discussing the problem with Caldwell's Windows I ordered the appropriate seals from them and a tube of Sikaflex 512 window sealant from Amazon in preparation for removing the window to cure the leak.
The location of the leak on the port/front window
Incidentally, if you follow the link to Caldwell's Windows website, the background photograph is of our Agden moorings. Caldwell's were most helpful with identifying the correct seals for our windows and are to be commended on their customer service. When I arrived at Agden, Alan Savage had already made a start on removing the window but there was one particular screw (there's always one) that was being troublesome. A quick attack with a hacksaw blade saw the problem screw removed and the window frame was gently eased out, making sure that it didn't kink or bend.
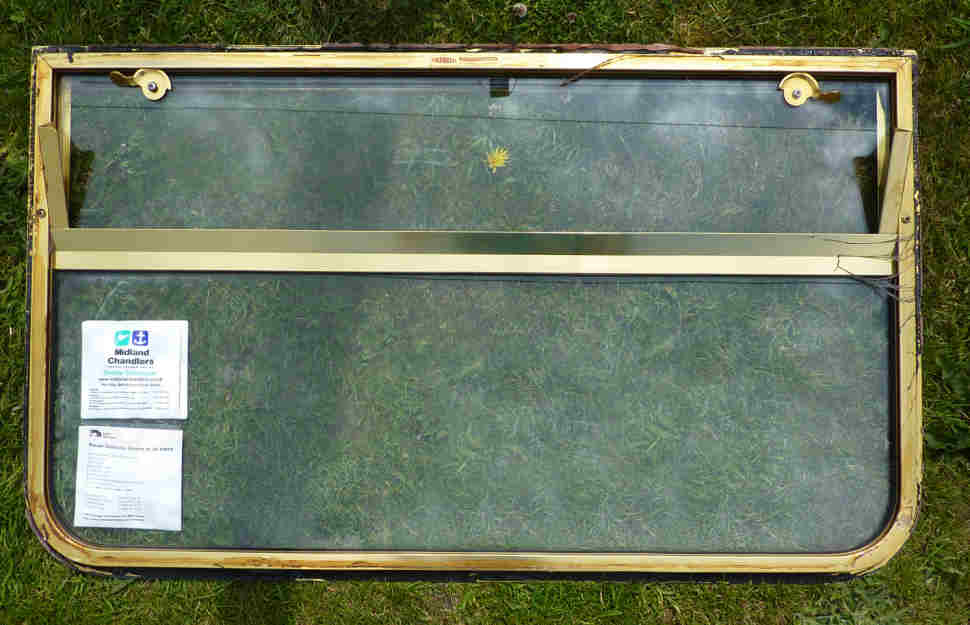
The window removed ready for stripping the old seals off...
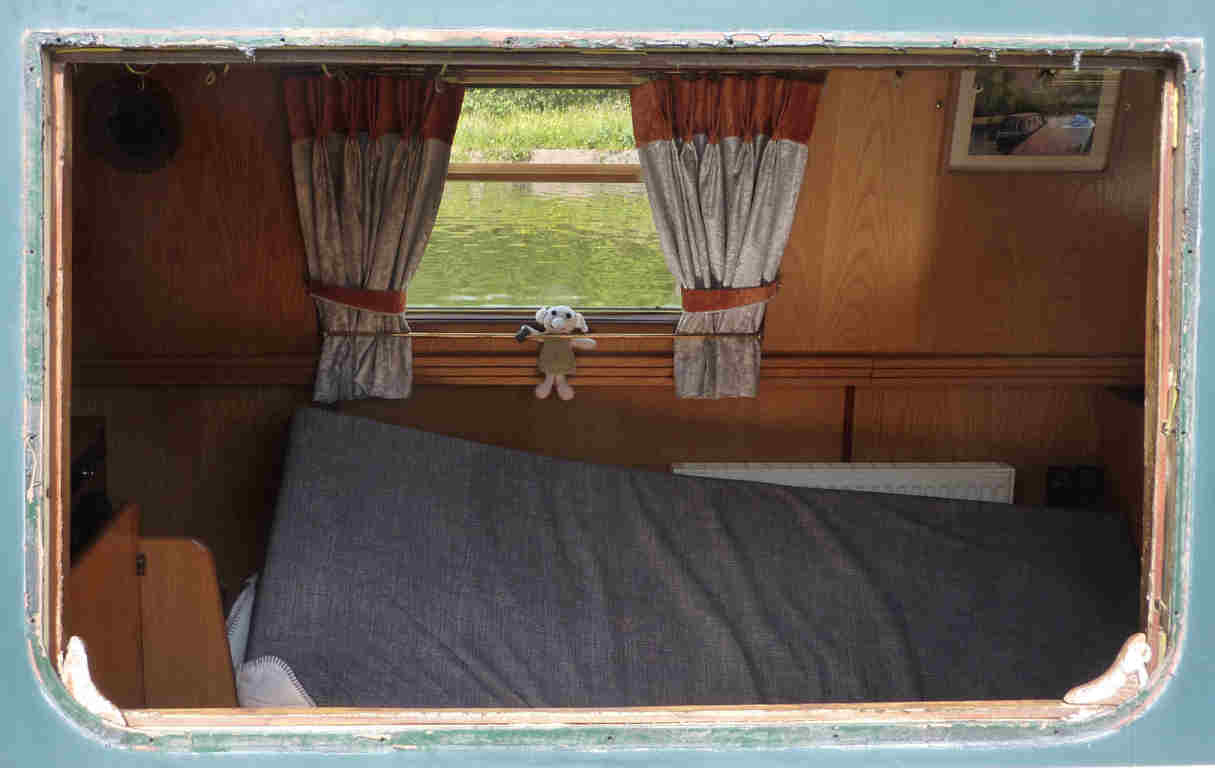
...the window aperture prior to cleaning it up (Dobby's watching)...
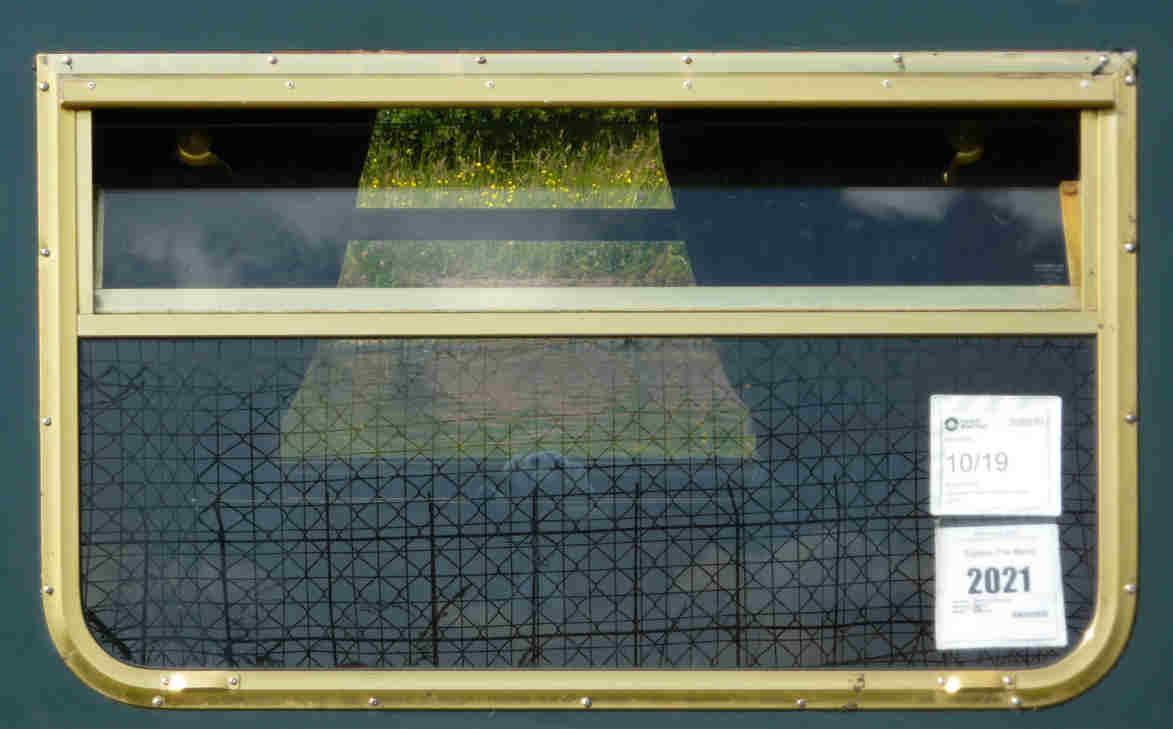
...and back in place, mission accomplished
With the frame removed, the old sealant and sealing strip was removed with petrol and the window aperture cleaned up in the same way. The new neoprene sealing strip was then stuck to the perimeter of the cleaned frame and Sikaflex applied on top of the seal, prior to refitting. With the window back in place and all the screws tightened I replaced the top hopper neoprene seal which caused the top hopper to stick, preventing it from opening and the bottom seal as well. I had sufficient sealing strip left to renew the hopper seals on the other windows and port holes at a later date. The next job was to polish the cabin sides paintwork. I made a start on the port side of the boat which is side of the boat is exposed to the most sunshine and requires the most attention. First off... the oxidised paint was removed with T-Cut before the first application of Autoglym Carnauba polish.
The difference that T-Cutting makes can be seen in this before and after photograph...
...and after completion, restored to its usual shiny finish...
...and from the other direction
With the window leak and Eberpächer sorted, the next item on the agenda was to touch-up the paintwork on the roof. It had started to peel caused, I suspect, by a combination of bird droppings and being baked in the sun. My daughter Lisa is an accomplished canal art painter and sign writer and had promised to come up to Agden on her boat to remedy the peeling paintwork. When she arrived it did not take her long to finish the touching-up and after she had finished she painted the camera lens that the squirrel on our sign-writing is holding blue and also painted her trademark... a dragonfly just below the boat's index number.
Lisa touching-up Squirrel's paintwork
After cleaning her brushes and putting everything away she promised to come up again at a future date after our summer holiday cruise to repaint the rest of the roof which was starting to look grubby. We were considering changing the roof colour to the same shade of green as the rest of the boat as I discovered that the cream paint oxidises and when it rains cream the run-off leaves cream lines on the cabin side paintwork. We were worried about Ruby burning her pads on the aft deck boards when the sun had been shining on them. Based on the success of the artificial grass I had fitted in the foredeck, we bought some inexpensive artificial grass to cover the aft deck with. The rear doors had insufficient clearance between them and the deck boards but I had already thought about this and cut a diagonal slit where the doors would be when they were open which did the trick. The end result was exactly what we had wanted even though the strands of the grass were a little longer than we would have liked. Another benefit would be that the engine would be a bit quieter as well. The artificial grass could be tolled-up from either end it the engine compartment or weed hatch was to be accessed.
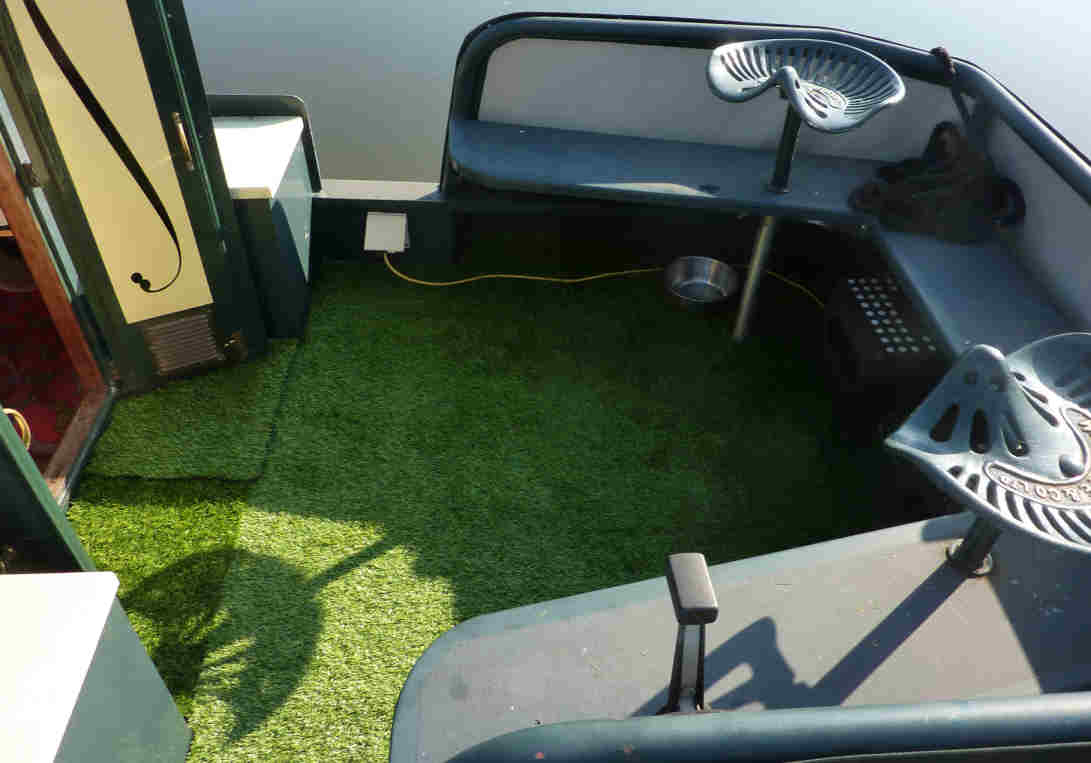
Artificial grass fitted to the aft deck to prevent Ruby's pads from being burnt on the hot deck boards
The next job was to replace the floor covering in the bathroom. The original floor covering was used as a template and the new covering was cut oversize to ensure a good fit, a technique that proved to be not only accurate but easier than anticipated.
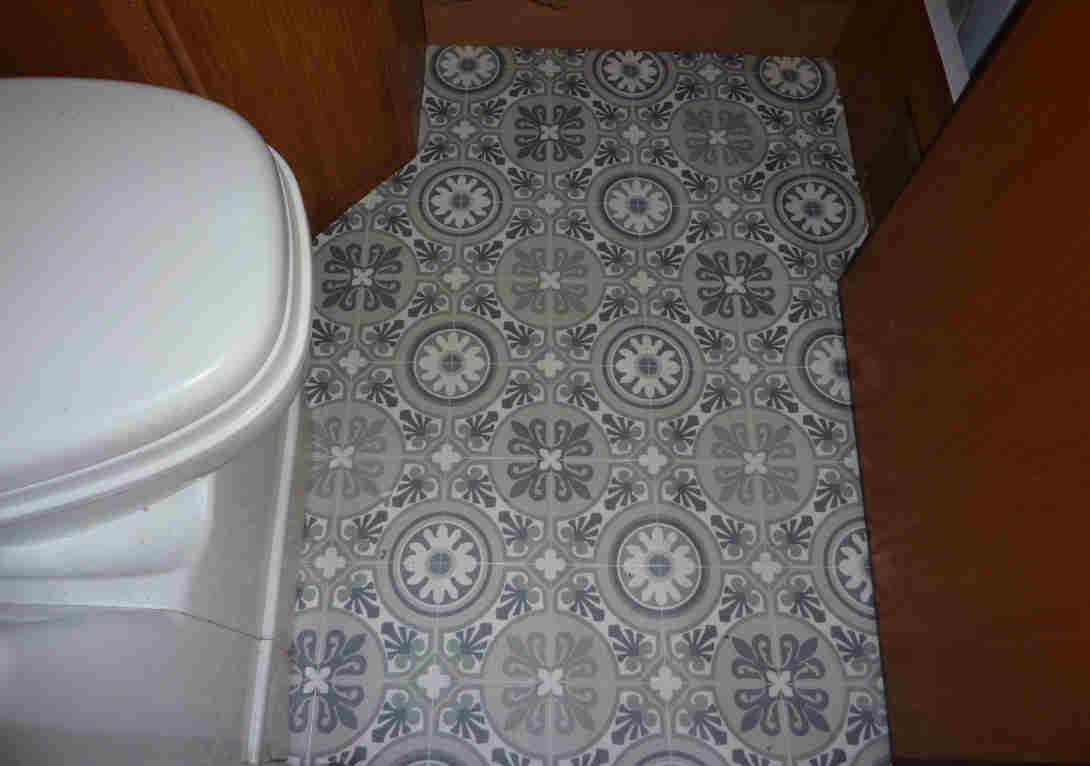
New bathroom floor covering
We have accomplished quite a lot when it comes to making the boat our own but there are still a few modifications we would like to make. The battery box might need to be replaced before the next Boat Safety Certificate examination takes place as one of the batteries is not enclosed within the existing box... the design of which makes it extremely difficult to access the batteries to check fluid levels, connections etc. As far as the interior is concerned there is not a lot that we would like to alter. We have toyed with the idea of having either a fixed double bed or a cross bed fitted in the rear cabin. Initially, we thought that this would make the entrance stairs from the rear deck awkward and cramped but we have devised a way to overcome that. The storage space beneath the bed would be difficult to access but we saw a boat at the Crick Boat Show that featured a pair of locking gas struts (https://www.strutsdepot.com/product/lockingmech) to ease the load. I contacted Strut Depot for guidance as to which strut would be best for our requirements and was impressed by the speedy response. They recommended a pair of locking struts providing 800 Newtons of assistance each and a pair were duly ordered.
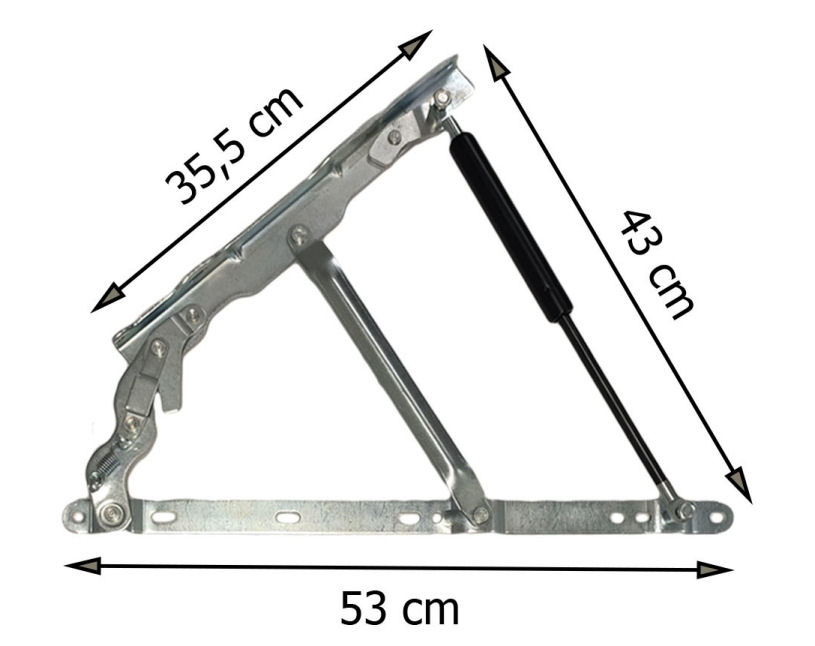
Locking gas strut from the Strut Depot
Having a double bed in this location might be susceptible from rain ingress when the sliding hatch or the rear doors were opened when it was raining, but a shower proof throw used when necessary would alleviate this problem. Below are a couple of illustrations outlining the plan.

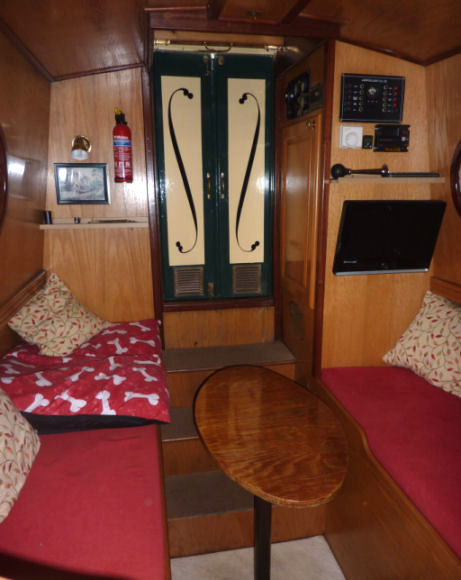
The aft cabin as it is currently...
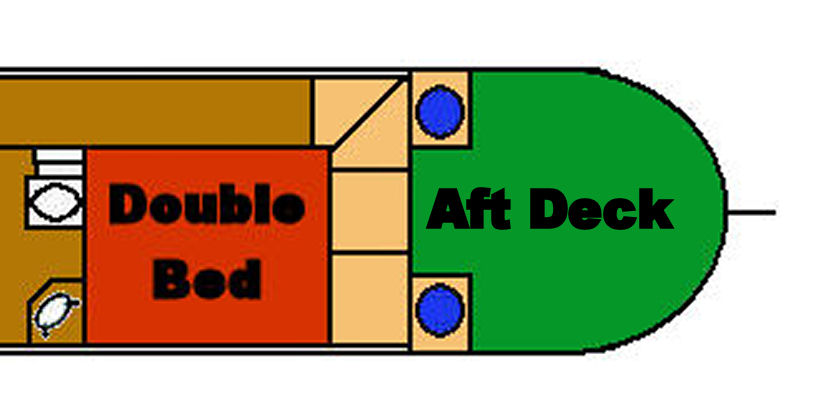
...and how we would envisage it with a double bed
We had seen stained glass narrowboat windows made by Narrowboat Glass advertised on Facebook and after visiting them at Venetian Marina we plan to have a set made for the boat's front doors in the not too distant future similar to the one illustrated below but with a different colour scheme (possibly orange instead of green).
Stained glass window from Narrowboat Glass
As any boat owner will tell you there are always a few jobs that they would like to complete in the future. We strive to keep our boat in good condition and are constantly thinking of ways to improve it. A few other jobs are outlined in the For Future Completion section of the Modification and Maintenance Diary below which will be accomplished as and when the necessary time and finances become available. Ask any boat owner and they will tell you that you can throw £50 notes at a boat and they won't stick!
|
Previous Known Modification and Maintenance Diary of nb Gill |
|
| 2002 | Boat built by Liverpool Boat Company for Mr E Gillies & christened Gill |
| 08-2006 | Boat Safety Certificate renewed |
| 2009 | Lounge & kitchen refitted fitted by Midway Boats, Barbridge Junction |
| 2009 | Additional window fitted adjacent to kitchen by Midway Boats |
| 2009 | Boat sold to Hilary & Alan Wiffin by Midway Boats |
| 2009 | Original refrigerator replaced with a Shoreline 12 Volt unit by Midway Boats |
| 2010 | Domestic batteries replaced by Midway Boats |
| 2010 | Replacement PRM (reconditioned) gearbox fitted at Norbury Wharf |
| 08/2010 | Boat Safety Certificate renewed |
| 04/2012 | Thetford C200 Cassette Toilet replaced by Midway Boats |
| 08/03/2013 | Engine serviced and boat put on brokerage at Midway Boats |
|
Modification and Maintenance Diary of nb Squirrel |
|
| 22/08/2013 | Bought by us from Midway Boats |
| 24/08/2013 | Removed tiller bar extension & unblocked feed pipe from fresh water tank |
| 25/08/2013 | 18" x 12" propeller fitted by Kings Lock Chandlery to replace lost original |
| 31/08/2013 | Faulty domestic batteries replaced, original stereo replaced with JVC KD-R 322, wiring tidied up, engine cleaned & gearbox oil changed |
| 05/09/2013 | |
| 07/09/2013 | New roller blind to inside the front doors fitted, original name removed & |
| 21/09/2013 | & replaced cushions in lounge |
| 22/09/2013 | New rubber toggles fitted to fore deck cover |
| 27/09/2013 | |
| 05/10/2013 | |
| 05/10/2013 | |
| 12/10/2013 | |
| 19/10/2013 | |
| 25/10/2013 | |
| 09/11/2013 | |
| 05/01/2014 | Hole drilled beneath side doors to help cure ingress of rainwater |
| 11/01/2014 | Fitted water sensor (Water DeTek) to lowest point of forward bilge beneath rear step |
| 11/01/2014 | Cleaned & tidied cupboard beneath rear step & refitted removable cupboard floor |
| 11/01/2014 | Extended TV aerial lead from lounge to aft cabin |
| 11/01/2014 | Replaced remainder of tungsten bulbs with LEDs |
| 12/01/2014 | Fitted bracket & relocated original TV to the aft cabin |
| 12/01/2014 | Removed old sealant beneath side doors & resealed with Sikaflex to help cure ingress of rainwater |
| 12/01/2014 | Fitted "Brolleymate" umbrella holder to original tiller bar for "everyday" use |
| 13/01/2014 | Additional tiller bar from "Total Eclipse" modified & hole drilled for locking the handle which has been sanded down to remove imperfections & re-oiled with linseed oil |
| 25/01/2014 | Extended 240 volt ring main & fitted additional 13 amp socket in electrical cupboard behind TV location in aft cabin |
| 25/01/2014 | Extended 240 volt ring main & fitted additional 13 amp socket in port side storage unit adjacent to front doors in lounge |
| 25/01/2014 | Installed microwave oven in kitchen on worktop of cupboard opposite sink |
| 25/01/2014 | Installed TV bracket & additional TV in lounge |
| 08/02/2014 | |
| 08/02/2014 | Extended 240 volt ring main & fitted additional 13 amp socket below microwave oven location |
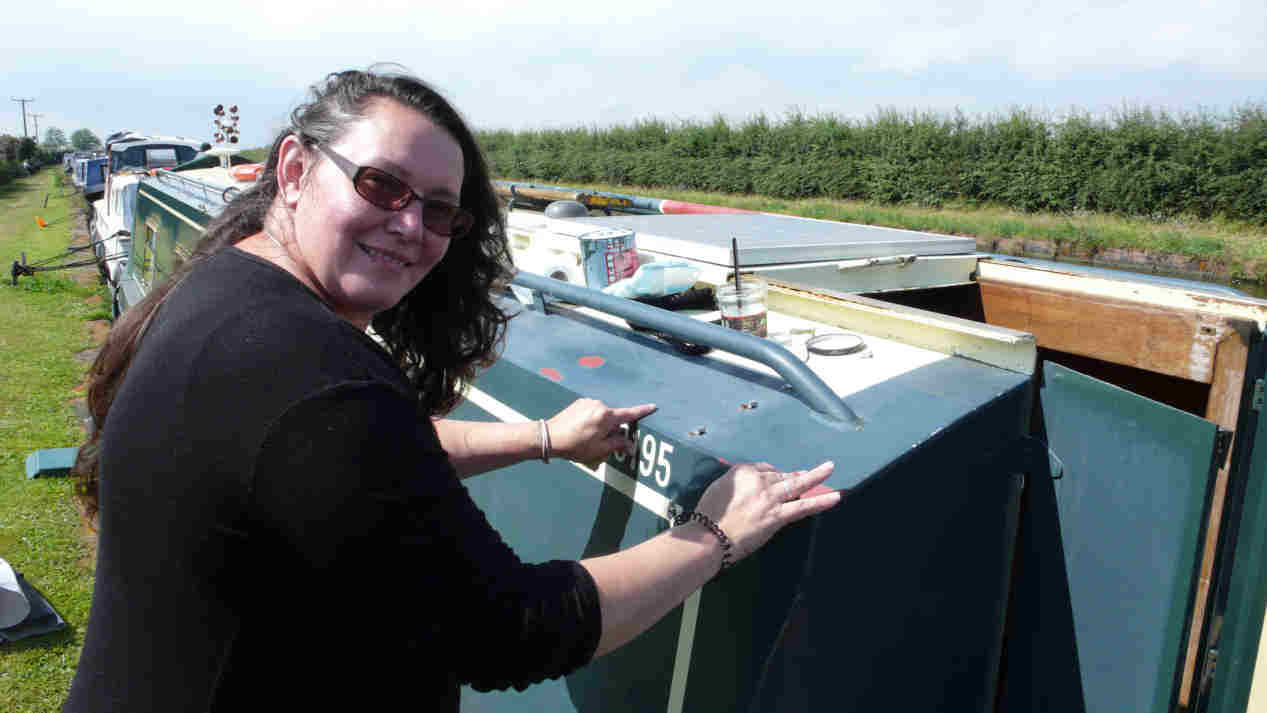
| 08/02/2014 | Applied name transfers to bow |
| 22/02/2014 | Cleaned roof in preparation for being painted |
| 01/03/2014 | New carpet mat put in rear cabin |
| 09/03/2014 | Fit varnished wood edging trim to pipe/cable trunking along starboard interior lining & in bathroom at floor level |
| 10/03/2014 | |
| 11/03/2014 | Installed new Sub-Zero Ice 6 x 9 stereo loudspeakers in lounge & ran stereo loudspeaker leads & spare cables from lounge to aft cabin |
| 11/03/2014 | Cleaned, sanded down, refurbished & repainted gang plank & boat pole |
| 22/03/2014 | |
| 24/03/2014 | Commenced removal of old varnish from inside aft door linings with paint/varnish remover |
| 28/03/2014 | Table keeper & brass cabin hooks fitted beneath gunwale between radiator & TV cabinet in lounge |
| 12/04/2014 | Fitted brass fairleads to bow either side of T-stud & on edge of roof either side of centre rope loop |
| 12/04/2014 | Cleaned window frame, replaced draught strip & window catch to kitchen window & re-aligned cabin hook inside aft doors |
| 09/05/2014 | |
| 15/05/2014 | Painted the external locker lids & gas bottle lockers & fitted self-draining false bottom to gas lockers for cylinders to sit on |
| 18/05/2014 | Thorn Marine |
| 27/05/2014 | |
| 31/05/2014 | |
| 22/06/2014 | |
| 05/07/2014 | Replaced draft excluder strip on side of front/starboard window hoppers & cleaned brass ventilators with "Miracle Brass Brite" then polished with Brasso |
| 19/07/2014 | Engine oil & filter changed & checked air filter |
| 23/07/2014 | Repaired side doors Perspex draught screen, fitted bolts to inside of rear sliding hatch, fitted carpet tiles temporarily to fore & aft decks |
| 19/08/2014 | Renewed Boat Safety Certificate by Nigel Hamilton at Thorn Marine |
| 13/09/2014 | Refitted TV in lounge after being repaired & hung painting of Worsley Packet House in lounge opposite TV cabinet |
| 28/09/2014 | Removed fore & aft deck cover hooks & "Lift Dot" studs, headlamp & door hooks in preparation for repainting |
| 18/10/2014 | Repainting cancelled until spring 2015 so refitted front & rear deck cover hooks, "Lift Dot" studs & replaced some plastic hooks with stainless steel hooks |
| 08/11/2014 | Moved boat up Oughtrington moorings, cleaned roof & exterior paintwork to remove leaf residue & green discolouring |
| 09/11/2014 | Emptied fresh water tank & cleaned interior of boat in preparation for winter |
| 29/12/2014 | Refilled stern gland greaser |
| 01/03/2015 | Replaced the Venetian blind in the kitchen with a roller blind & laminated underside of aft hatch to prevent condensation forming inside the boat |
| 07/03/2015 | Refitted re-upholstered stool lid |
| 20/03/2015 | Installed Beats Pill Bluetooth Loudspeaker cradle |
| 21/03/2015 | Cleaned boat roof, cabin sides, gunwales & hull using the Kärcher K4 Compact Pressure Washer fitted with the water scavenge pipe |
| 04/04/2015 | Ran cable from aft starboard bunk & at opposite end in lounge to stereo, aerial booster & 12 volt sockets then connected to fuse board & checked continuity |
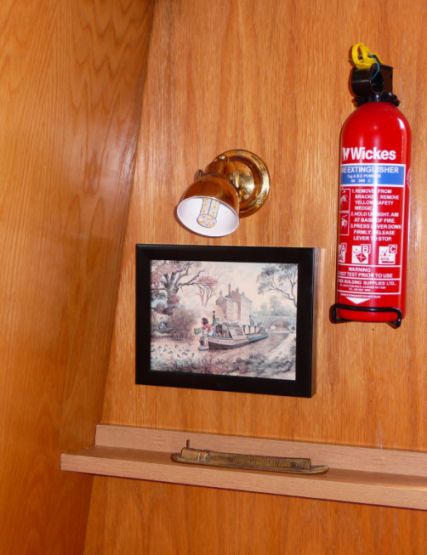
| 04/04/2015 | Fitted new shelves in rear cabin above TV & on the starboard side adjacent to the fire extinguisher. Also recessed & adjusted sliding hatch bolt keepers |
| 05/04/2015 | tidied original mains hook-up lead, wound onto storage drum & repaired air horn with cyanoacrylate adhesive (Superglue) |
| 18/04/2015 | Sorted out bow locker & fitted carpet tiles to floor of bow locker |
| 19/04/2015 | Re-painting the cabin sides & smooth portion of roof commenced with rubbing down paintwork & undercoat applied |
| 20/04/2015 | First coat of gloss applied to cabin sides & smooth portion of roof |
| 23/04/2015 | Pressure-washed fore & aft deck canopies at home ready for re-proofing |
| 25/04/2015 | |
| 25/04/2015 | Painters prepared fore deck & bulkhead for undercoating before rain stopped play |
| 26/04/2015 | Painters undercoated fore deck, bow, forward bulkhead & port side gunwale |
| 09/05/2015 | Painters sanded down & undercoated aft deck & starboard gunwale |
| 10/05/2015 | Painters applied second gloss coat to cabin sides & nearly completed glossing the gunwales, fore & aft decks |
| 16/05/2015 | Painters completed glossing, roof, coach-lines & bow detailing |
| 31/05/2015 | Inside aft doors & sign writing completed plus gang plank & boat pole glossed |
| 06/06/2015 | Repainting completed |
| 24/06/2015 | Refitted bow fairleads, side door bump-stops, front door ventilators & cabin hooks. Also fitted new mooring ropes |
| 27/06/2015 | New curtains fitted to the lounge windows |
| 28/06/2015 | Refitted centre rope fairleads, rear door ventilators & cabin hooks. First coat of Mer polish applied to paintwork |
| 30/07/2015 | Applied second coat of Mer polish to paintwork & fitted some canopy fittings |
| 30/08/2015 | Refilled stern gland greaser, replaced original headlight with LED unit, fitted Desmo table leg storage clips & polished fore & aft bulkheads |
| 07/09/2015 | Moved Squirrel to its new mooring on the jetties at Lymm CC |
| 12/10/2015 | Rub down & re-varnish sliding hatch wooden surround & aft door frame, trim wooden bolt block on rear sliding hatch & varnish with matt oak varnish |
| 13/10/2015 | Rub down & re-varnish inside the side doors & surround, front door frame & starboard/front window frame & fit new mooring (as against running) ropes |
| 19/10/2015 | Re-proofed front & rear deck canopies with Grangers Fabsil Gold |
| 09/11/2015 | Fitted Dyson DC34 docking station |
| 05/12/2015 | Refitted fore & aft deck canopy fittings (plastic bungee hooks replaced with stainless steel hooks) then refitted canopies |
| 24/02/2016 | Fitted mooring post extension, fitted replacement centre mooring rope, continued refitted aft deck canopy fittings & replaced locking bolt on aft sliding hatch |
| 23/03/2016 | Filled fresh water tank ready for Easter cruise |
| 26/03/2016 | Hung new painting in lounge adjacent to side doors |
| 30/03/2016 | Refilled stern gland greaser, checked engine oil & water levels |
| 31/03/2016 | Polished port-side superstructure & bow area |
| 01/04/2016 | Topped-up gearbox with ATF (Automatic Transmission Fluid) |
| 13/04/2016 | Fitted LED lighting beneath gunwales in corridor leading from aft cabin to lounge |
| 02/05/2016 | Installed switch & junction box & connected LED lighting beneath the gunwales in the corridor leading from the aft cabin to the lounge |
| 03/05/2016 | Fitted new shower curtain in bathroom |
| 23/05/2016 | Constructed new occasional table for aft cabin, fitted a Desmo table socket & applied five coats of varnish |
| 28/05/2016 | |
| 30/05/2016 | Fitted table leg clips in corridor, acoustically insulated fresh water pump compartment with carpet off-cuts, cut grass & tidied-up mooring |
| 12/06/2016 | Connected new 12 volt feed cable to stereo, aerial booster & 12 volt sockets in lounge |
| 28/06/2016 | nstalled solar panel charging cable in engine compartment identified removed & insulated unconnected surplus wiring in engine compartment connected 12 volt un-isolated electrical feed from central heating programmer & bilge pump feed to stereo in lounge to maintain memory, |
| 19/07/2016 | |
| 20/07/2016 | fitted fly screens to front & side doors |
| 23/07/2016 | Power-washed the roof |
| 24/07/2016 | Washed & polished the bow area, cabin sides & gunwales |
| 04/08/2016 | Completed solar panel wiring & filled stern gland greaser |
| 30/10/2016 | Checked antifreeze in engine & central heating, fitted new straps to front & rear deck canopies & fitted canopies in preparation for winter |
| 11/04/2017 | Washed paintwork and applied first coat of wax to the cabin sides |
| 13/04/2017 | Aft deck boards replaced with phenolic hex board ply wood by Kings Lock Chandlery |
| 17/04/2017 | Replacement 13kg propane cylinder from Thorn Marine |
| 22/04/2017 | Returned forward deck board to Kings Lock Chandlery for trimming |
| 20/05/2017 | . Replacement Dyson DC34 vacuum cleaner docking station fitted |
| 21/05/2017 | Hull blacking – 2nd coat |
| 22/05/2017 | Hull blacking – 3rd coat |
| 23/05/2017 | Hull blacking – 4th coat & fresh water pump feed pipes from fresh water tank disconnected & blown through to remove obstruction |
| 24/05/2017 | Roof, fore & aft decks & gunwales power-washed, polished gunwale, fore & aft deck paintwork, bow/stern fender jet-washed & shackles replaced & touched-up paintwork on foredeck adjacent to fairleads & gunwales |
| 25/05/2017 | Re-launched after hull blacking cured, initial quotation given by The Cover Company for a cratch board, fore deck canopy & dodger, polished port side cabin paintwork |
| 26/05/2017 | Serviced engine – oil/filter change, lubricate fittings, clean engine & engine compartment, port cabin side polished, trimmed back perished cooling water pipe leading from engine to skin tank & cooling system topped up with anti-freeze on completion |
| 20/06/2017 | Aft deck handrail measured and dodger template made by The Cover Company |
| 04/07/2017 | Completed dodger fitted over aft deck hand rail by The Cover Company |
| 21/07/2017 | Obtained short-term C&RT Licence to cover 2017 Summer Cruise |
| 27/07/2017 | Fitted exterior floor covering to fore deck floor & replaced TV in aft cabin with one from home |
| 29/07/2017 | Replaced faulty LED light unit in bathroom |
| 30/07/2017 | Cleaned, T-Cutted & polished starboard cabin side |
| 01/08/2017 | Saga Boat Insurance renewal |
| 03/08/2017 | Cleaned, T-Cutted & polished starboard cabin side with Autoglym Carnauba Wax Polish |
| 15/08/2017 | Garry from All Seasons Boat Covers measured for cratch, cover & side doors cover |
| 19/08/2017 | Moved to new mooring at Agden |
| 23/09/2017 | Re-filled stern gland greaser |
| 26/09/2017 | Removed headlight, old foredeck cover fittings & rope locker hasp so that Garry from All Seasons Boat Covers could fit cratch board temporarily for setting roof & bow gunwale profiles. Also polished bow gunwale with Autoglym Carnauba Resin Wax Polish & fitted aft deck lighting switch |
| 28/09/2017 | Cratch frame fitted by Garry from All Seasons Boat Covers & template made for foredeck & side doors covers |
| 08/10/2017 | Connected un-isolated electrical feed to aft deck light switch, fitted and connected aft deck LED lighting & polished aft bulkhead with Autoglym Carnauba Resin Wax Polish |
| 09/10/2017 | Replaced discoloured aft deck board lifters, fitted cast brass cut-off plaques & replaced faulty kitchen cupboard latch |
| 10/10/2017 | Took electrical feed from fore cabin lighting circuit & cleaned & polished starboard side paintwork (2 coats of Autoglym Resin Polish) |
| 11/10/2017 | Cleaned & polished (1 coat of with Autoglym Carnauba Resin Wax Polish) port side paintwork - rain stopped play! |
| 12/10/2017 | Completed cleaning & polishing the port side paintwork (2 coats of Autoglym Carnauba Resin Wax Polish in total) & purchased toilet fluid & new centre fairleads from Thorn Marine |
| 13/10/2017 | Side doors cover, cratch frame & cover fitted & dodger re-fitted by Ray & John from All Seasons Boat Covers |
| 14/10/2017 | Sanded down and re-varnished port side lounge & kitchen window surrounds |
| 15/10/2017 | Cleaned the inside of the boat & sorted out starboard bunk, taking home some items not required |
| 08/12/2017 | Water tank emptied, engine cooling system & central heating topped-up with antifreeze & aft deck cover fitted for winter |
| 13/01/2018 | Checked on boat & ran engine for 1 hour |
| 11/03.3018 | Fitted new mooring ropes, new Huawei phone charging cable, TV & iPod audio cables, partially filled fresh water tank, identified location of water leak in fresh water pump output pipes & blockage in fresh water tank outlet pipe |
| 14/03/2018 | Unblocked fresh water tank outlet pipe and replaced corroded pipe work |
| 25/03/2018 | Completed fresh water tank connections, filled tank & checked for leaks. Initially 90° elbow before cut-off valve leaked & sealed with silicone sealant. Rear seating fittings measured for new cast iron seats. Ordered second cast iron seat from eBay. |
| 26/03/2018 | Renewed C&RT licence for six months from 01/04/2018 to 31/09/2018 |
| 30/03/2018 | Fitted steerer’s cast iron tractor style seat on aft deck |
| 04/04/2018 | Removed bath room/toilet ventilator & resealed with silicone to prevent rainwater ingress. Stripped down fresh water pump and sealed joint with Vaseline to prevent dripping. |
| 08/04/2018 | Bought second cast iron tractor style seat & mounting bracket fitted |
| 14/04/2018 | Painted cast iron tractor style seats & fittings in Workmate at home |
| 21/04/2018 | Refitted cast iron tractor style seats after painting on aft deck & installed Beldray holder for the Kärcher Window Vac |
| 04/05/2018 | Fitted solar lamp/windmill mounting bracket, fitted horn/headlight bracket, relocated horn & headlight & replaced faulty LED light unit in bathroom |
| 06/05/2018 | Washed & polished starboard side of boat with Autoglym Carnauba Resin Wax Polish & touched-up green paintwork |
| 07/05/2018 | Replaced some aft deck tonneau cover fixing self-tapping screws with pop rivets |
| 29/05/2018 | Refitted fire blanket, fitted new water saving shower head, foredeck lighting switch, electrical wiring conduit, headlamp wiring, horn wiring & foredeck LED lighting to cratch beam & reconnected headlamp |
| 06/06/2018 | Boat Safety Certificate (expiry date - 19/08/2018) examination by Graham Thornton BSE |
| 10/06/2018 | Re-routed electrical cables as required by Boat Safety Certificate examination, cleaned port side of boat, took home Thetford C200 toilet cassette for cleaning & overhauling prior to summer cruise |
| 16/06/2018 | Engine oil & filter changed, roof cleaned with traffic film remover, paintwork on cabin cleaned, sides t-cutted & polished with Autoglym Carnauba Resin Wax Polish & moved shower head holder in bathroom |
| 24/06/2018 | Replaced Shureflow fresh water pump, cleaned shower sump pump filter & refilled stern gland lubricator |
| 2/07/2018 | Reinforced fixings for aft deck under-seat lighting with countersunk screws & nuts & refitted starboard side aft deck seating mounting post |
| 14/07/2018 | Power-washed roof, exterior paintwork, polished starboard cabin side & gunwales & vacuumed, cleaned & polished interior |
| 27/07/2018 | Replaced fixing screws on aft deck seating mounting posts & replaced loose stud-type aft deck tonneau cover fixing (re-drilled & tapped hole prior to fitting) |
| 28/07/2018 | Swapped temporarily discoloured centre starboard dado rails with forward port dado rail in lounge, re-attached missing carpet strip to underside of sliding hatch & repaired air horn |
| 29/07/2018 | Cleaned lounge carpet, sorted out starboard, aft bunk storage & attached "Life is Like a Camera" plaque in lounge & hung narrowboat & Post Office Van picture in aft cabin |
| 11/08/2018 | Replaced clock in aft cabin & hung canal pictures below it with Command Picture Hanging Strips |
| 12/08/2018 | Cleaned & polished port side cabin paintwork |
| 25/08/2018 | Filled fresh water tank & topped-up central heating system with antifreeze |
| 26/08/2018 | Modified & swapped discoloured starboard & forward port dado rails in lounge |
| 22/09/2018 | Checked engine cooling water & topped-up with antifreeze |
| 17/11/2018 | New 215 AH leisure battery fitted, stern gland greaser filled, engine drip-tray vacuumed & puppy training mat fitted inside engine drip tray |
| 18/11/2018 | Engine cooling system antifreeze specific gravity checked, topped-up with antifreeze, fresh water tank emptied, cupboards/wardrobe emptied & grass on mooring strimmed |
| 05/12/2018 | Fitted aft deck & side door covers & brought home anything not to be left on the boat |
| 12/02/2019 | Replaced TV in aft cabin |
| 16/02/2019 | Moved up moorings towards car park by one boat length. |
| 02/03/2019 | Fitted replacement window catch screws to the lounge windows & filled fresh water tank |
| 29/03/2019 | Jet-washed cabin sides & measured lounge for IKEA Hemnes sofa bed |
| 30/03/2019 | T-Cutted & polished cabin sides with Autoglym Carnauba Resin Wax Polish |
| 31/03/2019 | Topped-up fresh water tank @ Lymm |
| 01/04/2019 | Renewed C&RT licence for six months from 01/05/2019 to 31/10/2019 |
| 07/04/2019 | Gear change cable snapped & replaced with Paul Savage’s spare cable |
| 18/04/2019 | Adjusted new gear change cable & hung Squirrel picture from Andy & Lee Perry |
| 29/04/2019 | Fitted 4G antenna on starboard lounge window |
| 04/05/2019 | Slipped out of the water, cleaned hull, 1st coat of bitumen, replaced tiller bearing & rudder seating cup on skeg |
| 05/05/2019 | 2nd coat of bitumen applied & started touching-up gloss on gunwales |
| 06/05/2019 | 3rd coat of bitumen applied & continued touching-up gloss on gunwales |
| 07/05/2019 | Continued touching-up gloss paint on gunwales |
| 08/05/2019 | Replacement convertible lounge bed mattress foam delivered, concealed 4G antenna cables, TV cupboard tidied, woodwork in lounge polished with beeswax wood polish |
| 09/05/2019 | T-Cutted bow & stern paintwork & polished gunwales with Autoglym Carnauba Resin Wax Polish |
| 10/05/2019 | Prepared for re-launching & e-launched after hull blacking cured |
| 16/05/2019 | Purchased two new mooring stakes from Pacermarine via eBay |
| 28/05/2019 | Strimmed grass along coping stones around mooring posts & love seat on mooring |
| 29/05/2019 | Ange painted love seat with light green decking paint, touched-up chipped paintwork on superstructure, filled redundant holes in cabin roof with “Magic Metal” filler & repainted. Also, touched-up aft deck LED lighting screw heads |
| 30/05/2019 | Vacuumed ventilator apertures & cleaned brass roof ventilator bezels & grills inside cabins |
| 01/06/2019 | Tried new foam cushions & Mattresses from DV Foam (Middlewich) & measured for trimming |
| 05/06/2019 | Returned new foam cushions & Mattresses to DV Foam (Middlewich) for trimming |
| 23/07/2019 | Rebuilt rear steps, replaced faulty Johnson shower sump and pump assembly with a Seaflow unit from Amazon & tidied aft, starboard bunk space |
| 05/11/2019 | Cooling system & central heating system antifreeze specific gravity checked & topped-up with antifreeze |
| 08/01/2020 | Emptied water tank & sorted out food cupboard, throwing out of date tins & food packets |
| 30/01/2020 | Purchased emergency escape ladder from Marine Scene |
| 25/04/2020 | Filled fresh water tank, washed & T-Cutted port side cabin paintwork |
| 26/04/2020 | Polished port side cabin paintwork & cleaned aft deck |
| 27/04/2020 | Washed starboard side cabin paintwork & attached wheel fenders |
| 06/05/2020 | Varnished new flagstaff & folding table @ home |
| 13/05/2020 | Turned boat around , completed power washing roof, washed & T-Cutted port-side paintwork |
| 14/05/2020 | Polished starboard-side paintwork, turned boat around & started to re-polish port-side paintwork but was too hot & was streaky. Fitted radiator pipe trims |
| 17/05/2020 | Cleaned & re-polished port-side paintwork & cleaned windows inside & out |
| 22/05/2020 | Sanded down lounge window frames & re-varnished with two coats of varnish. Removed original bunk cushions & curtains & replaced with new ones made by Wendy Savage. (foam was £160.00). re-fitted rear- door bump stop on starboard gas locker lid |
| 23/05/2020 | Replaced original roller blinds & replaced with ones made by Wendy Savage. Also removed carpet from lounge in preparation for new floor covering |
| 24/05/2020 | Hung new squirrel artwork in lounge, fitted retaining hooks for kitchen blind, made plans for replacing two single berths in aft cabin with a double berth |
| 25/05/2020 | Removed unwanted blinds, cushions, bunk mattresses, etc. & took them home. |
| 26/05/2020 | Purchased new floor covering, microwave oven (grey), kettles (electric & whistling – grey) & kitchen storage jars/bread bin (grey) |
| 30/05/2020 | Replaced red kettle, storage jars & bread bin with grey ones |
| 31/05/2020 | Commenced replacing existing floor coverings with B&Q Limed Oak Effect Luxury Vinyl Flooring |
| 06/06/2020 | Installed new microwave oven & other grey accessories in kitchen & lounge |
| 07/06/2020 | Continued laying B & Q limed oak effect luxury vinyl flooring planks. Lobby area & lounge completed, kitchen nearly completed |
| 10/06/2020 | Continued laying B & Q limed oak effect luxury vinyl flooring planks. Kitchen & passageway nearly completed |
| 11/06/2020 | Completed replacing existing floor coverings with B&Q Limed Oak Effect Luxury Vinyl Flooring. Some remedial work to be completed & toilet area to be fitted at a later date but, on the whole… very satisfied with the end result |
| 14/06/2020 | Completed remedial work on new flooring then decorated front door panels lower with off-cuts to hide distressed timber |
| 15/06/2020 | Phil Savage replaced centre fairleads & filled existing holes with “Magic Metal” filler. Removed unwanted items ready & prepared boat for holiday cruise |
| 31/07/2020 | Refilled stern gland greaser |
| 01/08/2020 | Fed 12 volt cables through port side trunking & fitted USB sockets in lounge below port side gunwale |
| 23/10/2020 | Refilled stern gland greaser |
| 30/10/2020 | Bled aft central heating radiator & installed electric storage heater in lounge |
| 22/11/2020 | Emptied freshwater tank, cleared self-draining deck channels & drainpipes, topped-up engine cooling system & central heating with pink anti-freeze, emptied cupboards, removed bedding & items not required over winter & fitted aft deck winter cover |
| 19/12/2020 | Checked bilge, batteries, tightened stern greaser, etc. |
| 31/03/2021 | Removed aft deck winter cover, checked heating & everything out, started engine, cleaned & polished the interior woodwork in preparation for the Easter weekend |
| 03/04/2021 | Filled water tank & checked for leaks |
| 27/04/2021 | Emptied & cleaned engine drip tray, sorted & tidied engine compartment, fitted microwave shelf in kitchen which necessitated lowering the supporting brackets & adjusting 240 volt socket below, mounted the carbon monoxide (co) detector above cooker hob, sanded down & re-varnished forward/port side window frame. |
| 28/04/2021 | Collected new battery from Alpha Batteries, Rochdale |
| 01/05/2021 | Fitted new starter battery. Eberspachër central heating unit not working – electrical connections & fuses checked but still would not operate… possible controller lock-out |
| 08/05/2021 | Removed Eberspachër & taken to Anderton Marina for re-setting & servicing |
| 31/05/2021 | New glow plug fitted & reset Eberspächer central heating unit by Anderton Marina & refitted |
| 20/06/2021 | Cleaned, T-Cutted & polished port-side cabin paintwork |
| 22/06/2021 | Removed port/front window, replaced main seal & top hopper seals |
| 23/06/2021 | Fixed leaking exhaust joint on Eberspächer central heating unit, tightened up fuel pipe fitting on Eberspächer central heating unit, fitted additional shelf above microwave oven, cleaned windows on port side, continued T-Cutting paintwork on port-side of cabin & replaced life belt |
| 03/07/2021 | Applied exhaust paste to seeping exhaust joint on Eberspächer central heating unit & port-side roof paintwork touched-up by Lisa Wood. |
| 06/07/2021 |
Changed insurance company to Craftinsure (Underwriters for Navigators and General) to run from 01/08/2021 |
| 10/07/2021 | Commenced T-Cutting & polishing paintwork on starboard-side of cabin & treated window/porthole seals with olive oil to prevent sticking |
| 13/07/2021 | Filled fresh water tank, emptied toilet & carried on T-Cutting & polishing the starboard-side of cabin |
| 14/07/2021 | Completed cleaning, T-Cutting & re-polishing starboard side cabin paintwork. Made a start on polishing the port side paintwork but weather was too hot |
| 15/07/2021 | Purchased artificial grass for aft deck |
| 17/07/2021 | Fitted artificial grass to aft deck |
| 18/07/2021 | Joined Canal & River Rescue |
| 19/07/2021 | Purchased 3 month C&RT license |
| 08/08/2021 | Refilled stern gland greaser |
| 09/08/2021 | Purchased telescopic boat pole from Kings Lock Chandlery |
| 19/09/2021 | Fitted new floor covering & barrier strip in toilet |
|
Non-urgent ä High Priority ää |
|
| 06/2021 | Secure kitchen sink drain pipe with Jubilee clip ää |
| 07/2021 | Check gearbox fluid level, change engine oil, filter & refill cooling system with water/antifreeze mixture ää |
| 07/2021 | Refit & connect klaxon-type horn ää |
| 07/2021 | Investigate cooling water leak adjacent to oil filter ää |
| 07/2021 | Paint original aft deck seating fittings with special metals primer then Mason’s Black Green RAL6012 ä |
| 07/2021 | Fit separate shower sump pump isolation switch in wardrobe & main water pump adjacent to water tank/pump ä |
| 07/2021 | Countersink & fill unwanted holes on roof with “Magic Metal” filler & touch-up paintwork where required ää |
| 2021 | Replace USB sockets inside TV cabinet ä |
| 2021 | Fit wind direction indicator ä |
| 2021 | Sand & re-varnished window & porthole frames ä |
| 2021 | Rub down & paint folding table in foredeck green with Mason’s Black Green RAL6012 ä |
| 2021 | Fit aluminium splash-back in kitchen ä |
| 2021 | ä |
| 2021 | Replace remaining aft deck tonneau cover fixing self-tapping screws with pop rivets ä |
| 2021 | ä |
| 2022 | Fit additional 12 volt sockets adjacent to central heating radiators for Radfan central heating radiator fan ä |
| 2022 | Install Radfan central heating radiator fan ä |
| 2022 | Slip out of the water, clean, paint hull with bitumen ä |
| 2022 | Paint the stern tunnel bands & bow red & beige as on Total Eclipse ä |
| 2022 | Seal water leaks beneath tiller top bearing & aft gunwale ä |
| 2022 | Convert aft cabin single bunks into a double bed with access to storage area below utilising 800 Newton locking gas-assisted struts from https://www.strutsdepot.com/product/lockingmech (£38) & relocate aft steps ä |
| 2022 | Relocate original loudspeakers in aft cabin above the new double/cross bed ä |
| 2022 | Rebuild battery compartment & install additional leisure battery ä |
| 2022 | Fit engine/leisure battery bridge switch ä |
| 2022 | Clean, dry & paint the rear bilge, engine compartment & gas lockers ä |
| 2021 | Countersink & fill unwanted holes in bow gunwale with “Magic Metal” filler & repaint where necessary ä |
| 18/08/2022 | Boat Safety Certificate renewal ä |
| 2022 | Soundproof engine compartment with Kingspan and deck boards with soundproofing pads from Midland Chandlers ä |
| 2022 | Fit waterproof headlamp/horn switch panel adjacent to engine control lever panel ä |
| 2022 | Relocate 240 volt landline socket to beneath starboard aft deck seating ä |
| 2022 | Plane sticking front door, fit Yale-type door lock to starboard front door & swap bolts to port side front door ä |
| 2022 | Obtain & fit stained glass windows by Narrowboat Glass to the front door windows ä |
| 2022 | Fit security bar & lock to outside of front doors ä |
| 2022 | Investigate or devise & fit means of locking fuel filler cap ä |
| 2022 | Investigate CabinCare roller blind type fly screens for side & front doors ä |
|
Engine Hours |
|
|
22/08/2013 (when bought) |
2228 |
|
09/11/2013 (end of boating season) |
2287 |
|
12/04/2014 (start of boating season) |
2291 |
|
19/07/2014 (oil & filter change) |
2309 |
|
09/12/2014
(end of boating season) |
2448 |
|
01/04/2015 (start of boating season) |
2481 |
|
01/11/2015
(end of boating season) |
2496 |
|
01/04/2016 (start of boating season) |
2644 |
|
20/07/2016 (before summer cruise) |
2664 |
|
12/08/2016 (after summer cruise) |
2722 |
|
01/11/2016
(end of boating season) |
2745 |
| 05/04/2017 (start of boating season) |
2749 |
|
29/07/2017 (before summer cruise) |
2817 |
|
12/08/2017 (after summer cruise) |
2884 |
|
01/11/2017
(end of boating season) |
2920 |
|
01/04/2018
(start of boating season) |
2922 |
|
16/06/2018 (before summer cruise) |
2988 |
|
07/2018
(after summer cruise) |
3072 |
|
01/11/2018
(end of boating season) |
3116 |
|
01/04/2019 (start of boating season) |
3125 |
|
29/06/2019 (before summer cruise) |
3157 |
|
05/07/2019
(after summer cruise) |
3250 |
|
01/11/2019
(end of boating season) |
3298 |
|
01/04/2020
(start of boating season) |
3305 |
|
19/06/2020
(before summer cruise) |
3310 |
|
05/07/2020
(after summer cruise) |
3338 |
|
22/11/2020
(end of boating season) |
3384 |
| 01/04/2021 (start of boating season) | 3385 |
| 22/06/2021 (before summer cruise) | ? |
| 05/07/2021 (after summer cruise) | ? |
|
31/10/2021
(end of boating season) |
? |
Photographs of nb Squirrel at various locations
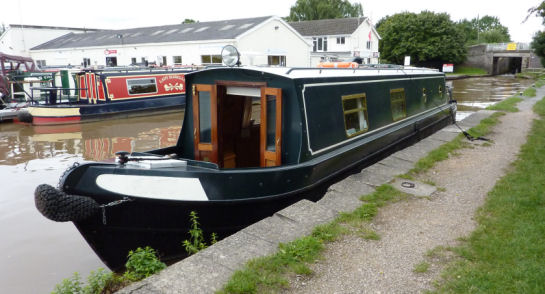
Below Cholmondeston Lock on the Middlewich Branch of "Shroppie" when bringing her back to Lymm after buying her - 24th August 2013
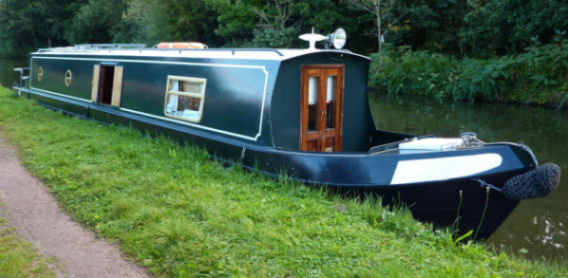
Moored at Dunham Massey - Bridgewater Canal - 20th September 2013
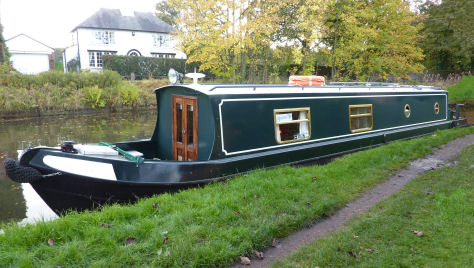
Moored at Grappenhall - Bridgewater Canal - 27th October 2013
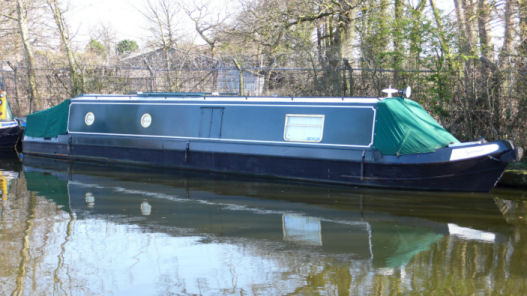
"Tucked up and asleep" at Oughtrington - Bridgewater Canal - 11th March 2014
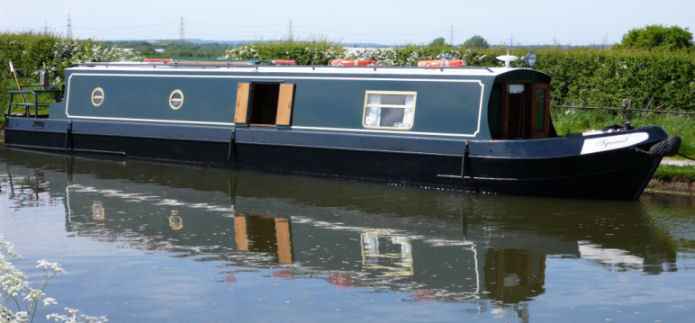
With the hull freshly re-blacked... basking in the sunshine at Moore - Bridgewater Canal - 18th May 2014
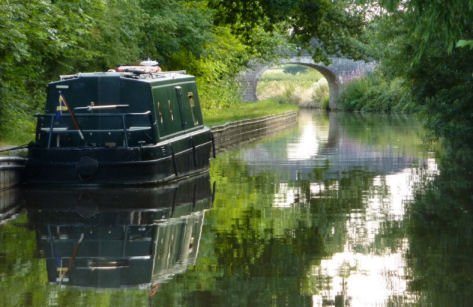
Secluded mooring above Baddiley Locks - Llangollen Canal - 31st July 2014
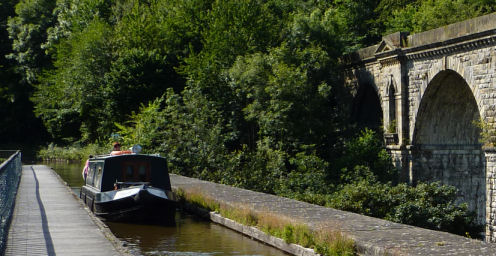
Crossing Chirk Aqueduct - Llangollen Canal - 4th August 2014
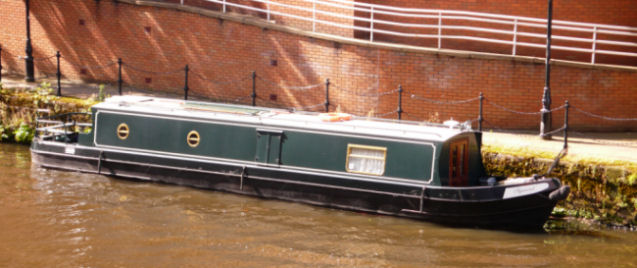
Moored at the Mark Addy, Manchester - River Irwell - 23rd August 2014
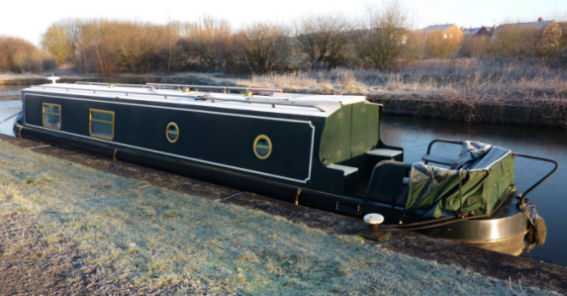
Iced in at Dover Lock near Wigan - Leeds and Liverpool Canal - 30th December 2014
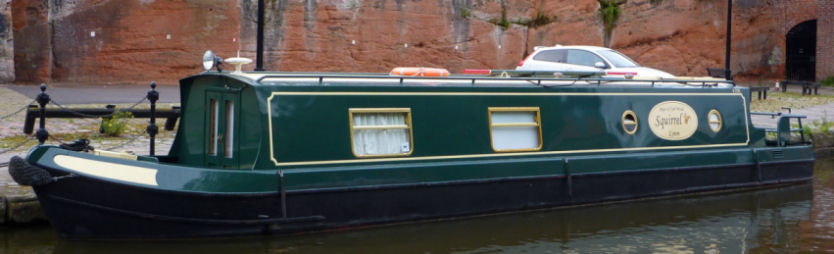
Moored at Castlefield, Manchester - Bridgewater Canal - 11th July 2015
At Calveley - Shropshire Union Canal - 30th July 2015

Waiting for Wardle Lock, Middlewich - Shropshire Union Canal - 5th August 2015
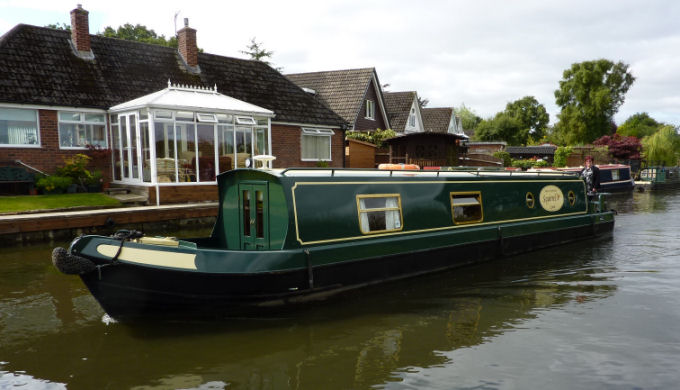
Ange steering at Thelwall - Bridgewater Canal - 6th September 2015
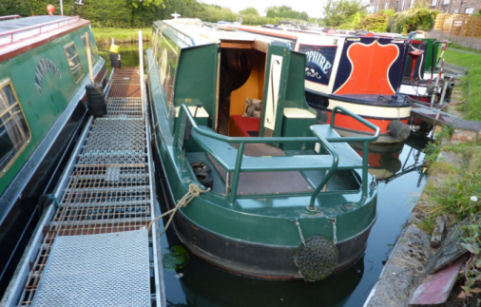
On the new jetty mooring at Lymm - Bridgewater Canal - 7th September 2015
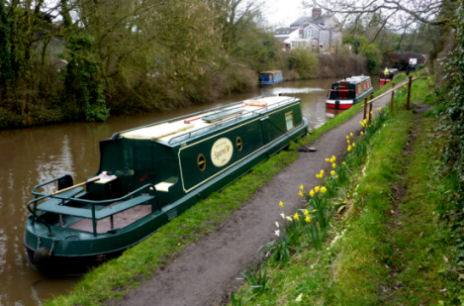
In the queue for Preston Brook Tunnel - Bridgewater Canal - 26th March 2016
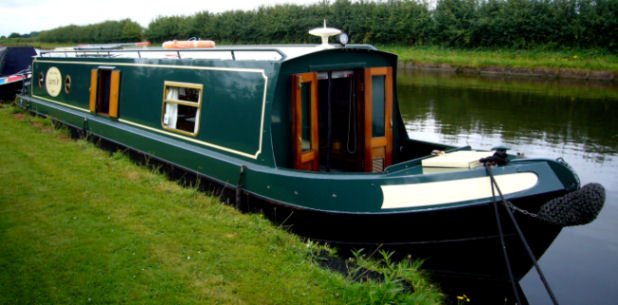
On borrowed moorings at Agden - Bridgewater Canal - 24th July 2016
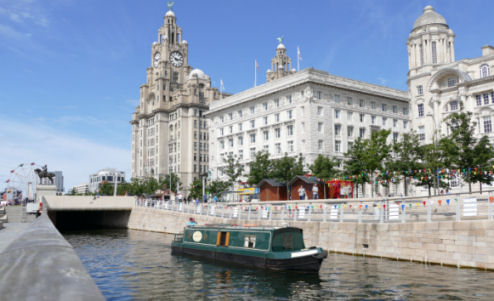
Passing in front of the Three Graces at Liverpool's Pier head - 5th August 2016
(Photograph - Michael Dawson)
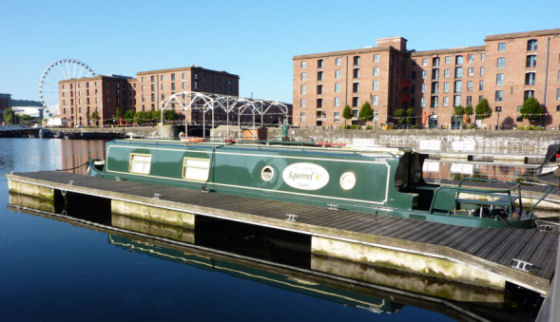
In Salthouse Dock, Liverpool - 6th August 2016
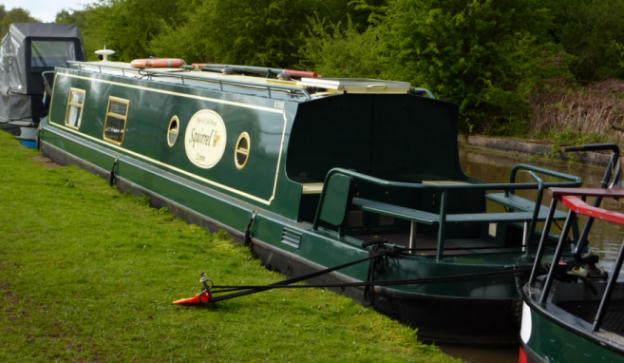
At the Salt Museum, Lostock Gralam - Trent & Mersey Canal - 15th April 2017
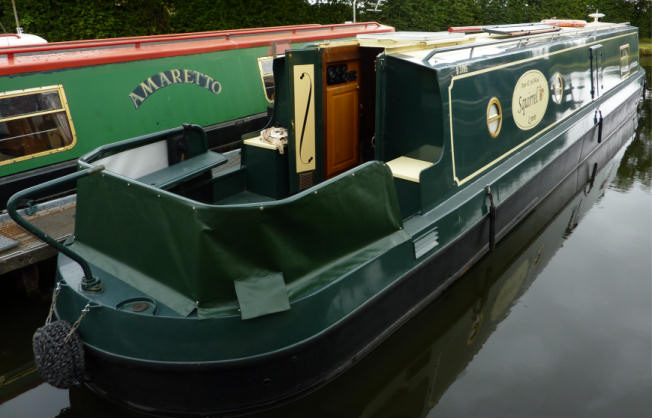
Sporting a new dodger on the mooring at Lymm - Bridgewater Canal - 4th July 2017
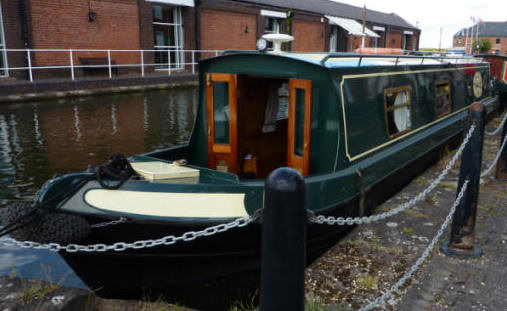
At The Boat Museum, Ellesmere Port - Shropshire Union Canal - 5th August 2017
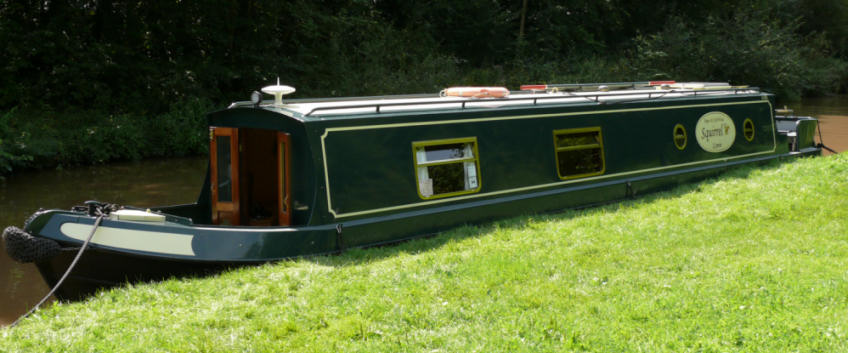
At Syke's Hollow, Cholmondeston - Shropshire Union Canal Middlewich Branch - 10th August 2017
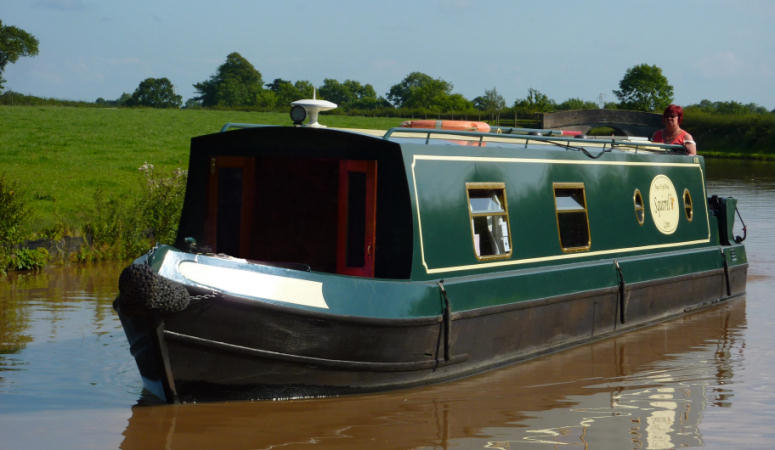
At Church Minshull - Shropshire Union Canal Middlewich Branch - 10th August 2017
On new moorings at Agden with cratch fitted - 14th October 2017
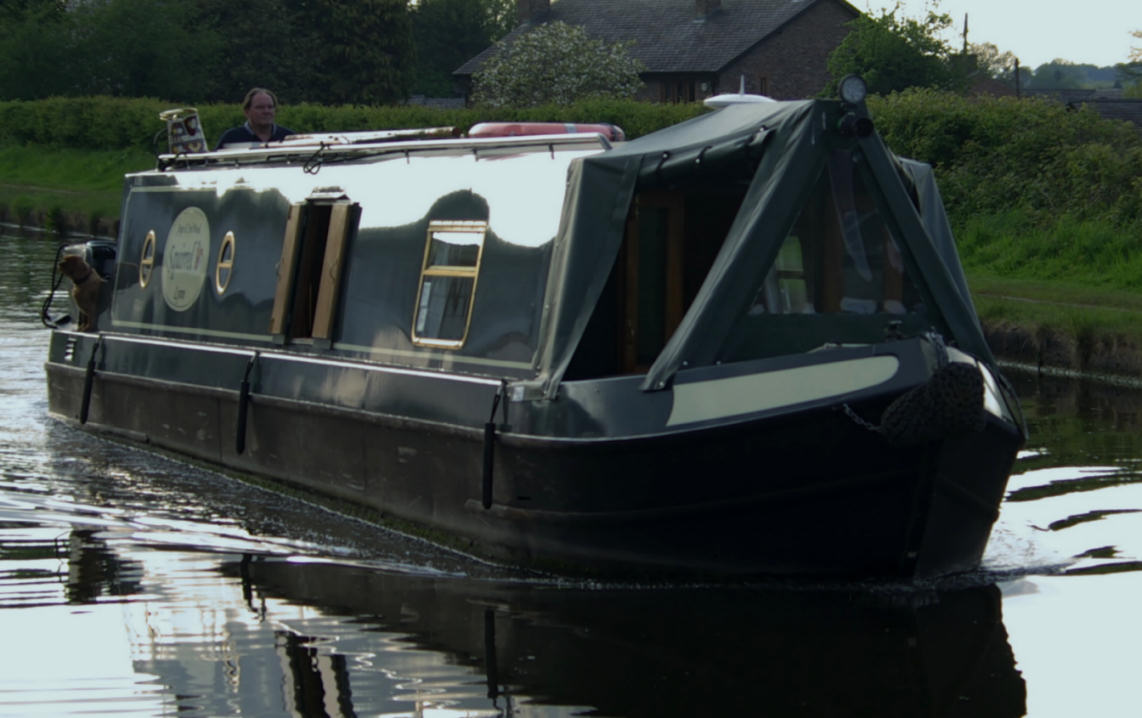
A shiny Squirrel near Agden - Bridgewater Canal - 4th May 2018
(Photograph - Colin Bradshaw)
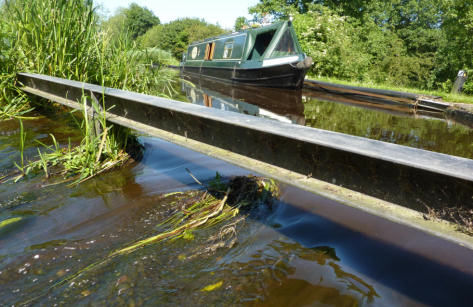
Above Aston Number Two Lock - Montgomery Canal - 27th June 2019
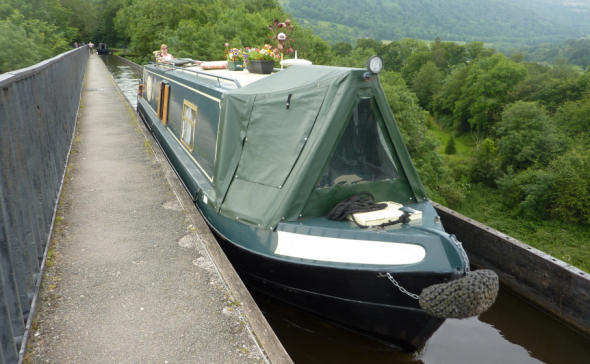
Crossing Pontcysyllte Aqueduct - Llangollen Canal - 29th June 2019
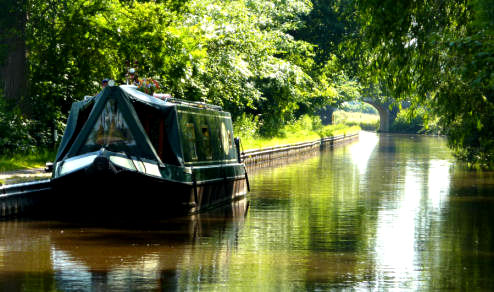
Squirrel above Baddiley Locks - Llangollen Canal - 3rd July 2019
(up-dated version of an earlier photograph taken on 31st July 2014)
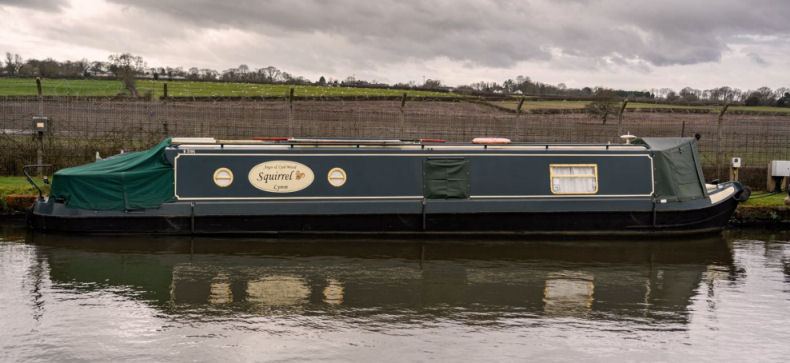
Winterised Squirrel at Agden on 2nd February 2020 taken from the towpath
(Photograph - Norman Pimlot)
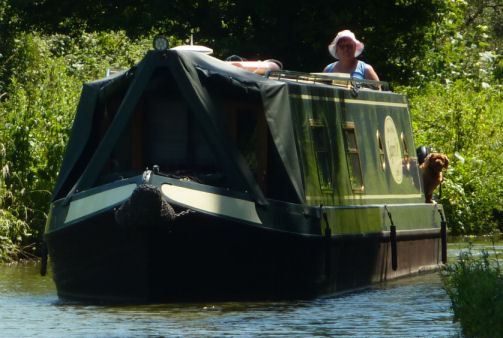
Ange and Ruby on board Squirrel at Middlewich on the 26th June 2020
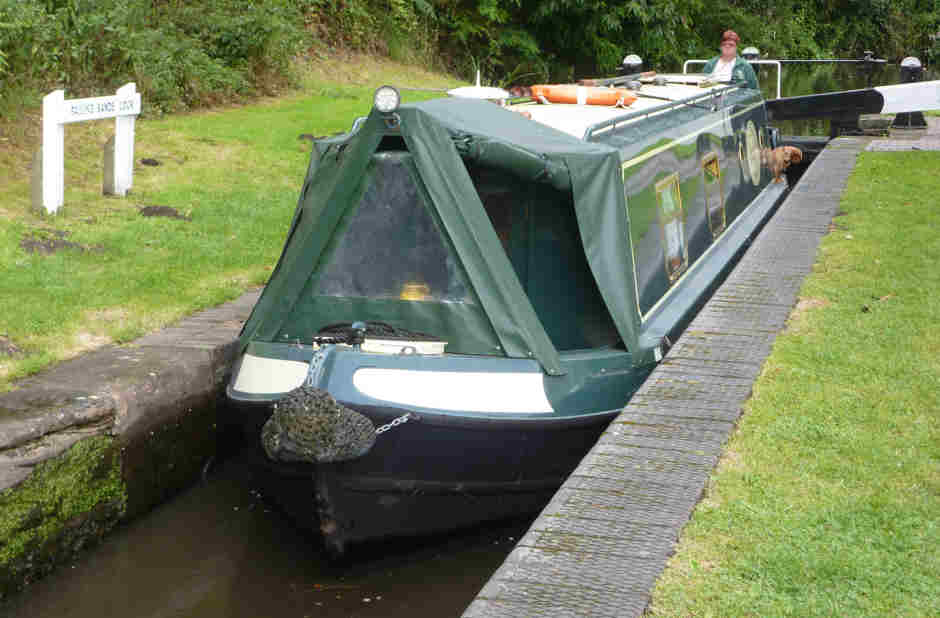
Ange and Ruby on board Squirrel at Falling Sands Lock on the 30th July 2021
So there you have it... an insight to our narrowboat... Squirrel. It is coincidental that the boat was built less than three miles away from where we live, but on the opposite side of the River Mersey from Wallasey on the Wirral Peninsula. The Liverpool Boat Company ceased building boats in 2008 due to the increased price of steel preventing them from producing competitively priced boats but their workshops in Liverpool were inherited by the Collingwood Boat Company as were many their boats' design features. I recently saw a wide-beam boat from Collingwood Boat Company that at first glance looked identical to Squirrel albeit wider, longer and with a few different design details eg: wider doors, "traditional" handrails, different window frames, etc. But the boat's heritage cannot be doubted.
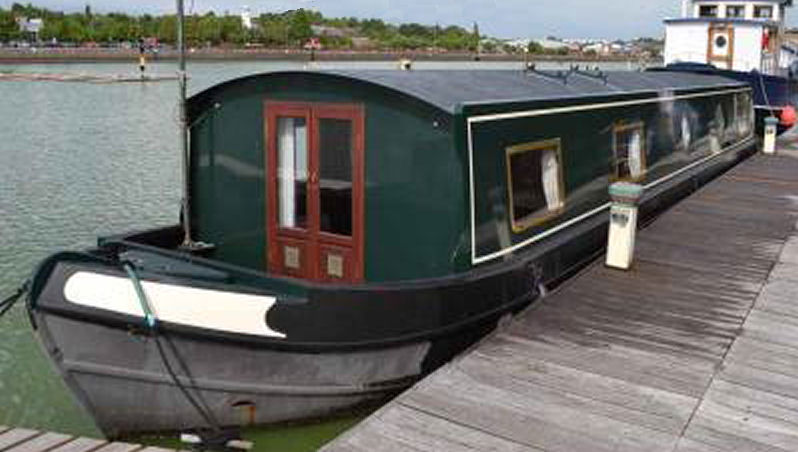
This Collingwood wide-beam is almost identical to Squirrel... albeit with different handrails, windows, wider and longer
(Photograph - Boatshed.com)
Squirrel has many features that we planned to incorporate into our previous boat... Total Eclipse, such as the split rear deck boards allowing access to the weed hatch without having to lift the entire rear deck boards and side doors which we always wanted to increase ventilation and light. They were jobs on our "to do" list but we never got around to doing them. The boat also has many features that we didn't anticipate fitting to Total Eclipse such as central heating and an inverter that are none-the-less greatly appreciated on Squirrel, and with no solid fuel stove the central heating is necessary. The bi-annual slipping for cleaning and re-blacking the hull plus regular maintenance, sacrificial anode replacement and painting should ensure that the boat lasts (hopefully) for many years to come and will take us on many more canal adventures in the future.
|
or select another book below... |
||
|
|
||
|
|
||
|
|
||
|
|
||
|
|
||
|
|
||
|
|
||
|
|
||
|
|
||
|
|
||
|
|
||
|
|
||
|
|
||
|
|
||
|
|
||
|
|
||
|
|
||
|
|
||
|
|
|
"Canalscape" and "Diarama" names and logo are copyright |
Updated 19/09/2021