Wyre Heal
A Local History of the Wirral Peninsula
Chapter 11
Wallasey Pool
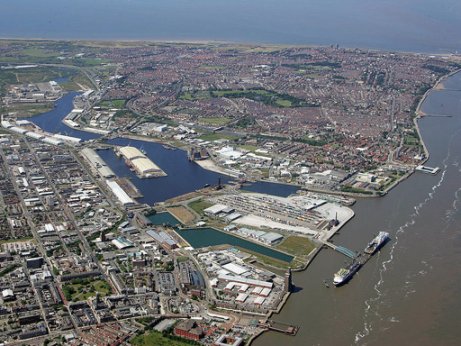
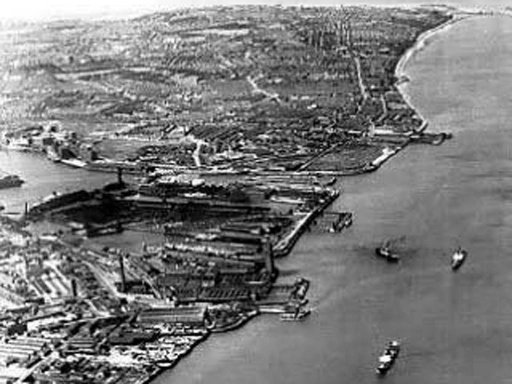
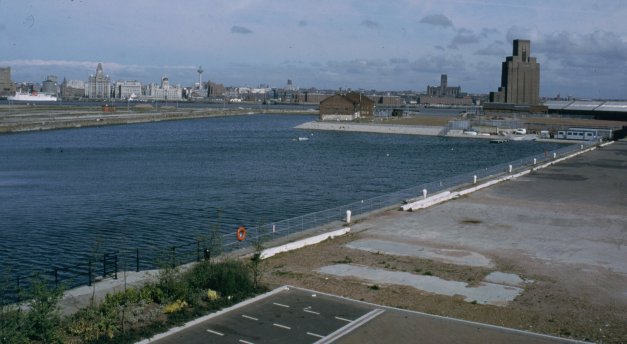
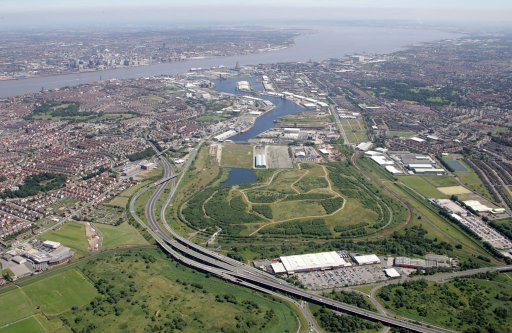
The name Wallasey is derived from the Gaelic... “Wealas Eye”, which roughly translated means Welshman’s or Stranger’s Island, as at high tide the settlement was cut-off from the rest of the Wirral Peninsula. Even today Wallasey is, as illustrated by the aerial photograph below, an island of sorts. It is impossible to go to or from the town without crossing over (or under) water of some description, whether it be Liverpool Bay, the River Mersey, the River Birkett or Wallasey Pool… now known as Wallasey and Birkenhead Docks.
This aerial photograph illustrates Wallasey's separation from the rest of the Wirral Peninsula
(Photograph - James M Wood Collection)
In the past, the main feature that cut-off Wallasey from the main land, making it an island was Wallasey Pool. This is a natural inlet running from the River Mersey across the north-western corner of the Wirral Peninsula. At high tide, the water level in the Pool rose to such an extent that it stretched across the marshland that is now Leasowe, joining Liverpool Bay and thus, bisecting the tip of the peninsula. Such was the height and strength of the tide that the water also travelled up the Rivers Birkett and Fender, swelling both so that an area stretching as far as Bidston Moss, Woodchurch and as far as Prenton Dell became a marshy flood plain. At the furthest point... what is now Prenton, the Prenton Brook sprang from the hill at the top of what is now Prenton Hall Road and powered Prenton Mill (hence Prenton Mill Road) before running down to Prenton Dell which became a brackish lake at high tide and marshland at low tide. This flooding was to occur twice a day with every tide until a barrage was constructed across the mouth of Wallasey Pool and another tidal barrier or embankment was constructed between Leasowe and Wallasey Village to prevent the Pool joining Liverpool Bay. Entrance locks were constructed at the mouth of Wallasey Pool to allow craft access to what was to become Wallasey and Birkenhead Docks. Prior to the taming of the Pool, the only way across the water was either by boat or by a rickety bridge near to what is today Bidston Moss that was supposedly constructed from the bones of a stranded whale.
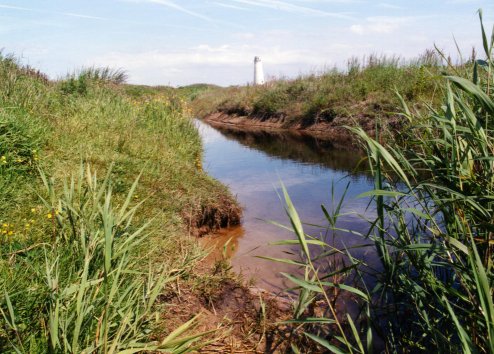
The head of the River Birkett near to Leasowe Lighthouse
Construction began in the nineteenth century on this venture and it was not completed until early in the twentieth century. Even today, with modern land drainage methods, an area stretching from Leasowe to Noctorum along the M53 corridor is still prone to flooding when torrential rain has swelled the Rivers Birkett and Fender. This flooding is not surprising really as the area is technically a flood plain. Consequently, when the rivers burst their banks, the excess water cannot be drained away due to the location being below sea level at high tide.
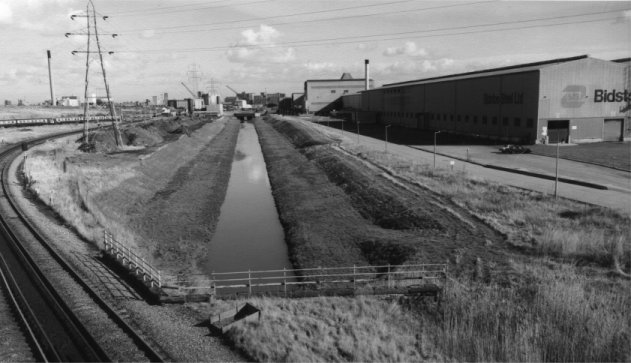
The River Birkett running alongside Bidston Steel - now a Tesco Superstore
The value of Wallasey Pool as a natural harbour has long been recognised. It's banks have been home to many marine connected activities and a primitive dock was located close to what is now Kelvin Road which used to transport the finished articles from Seacombe Pottery to various parts of the country. Seacombe Pottery was founded by John Godwin (formally of the Crown Works in Longton, Staffordshire and well known for his "Pearlware" pottery) in 1852. The other activities included smuggling (something that Wallasey has long been notorious for), fishing, ferries and ship building. William Laird founded his first shipyard on the banks of Wallasey Pool prior to moving to land reclaimed from the Mersey adjacent to Birkenhead Priory where his ship building business flourished up to the latter part of the twentieth century.
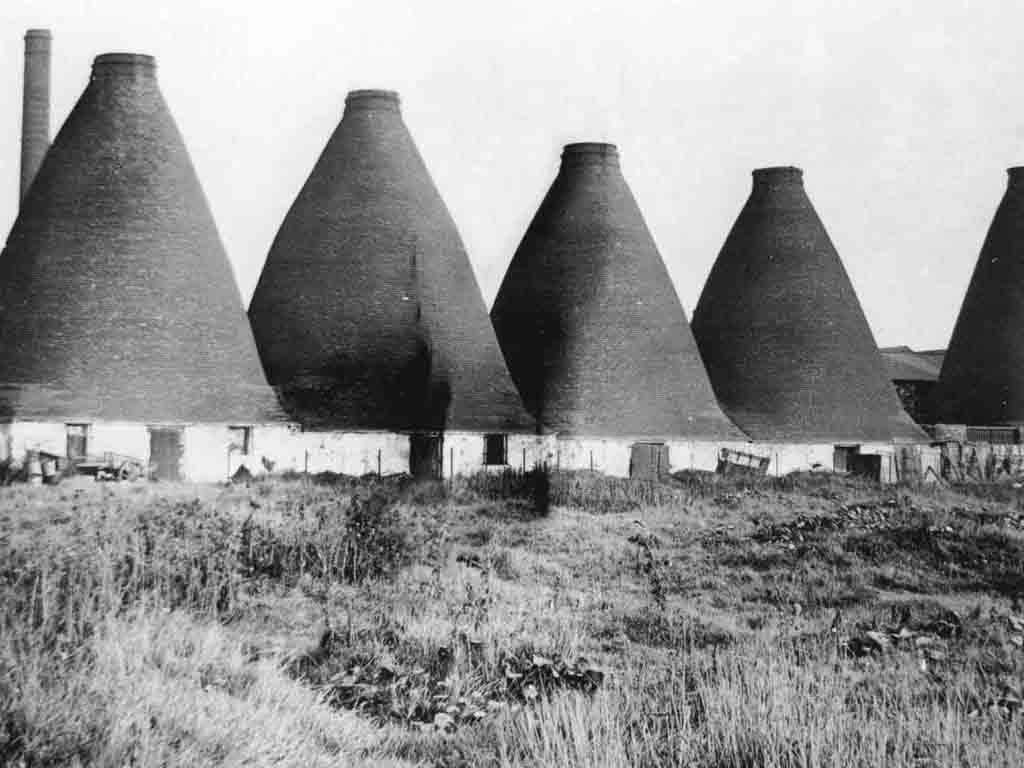
Seacombe Pottery... where Kelvin Road is today
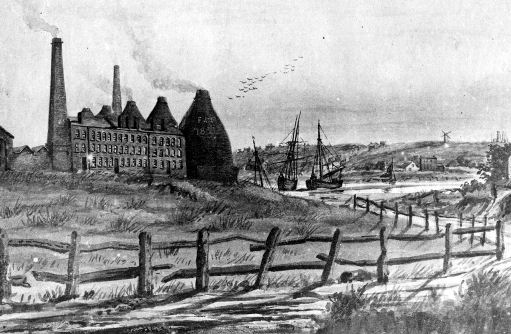
This artwork of the pottery exhibits quite a bit of "artistic licence" as it shows Bidston Windmill close by
The foundation stones of the docks were laid in the early part of the nineteenth century with the Alfred Dock entrance locks being opened in 1866 but the main design and construction of today’s docks was undertaken by Jesse Hartley, who also constructed many of Liverpool’s docks. He completed construction of the locks, retaining walls and the land reclamation schemes in the 1890’s.
Two ship canals have been proposed to connect with the pool. The first was an extension to the Bridgewater Canal from Sale to West Kirby and the second was an extension to the Pool, cutting across Bidston Moss to Leasowe where it would have connected with Liverpool Bay. Thomas Telford, the renowned canal builder and civil engineer was reputedly consulted for both schemes and when inspecting Wallasey Pool he is supposed to have said… “Look... they’ve built Liverpool on the wrong side of the river!” His inference was that the natural harbour of Wallasey Pool should have been taken advantage of instead of reclaiming land from the Mersey to construct the Liverpool dock system. Neither of the ship canal schemes came to fruition but the one that was to have connected to the Bridgewater Canal did pre-date the Manchester Ship Canal by seventy years.
Map of Wallasey and Birkenhead Docks
.jpg)
|
Key to Map |
|
|
1 |
Seacombe Mersey Ferry Floating Landing Stage |
|
2 |
Alfred Lock |
|
3 |
Second Alfred Lock (in-filled) |
|
4 |
Alfred Dock |
|
5 |
Alfred Dock Bascule Bridge |
|
6 |
Causeway at site of Alfred Dock Swing Bridge (dismantled) |
|
7 |
Fixed Wallasey Dock Bridge (originally bascule - partially dismantled) |
|
8 |
Site of Wallasey Dock (in-filled) |
|
9 |
Pumping Station (restored) |
|
10 |
Causeway at site of Number Four Bascule Bridge (dismantled) |
|
11 |
Egerton Dock (water level lowered) |
|
12 |
Egerton Bascule Bridge |
|
13 |
Morpeth Dock (partially in-filled) |
|
14 |
Morpeth Lock (in-filled) |
|
15 |
Twelve Quays Roll-On-Roll-Off Irish Ferry Terminal |
|
16 |
East Float |
|
17 |
Site of Vittoria Swing Bridge (dismantled) |
|
18 |
Vittoria Dock |
|
19 |
Location of Historic War Ships and redeveloped Spillers Flour Mills |
|
20 |
Barge Docks (in-filled) |
|
21 |
Vittoria Wharf |
|
22 |
West Float |
|
23 |
Mersey Ferries Berths |
|
24 |
Jetty |
|
25 |
Duke Street Bridge (bascule bridge) |
|
26 |
West Float |
|
27 |
Duke Street Wharf |
|
28 |
Cavendish Wharf |
|
29 |
Gillbrook Basin |
|
30 |
Rank’s Creek (in-filled) and site of demolished flour mills |
|
31 |
Canada Creek |
|
32 |
Cheshire’s Quay |
|
33 |
Lewis’s Quay (United Molasses) |
|
34 |
Bidston Dry Dock (one remaining - two in-filled) |
|
35 |
Creek and loading wharf at side of old Mobil Oil plant |
|
36 |
Poulton Swing Bridge (fixed) |
|
37 |
Bidston Dock (in-filled) |
|
38 |
Overflow |
|
39 |
River Fender |
|
40 |
River Birkett |
|
41 |
Woodside Mersey Ferry Floating Landing Stage |
|
42 |
Location of Cammell Lairds Shipbuilders Dry Docks & Basins |
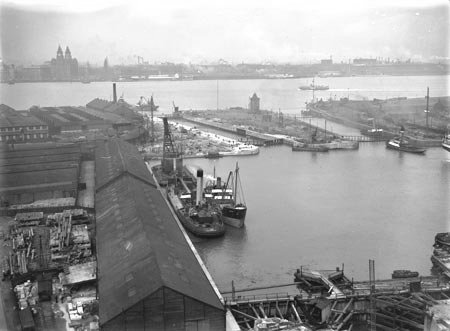
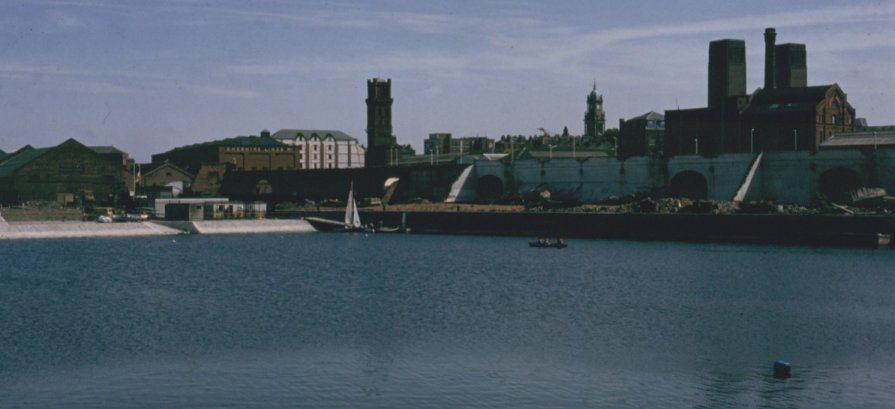
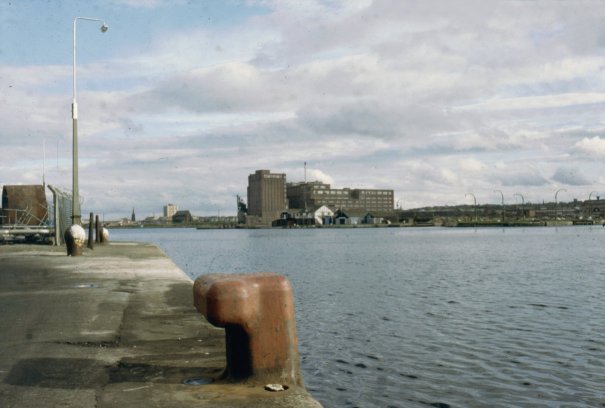
A 1920's aerial photograph of the entrance to Wallasey Pool
(Photograph - James M Wood Collection)
From when the construction of the docks was completed they were successful. Goods from all over the North West were transported to ports in every country on the planet. It was not until containerisation and bulk transport was introduced in the 1960’s that the port’s importance began to diminish, leaving only a few berths in regular use today. The Morpeth Dock, which was one of the earliest docks constructed on the Birkenhead side of the Pool, has been isolated from the main system by a dam and it's bascule bridge ("D" Bridge) removed and replaced by a causeway.
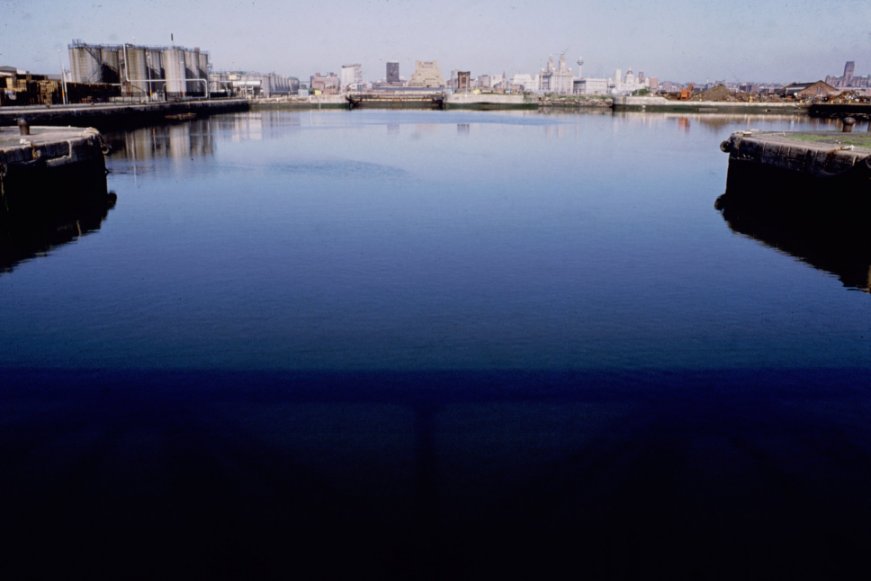
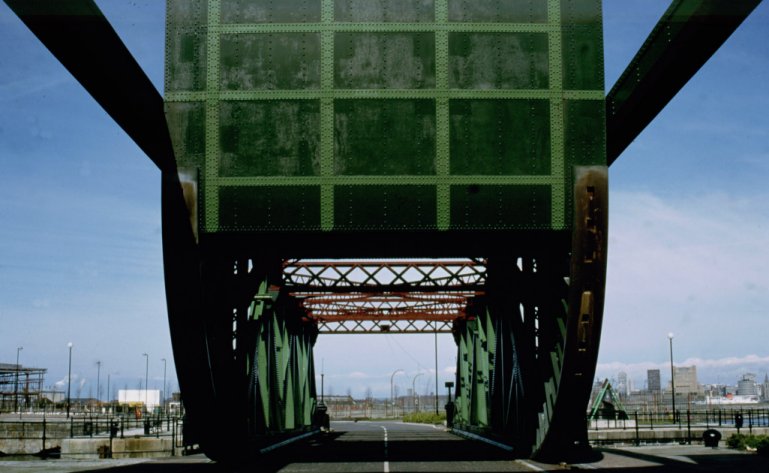
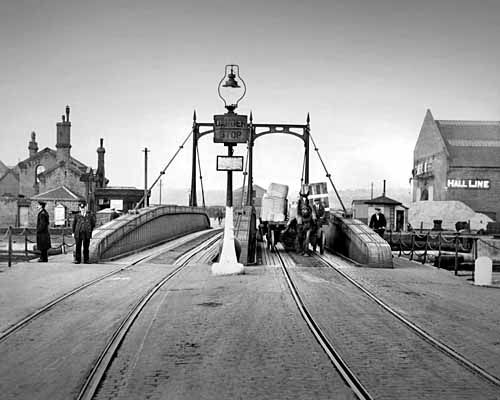
Alfred Dock looking towards the River Mersey entrance locks from "A" Bridge
Alfred Dock and the entrance locks in the 1930's
(Photograph - James M Wood Collection)
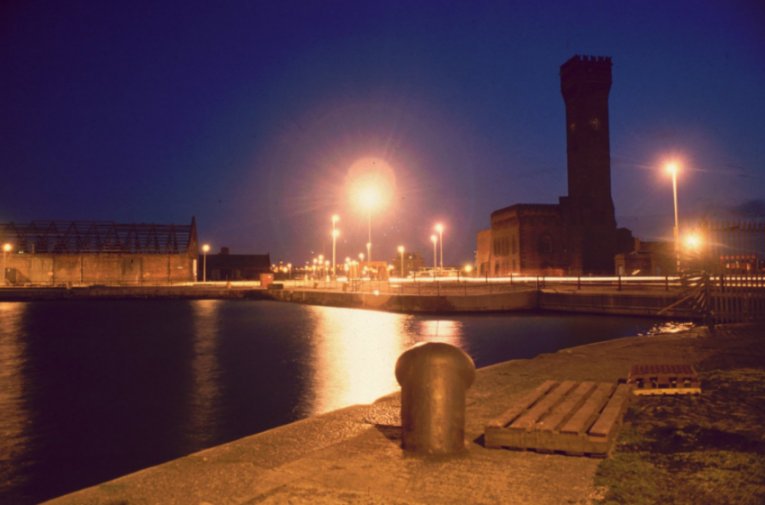
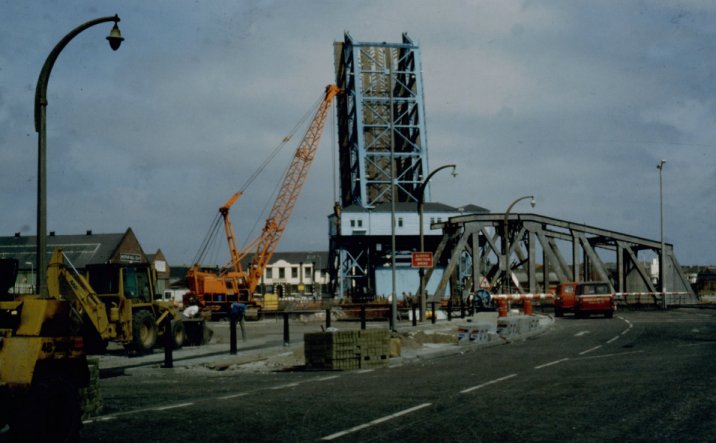
A nocturnal photograph of Alfred Dock and the shortened Hydraulic Tower in 1991
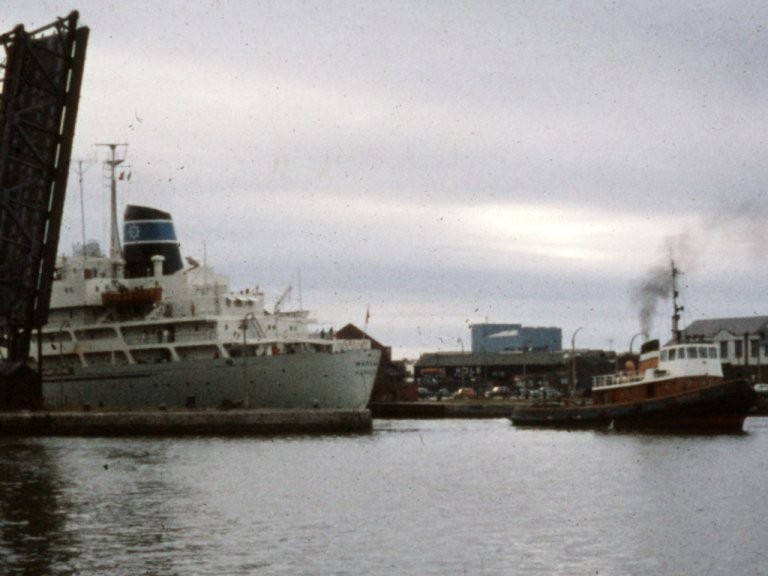
A 1970's photograph of a cargo ship passing through "A" Bridge into Alfred Dock
(Photograph - James M Wood Collection)
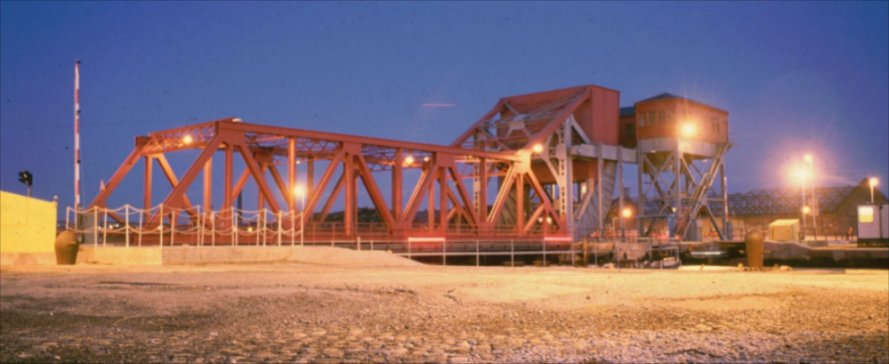
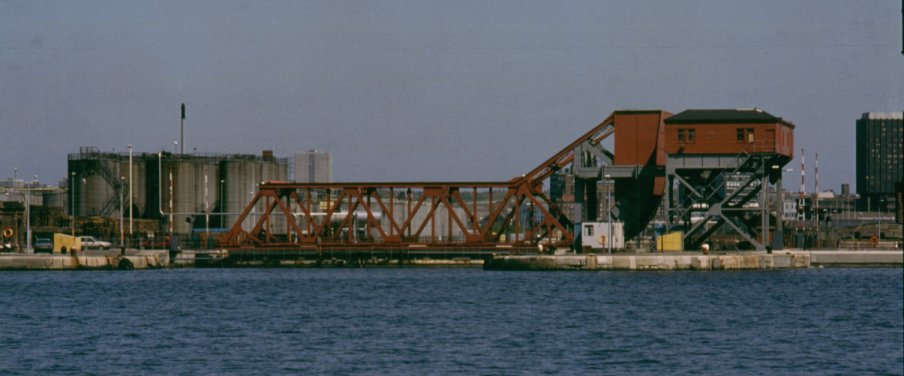
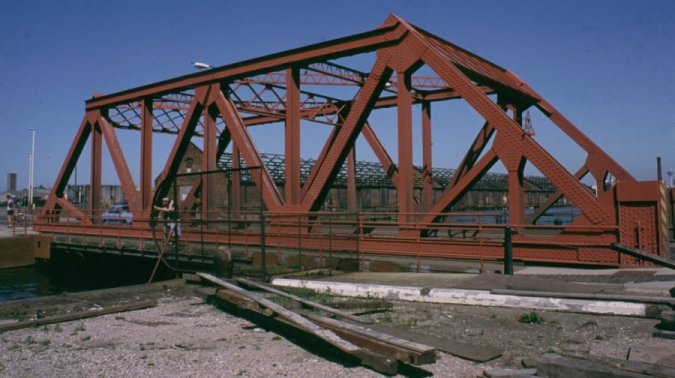
Two photographs of "A" Bridge... the last surviving movable bridge of the Four Bridges group
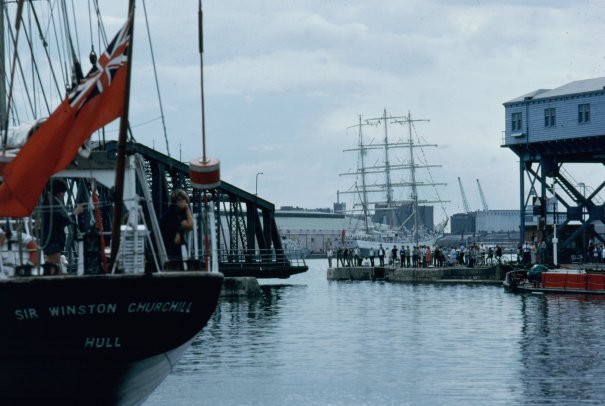
"B" Bridge being swung for "Sir Winston Churchill" during the tall ships' visit in August 1984
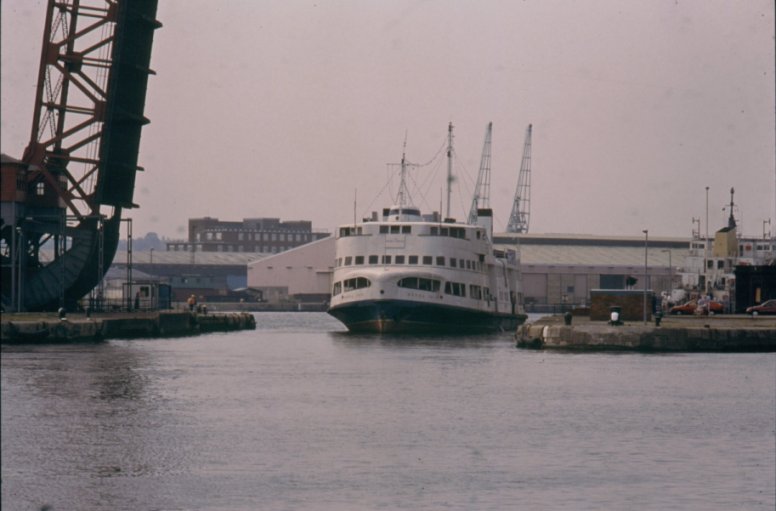
The Mersey Ferries "Royal Iris" passing beneath "A" Bridge for the last time
Part of it has been in-filled and the remainder of the dock has had its water level lowered. Wallasey Dock’s bascule bridge (C Bridge) was partly dismantled leaving the roadway and part of the bridge framework. The 1926 swing bridge ("B") over the second entrance to the East Float from Alfred Dock was removed and a dam and causeway constructed. This meant that the original “Four Bridges” shrank to one bridge if the bridge over the entrance to Wallasey Dock is disregarded (due to it now being a fixed, non-movable roadway crossing).

"B" Bridge complete with "Bird Droppings" sign before demolition
Tower Road was closed during the demolition of "B" Bridge
A "camel" or caisson in position during "B" Bridge's demolition to facilitate in-filling for the causeway
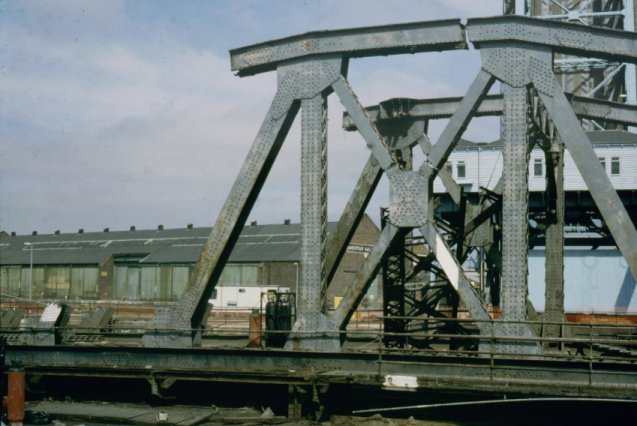
Dismantling "B" Bridge
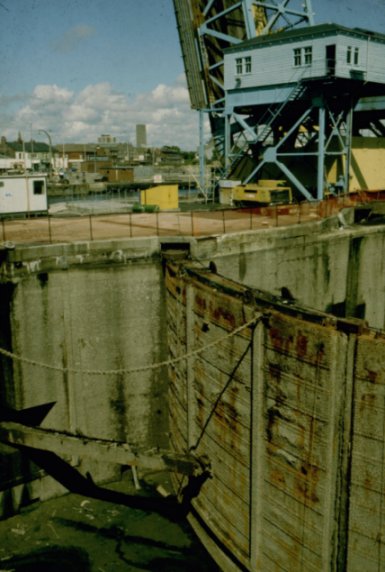
Lock gate detail prior to in-filling beneath "B" Bridge for the causeway
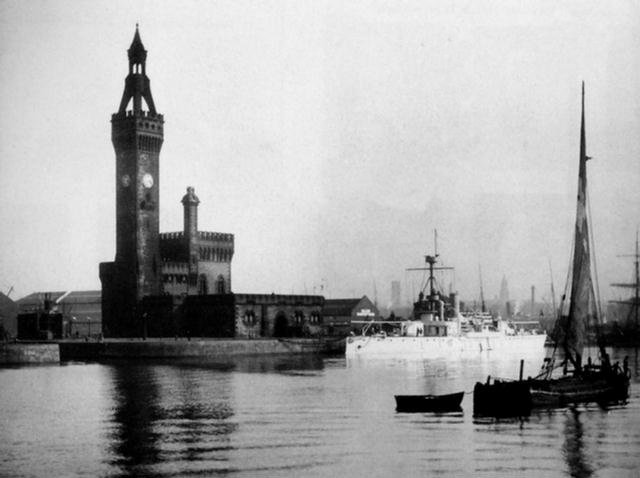
A 1920's photograph of Jesse Hartley's Hydraulic Tower from the East Float
(Photograph - James M Wood Collection)
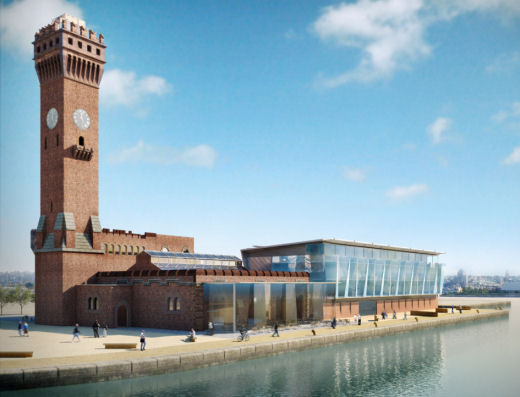
An artist's impression of how the restored Hydraulic Tower will look when completed
(Photograph - Peel Holdings)
The winches, lock gates and bridges were all hydraulically operated. Water was pumped from the dock by large steam operated pumps and stored in a tank on top of the Hydraulic Tower between "B" and "C" bridges. This tank gave sufficient "head" of water pressure to either operate the hydraulic rams controlling the lock gates and "B" swing bridge. The "A", "C" and "D" bascule bridges had water admitted into the large water tank which acted as a counterweight which "pulled" the bridge backwards on a toothed track to open it using a cantilever effect. Over the years the gates and bridges have been converted to electric power and the tower became redundant. It was severely damaged during the Second World War and repaired unsympathetically by the Mersey Docks and Harbour Company. The current owners... Peel Ports are investing in a long-term regeneration of the area known as Wirral Waters which includes restoration of the tower to its former glory but without the water tank at the top of the tower.
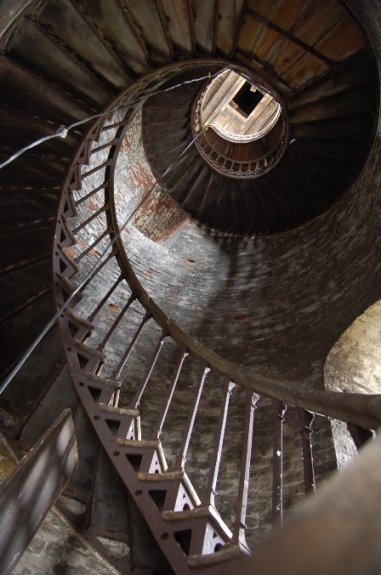
The cast iron spiral staircase inside the Hydraulic Tower
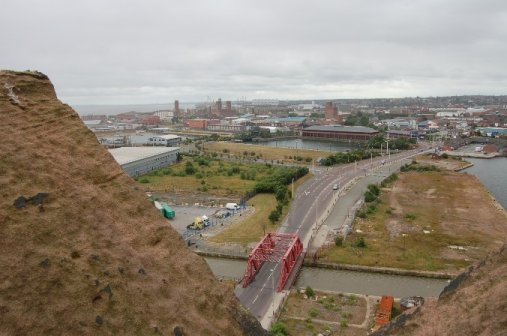
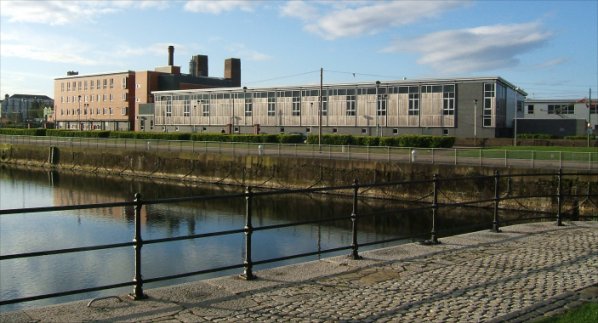
The view across the Four Bridges from the top of the Hydraulic Tower with the now replaced C Bridge and college location in the foreground
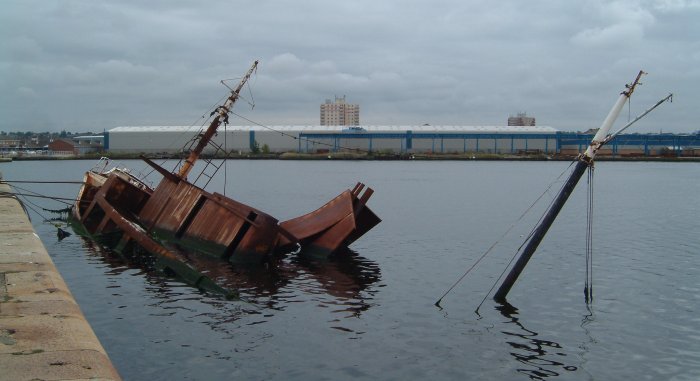
This sunken boat behind the Hydraulic Tower has been a feature of the docks for many years
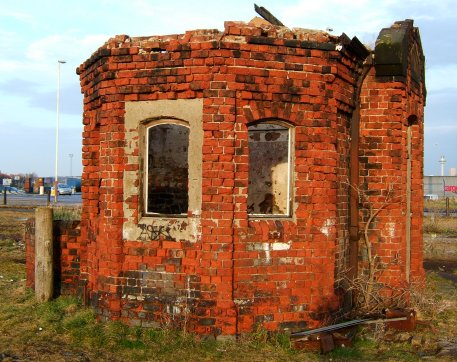
Disused and recently demolished lock gate and bridge keeper's lobby beside "C" Bridge and the entrance to Wallasey Dock
"C" Bridge after removal of the tilting mechanism and made into a fixed bridge
In August 1984 the Tall Ships visited the River Mersey for the first time. Wallasey and Birkenhead Docks were moorings for the first visit from the Tall Ships. Some of the ships were moored in Wallasey and Birkenhead Docks as well as in Liverpool Docks In subsequent years, the Tall Ships have returned to the River Mersey but their moorings are usually concentrated in the Liverpool North Docks and Albert Docks.
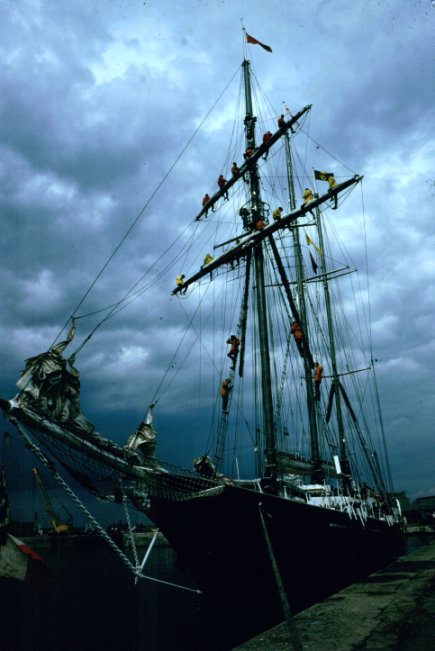
Sailors in the rigging of one of the Tall Ships
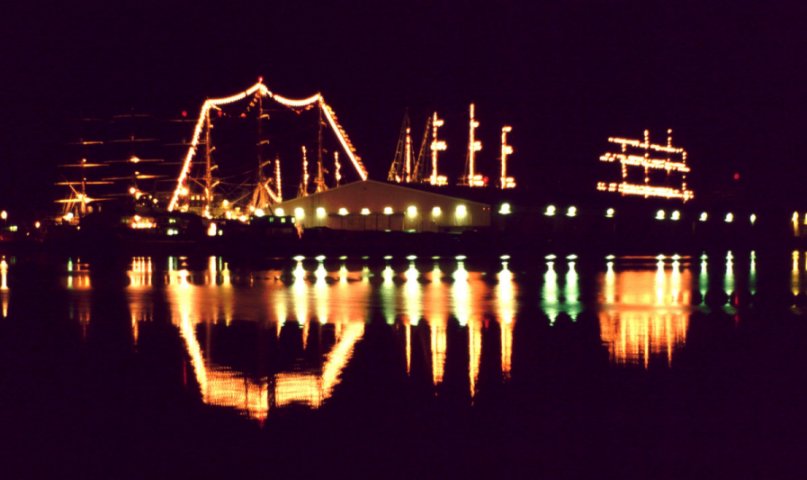
The Tall Ships illuminated at night
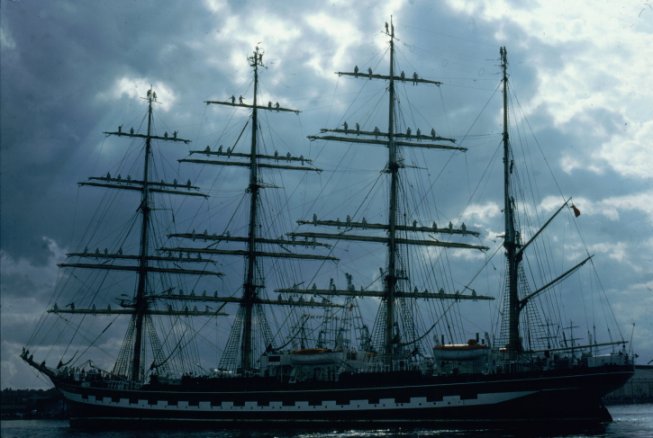
The Russian Tall Ship " Kruzenshtern" complete with obligatory crew in the rigging
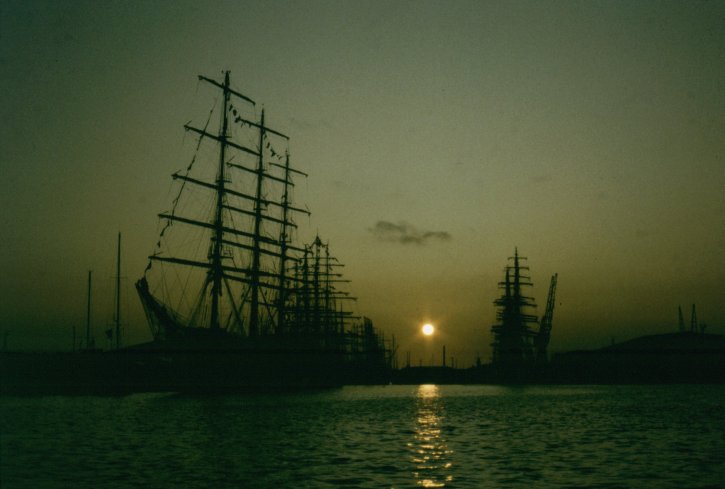
Sunset over Vittoria Dock where the majority of the Tall Ships were berthed
Trade has shrunk to such a low level that other parts of the Pool have been in-filled. Wallasey Dock, situated between the Morpeth Dock and the Alfred Dock entrance locks from the Mersey, was once a tidal dock having it's own entrance from the river and known as the Great Low Water Basin. In this form it was unsuccessful. The river entrance was filled-in, the dock connected to the main dock system and renamed Wallasey Dock in 1877. This dock was lined with warehouses... one of which was occupied for many years by "Barry No-shoes" who ran a successful car spares outlet.
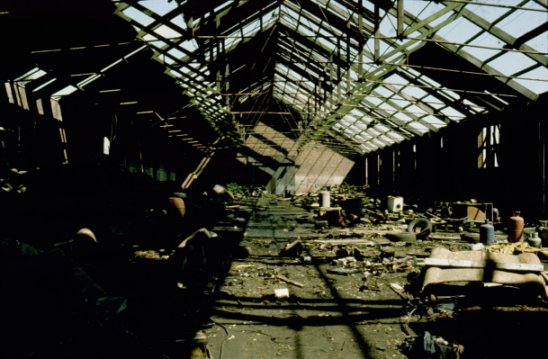
Inside one of the partially demolished warehouse besides Wallasey Dock
After the warehouses were demolished the dock was in-filled during the spring of 2002 and the land used as a marshalling area for vehicles waiting to board the new Irish roll-on-roll-off ferry terminal that was constructed on the site of the old Wallasey Landing Stage. The ferry service operates from the new terminal and floating landing stage in the river built in 2002. At the far end of Wallasey Dock is situated a pumping station responsible for “topping up” the water levels within the dock system with water drawn from the River Mersey. During the in-filling of Wallasey Dock, the water from the pumping station was diverted into a new culvert constructed beneath the surface of the lorry park and out-falling adjacent to the now fixed number C Bridge.
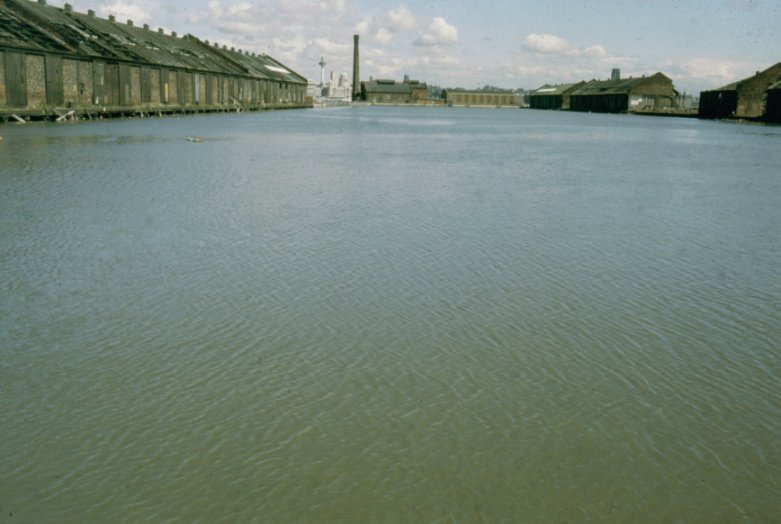
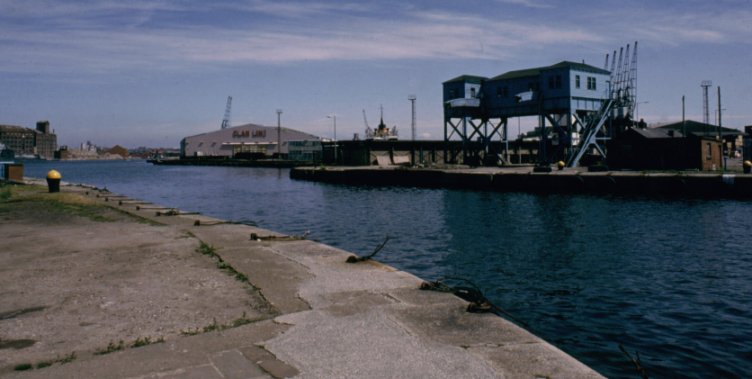
Wallasey Dock lined with warehouses and the pumping station at the far end prior to in-filling
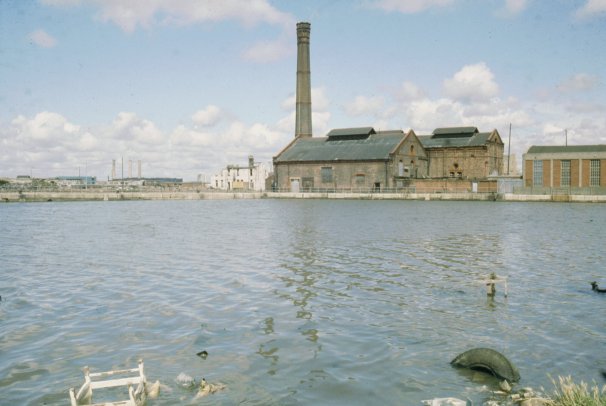
The Pumping Station at the far end of Wallasey Dock

Wallasey Dock and disused warehouses prior to demolition and in-filling...
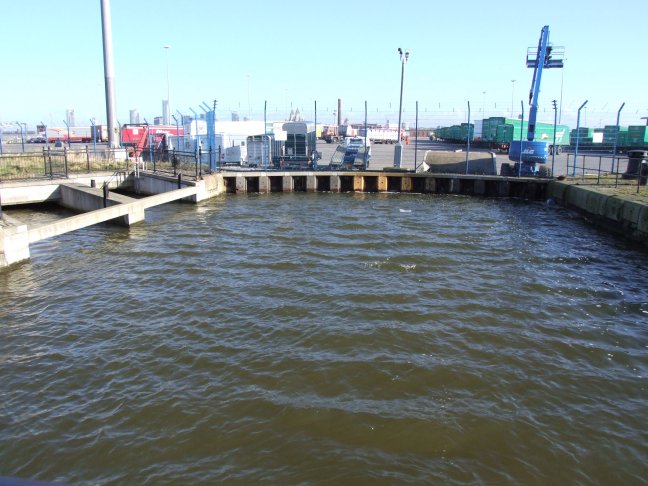
... and from virtually the same viewpoint today with the outfall from the Pumping Station culvert on the left
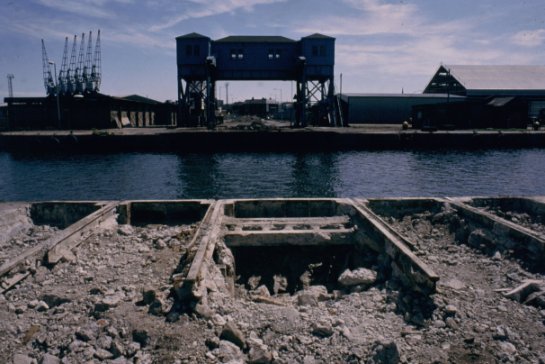
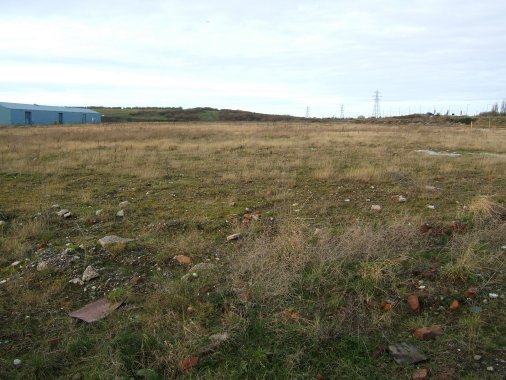
The previously mentioned Wirral Waters regeneration scheme will include new buildings lining the dock side. The first building in this scheme was the Wirral Metropolitan College's Wirral waters Campus. Construction work commenced in September 2014. During preparation for the foundations of the new building, remains of an old dry dock that used to occupy the site were uncovered. These remains had to be in-filled and stabilised prior to construction work commencing.
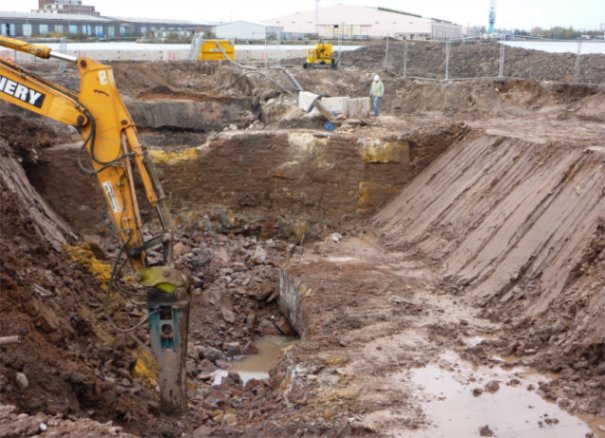
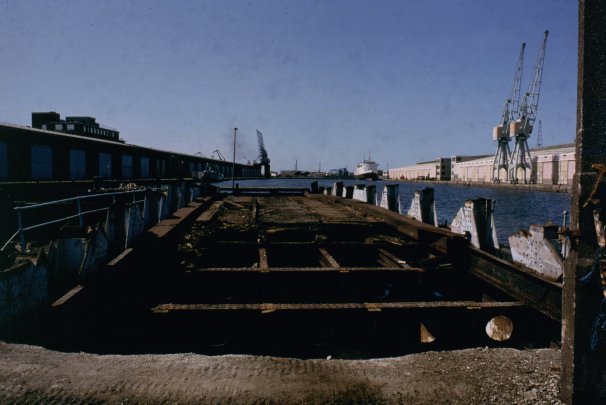
Remains of the dry-dock that were uncovered during preparation work
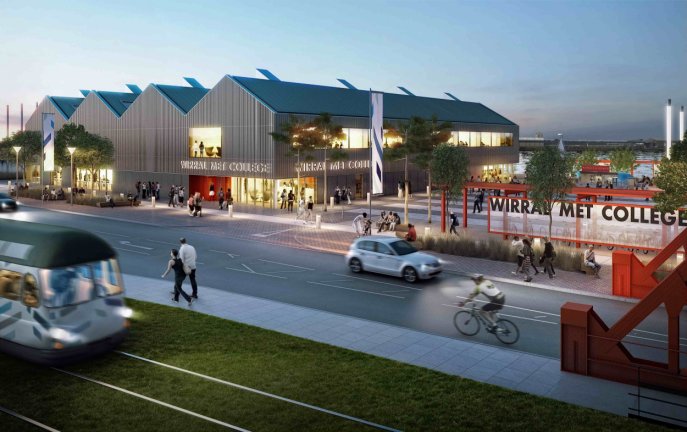
An architects impression of how the new campus will look... note the tram and tram tracks!
The College accommodates the construction industry courses relocated from the twelve Quays Campus adjacent to the nearby Morpeth Dock. The new campus was completed and open to students in September 2015 and has since won several architectural awards.
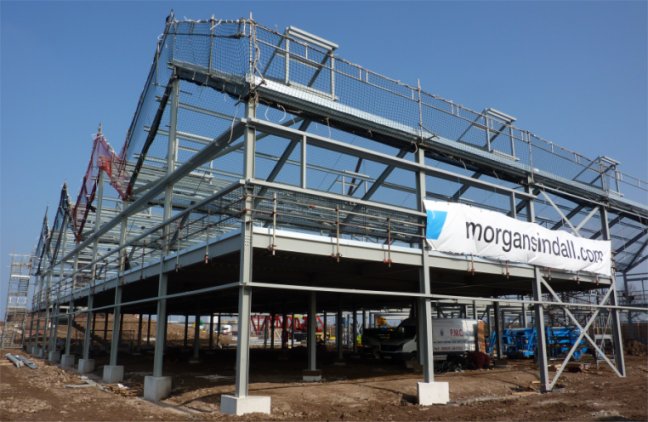
Steelwork for the new college campus being constructed
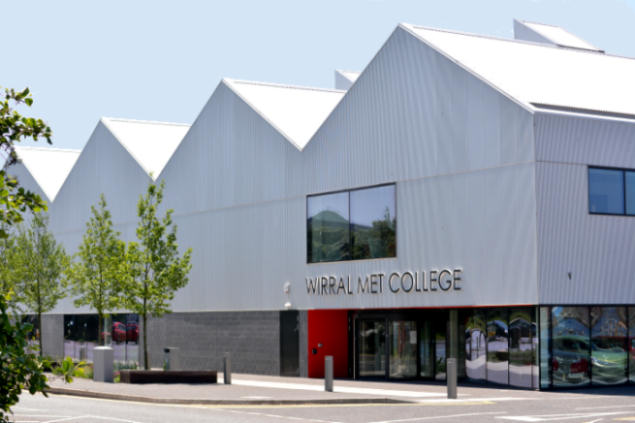
The entrance to the new Wirral Metropolitan College's Wirral Waters Campus
In March 2017 Tower Road was closed to facilitate replacement of C Bridge with a modern concrete bridge that did not have the headroom constraints of the bridge it replaced. The steel bridge was cut in half a onto the side of the dock by two gigantic cranes. The first attempt at craning the bridge sections failed due to the cranes not having the lifting capacity so larger cranes were employed and the removal was successful. Once craned onto the quayside the sections were cut up for scrap. The new concrete bridge spans were installed in May 2017. It was rumoured that the new bridge would be wide enough to accommodate a tram track that was an extension of the Birkenhead Heritage Tramway but on inspection this does not appear to be the case.
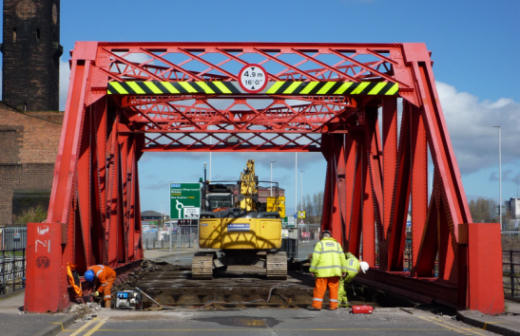
Preparations to dismantle C Bridge - March 2017
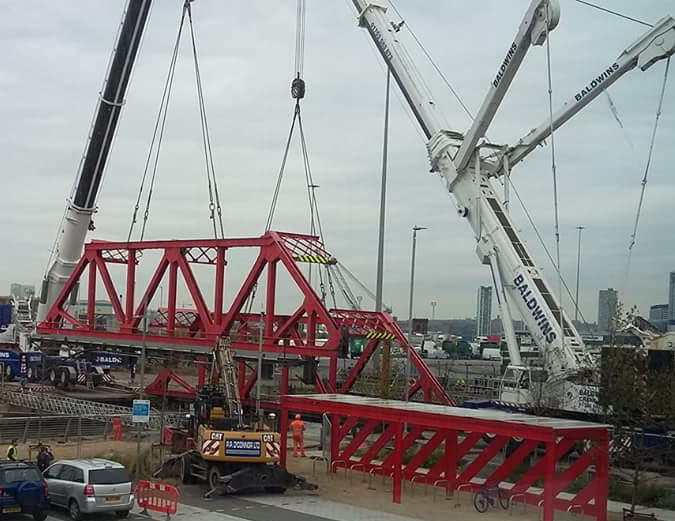
The two halves of C Bridge being craned onto the quayside - April 2017
(Photograph - Mike Wade)

Remains of dismantled C Bridge being cut up for scrap - April 2017
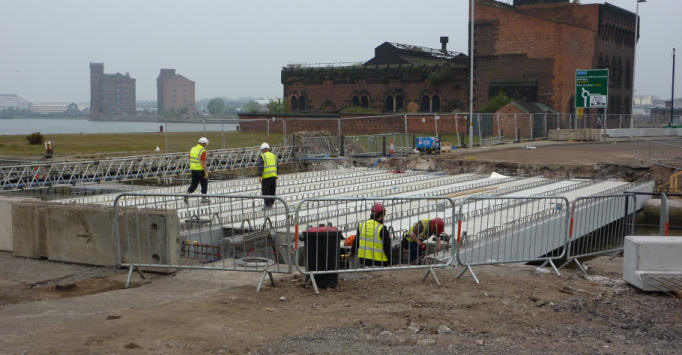
The new concrete bridge spans in place - May 2017...
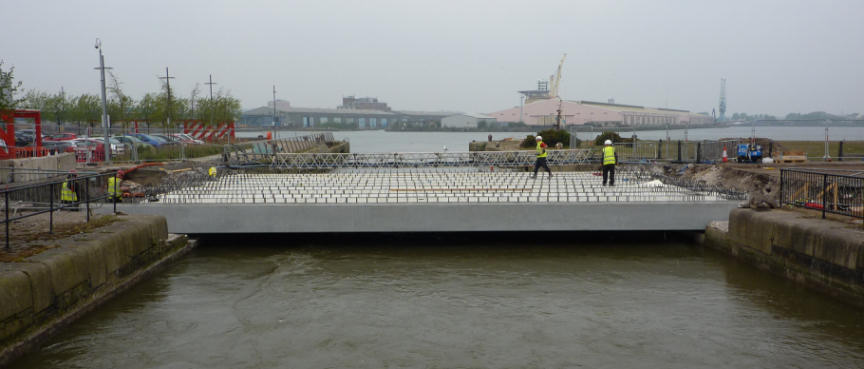
...and from a different angle - May 2017
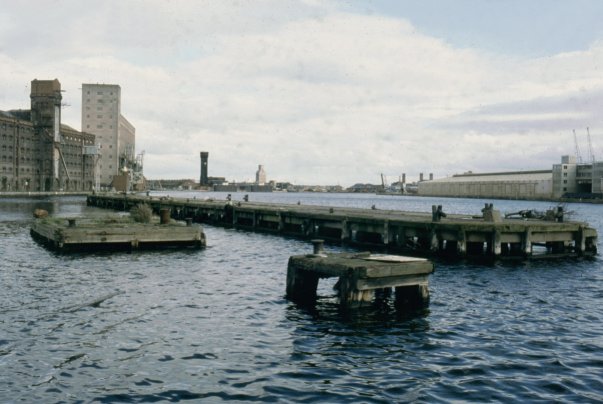
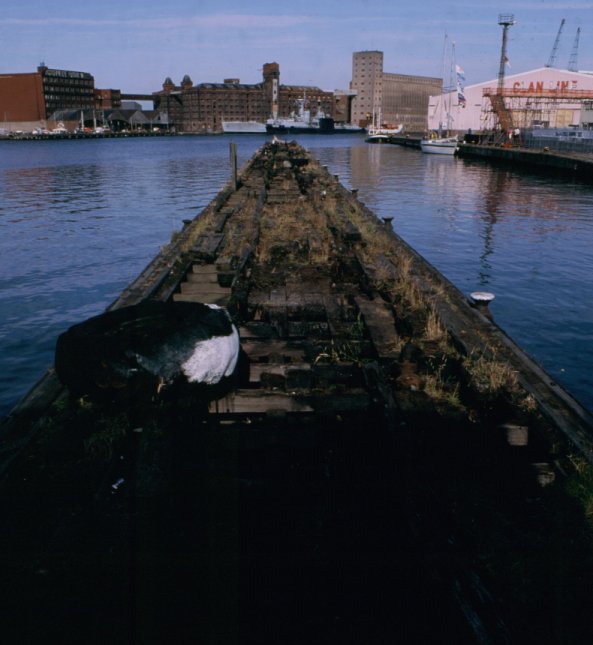
On the river side of Wallasey Dock, close to the pumping station was situated Wallasey Landing Stage which was used mainly for the importing of livestock. An elevated walkway was constructed allowing animals to walk to the Woodside Lairage abattoir situated next to Woodside Ferry. Next to the elevated walkway or cattle walk as it was known locally was the "One O'clock Gun". This small cannon would fire at precisely one o'clock to indicate the end of lunchtime to the dock workers.
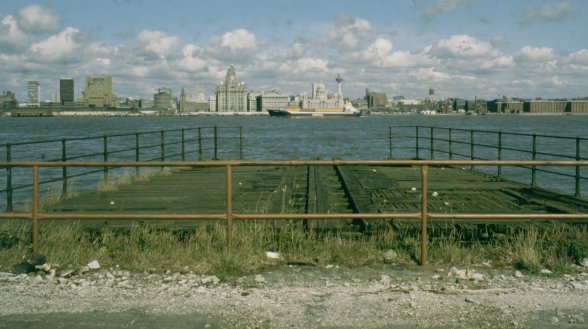
Remains of the old Wallasey Landing Stage...
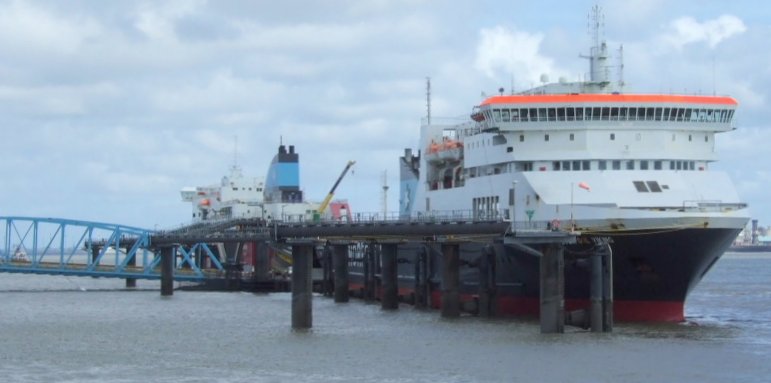
... and today's Irish Roll-On-Roll-Off Ferry Terminal that was constructed on the site

The "One-O-Clock Gun" beside the remains of the elevated livestock walkway
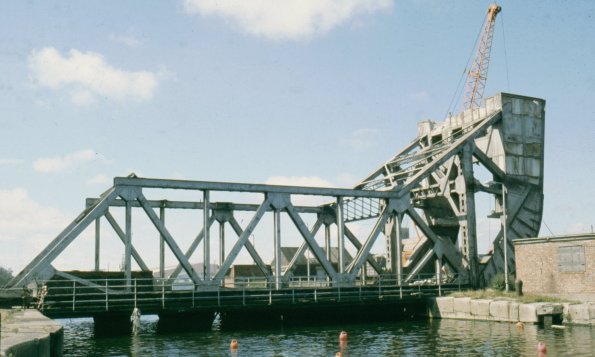
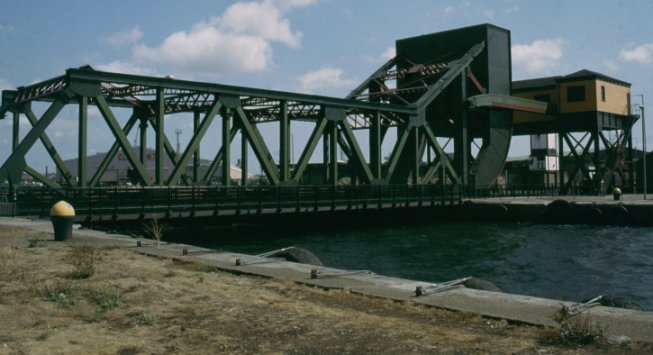
"D" Bridge prior to dismantling and a causeway built in it's place
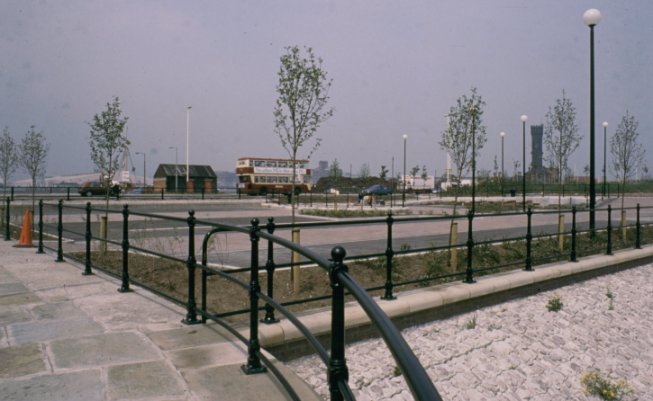
The barrage and landscaped area formerly the location of "D" Bridge and now the home of HMS Conway's mast
The second building in the Wirral Waters development was a purpose built office block housing a call centre for the Contact Company. This was located at the side of Egerton Dock and was completed not long after the Wirral Metropolitan College's Wirral Waters Campus.
Egerton Dock and bridge after separation from the main docks system and with lowered water level
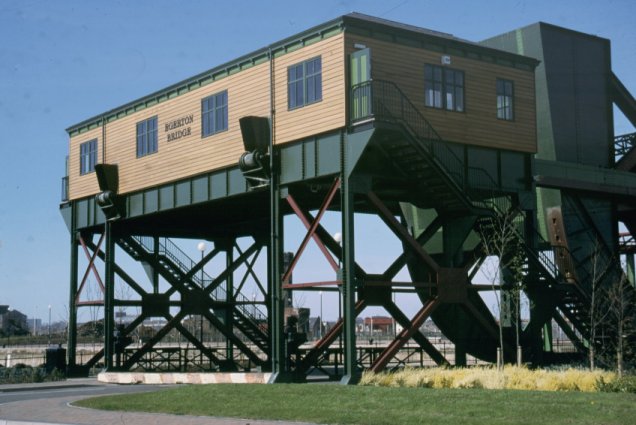
Egerton Bridge showing the refurbished control cabin
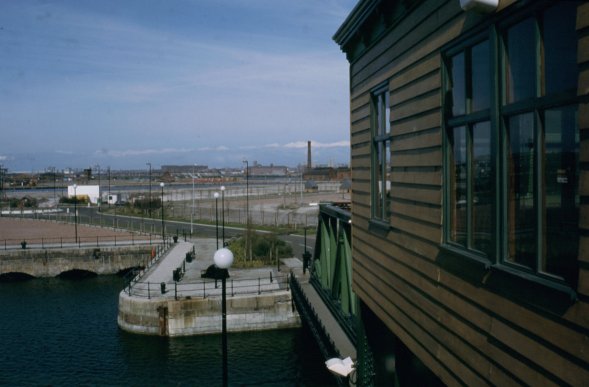
The view from the control cabin on Egerton Bridge
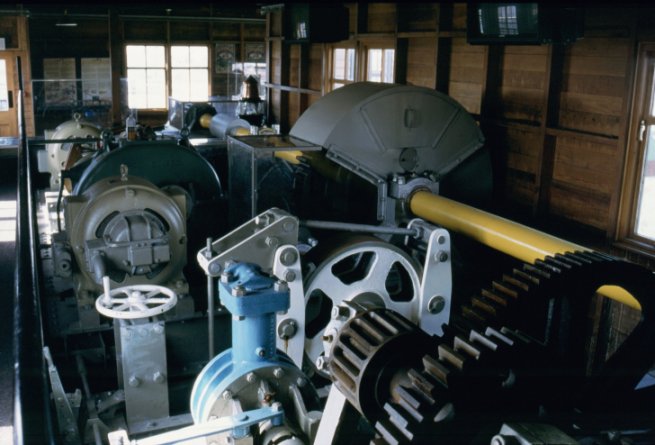
The original machinery inside the control cabin on Egerton Bridge
Looking across Egerton Bridge
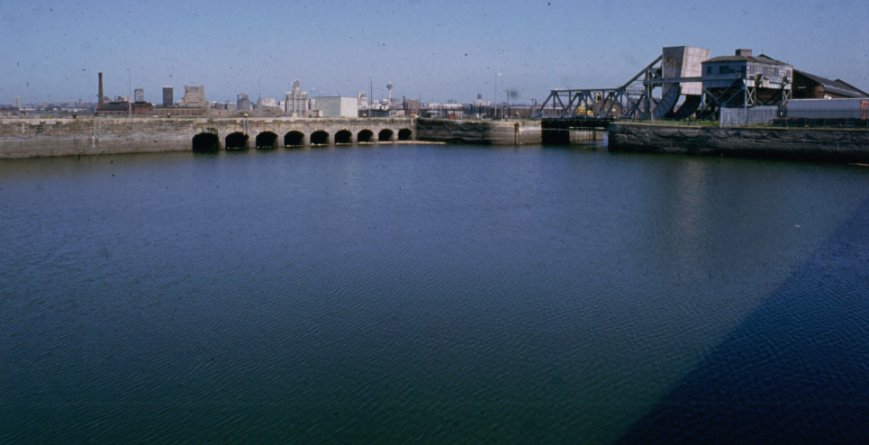
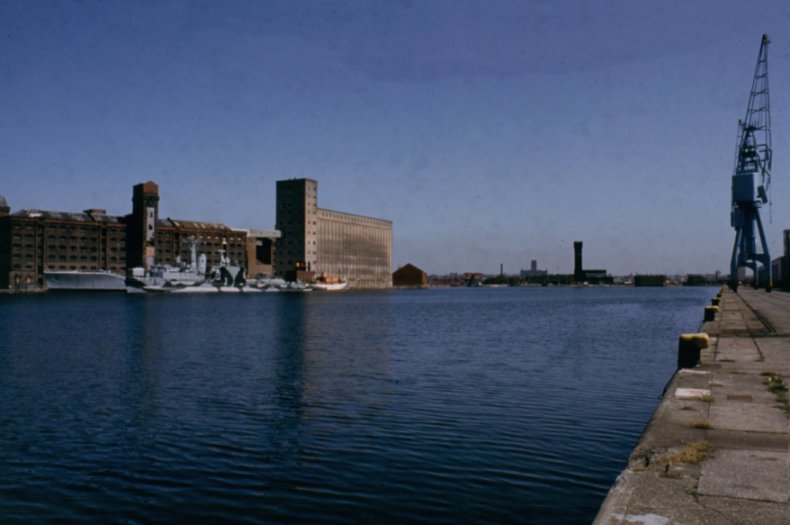
Morpeth Dock looking towards the in-filled river entrance
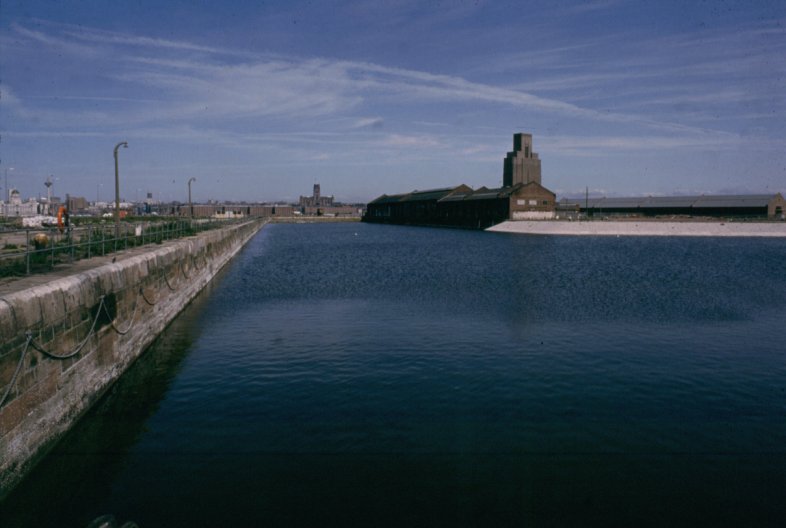
Morpeth Dock with Liverpool's Anglican Cathedral on the skyline
On the Birkenhead side, much of the warehousing has been demolished and a steel stockholder (Smiths Steel Stockholders – previously located on the site occupied by Wirral Metropolitan College’s Twelve Quays Campus… adjacent to Morpeth Dock) now occupies the site.
Watersports on Morpeth Dock with what is now Wirral Metropolitan College's 12 Quays Campus in the background
The 12 Quays Campus viewed from adjacent to Egerton Bridge
Opposite the now dammed, entrance to Egerton Dock is the East Float Dock. The entrance to this arm of the docks was once spanned by a swing bridge connecting the Birkenhead side of the docks to a man-made island known as Vittoria Quay and Dock which accommodates warehousing and additional shipping berths. In later years the dock has been home to laid-up Isle of Mann Steam Packet Company ships, Fishery Protection vessels and even a company building and repairing tugs and small ships. Adjacent to the entrance to the docks from the Birkenhead side, where the roundabout is today was a police station. It was close to "D" Bridge and backed onto Egerton Dock. Opposite were the Mersey Docks and Harbour Board workshops. This location is now occupied by the Tower Quays business development.
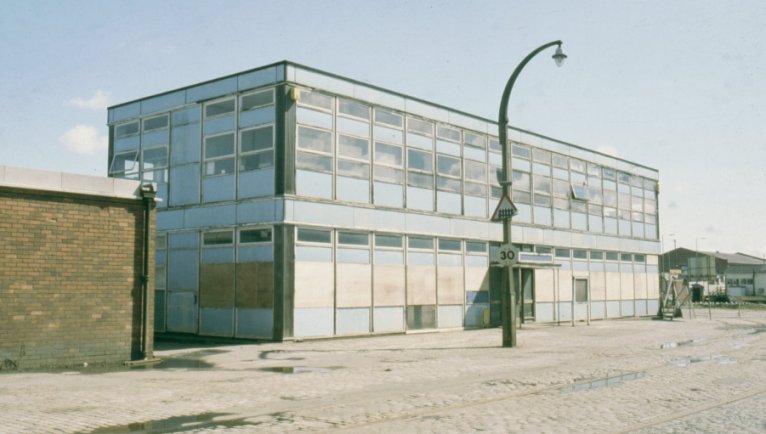
The police station located close to "D" Bridge
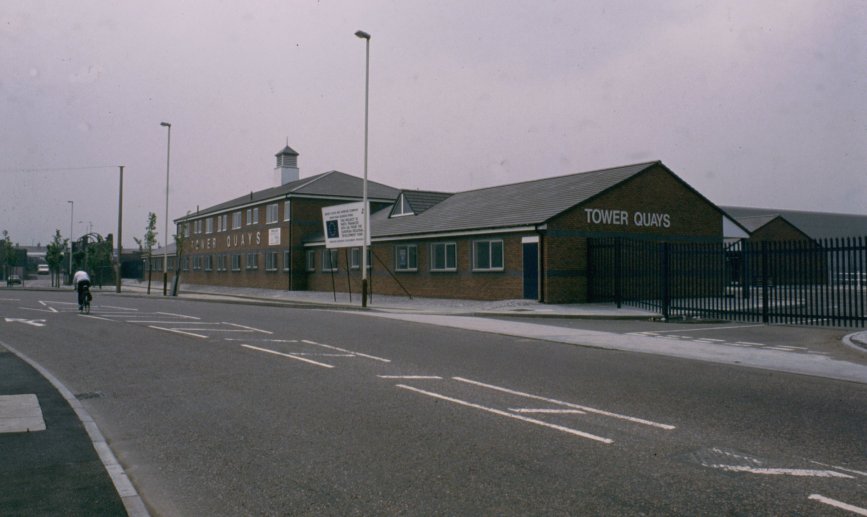
Opposite where the Police Station was is located Tower Quays Business Development
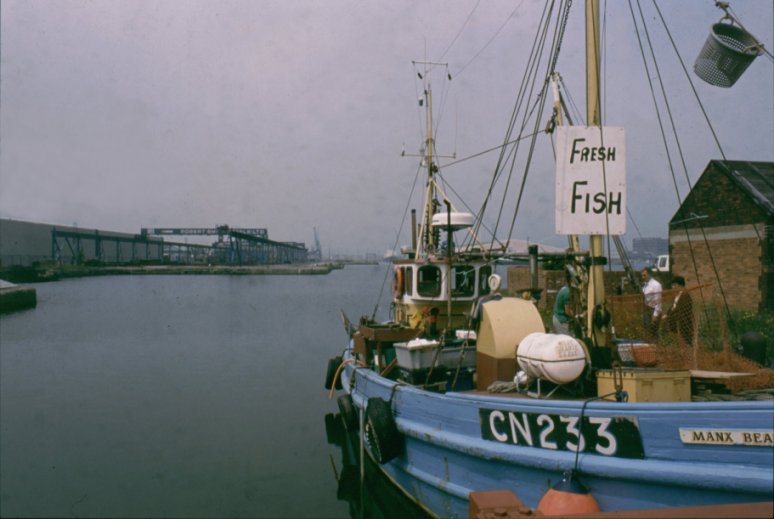
The fishing boat "Manx Beauty" moored at Tower Quays on Tower Road with Vittoria Dock in the background
The partially dismantled Vittoria Swing Bridge
East Float from Tower Quays... note demolished warehouses on the left in the distance
Spiller's Flour Mills photographed from the island between "A" and "B" Bridges
(Photograph - James M Wood Collection)
Mooring jetties on East Float in 1986
Looking towards the Four Bridges from Duke Street Bridge in the 1960's
(Photograph - James M Wood Collection)
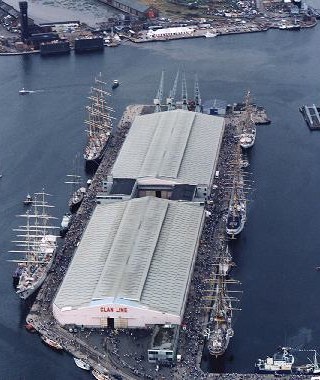
An aerial photograph of Vittoria Dock and the East Float during the Tall Ships' visit in August 1984
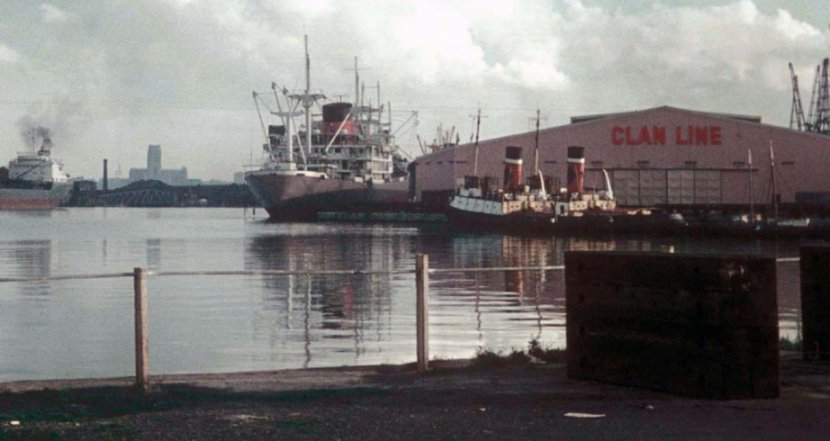
A 1989 photograph of The East Float showing the Historic Warships and the now demolished mill building (centre)
In 1982 when the Argentineans invaded the British Falkland Islands her next tour of duty was to have been three months in the West Indies, but she quickly adapted to the urgency of the situation and steamed the 8000 miles south as part of the task force ordered to recapture the Islands. At South Georgia on 21st April 1982, “H.M.S. Plymouth” took part in the first direct action against Argentinean forces when her “Wasp helicopter” fired a missile at the submarine “Santa Fe” and as a result of this action the enemy submarine was beached by her crew. The “Santa Fe” was thus the first enemy warship to be put out of action during the conflict. “H.M.S. Plymouth” later helped carry out the bombardment of enemy positions ashore prior to troop landings. The first stage of the liberation of the Falklands had been completed only three weeks after the Argentinean invasion, but the most dangerous period was to come, when she escorted the waves of landing craft to the beaches. Argentinean aircraft attacked “H.M.S. Plymouth” and the other ships in San Carlos Water, which became nick-named "Bomb Alley.
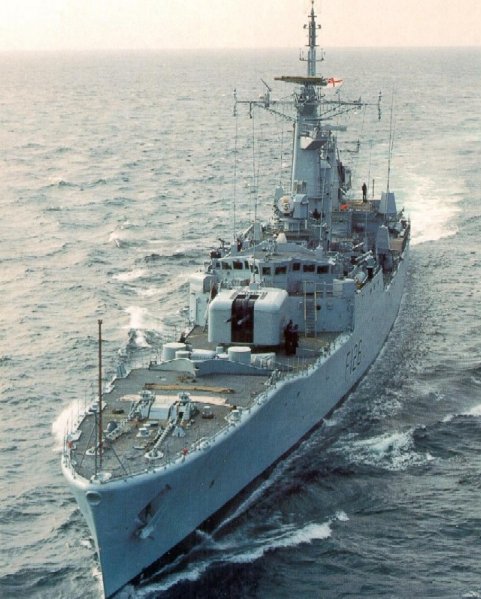
HMS Plymouth whilst still in service
(Photograph - www.hmsplymouth.co.uk)
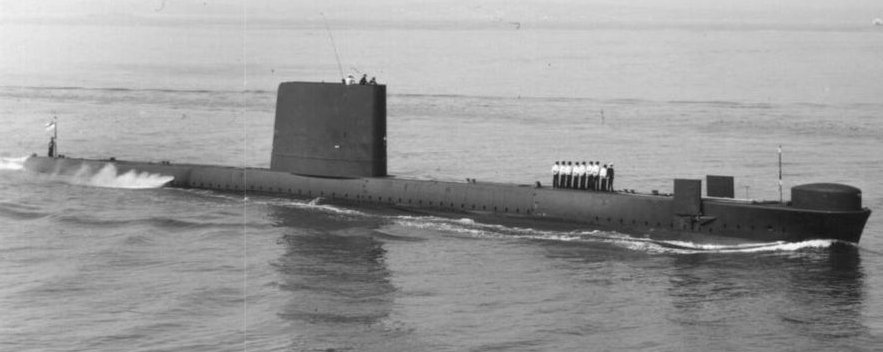
HMS Onyx whilst still in service
(Photograph - www.taringa.net)
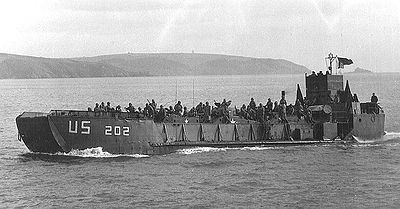
An LCT (Landing Craft Tank) similar to LCT 7074
(Photograph - www.historicwarships.co.uk)
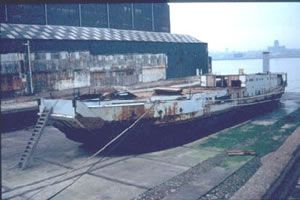
LCT 7074 (otherwise known as "Landfall") is the last surviving LCT that took part in the D-Day landings of World War Two. More than 700 landing craft tank provided the backbone of the invasion of Normandy. LCTs could carry eleven Sherman tanks and LCT 7074 carried ten of them to Normandy. Nine managed to reach the the beach without being hit or breaking down. After returning to Southampton, LCT 7074 carried American reinforcements back to Normandy for the assault on Cherbourg. After the War the Royal Navy handed the LCT 7074 to the Master Mariners of Liverpool and for many years she was the lunch club, in a central position in Canning Dock on the Liverpool Waterfront, later to be a floating nightclub known as "Nightclub Landfall" moored in Stanley Dock. The Warship Preservation Trust hoped to complete restoration of the LCT 7074 but she is currently sunk adjacent to the Spillers Mills apartments.
"Landfall" being inspected at Cammell Lairds
(Photograph - www.historicwarships.co.uk)
The Mersey Bar Lightship LV23, christened “The Planet”, was built by Philip & sons of Dartmouth Devon (who also built some of the Mersey Ferryboats) in 1960 who were also responsible for building some of the Mersey ferryboats. For many years she was moored at the entrance to the River Mersey at the Bar as a navigation aid. Whilst on station she could not run into port to avoid a storm, as she had no propulsion engines. She had to sit it out any storms whilst attached to the seabed by her two strong anchors. Built more solidly than today's Warships, this little vessel could handle all that the elements could throw at her. With thick steal plates riveted and welded together, the sea would have to work hard to destroy it. As previously mentioned she is not part of the Historic Warships Collection but is owned by the Planet Preservation Society and shared the warships’ moorings until a more suitable location was found at Canning Dock adjacent to the Strand in Liverpool.
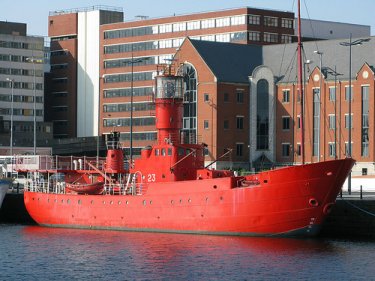
LV23 - Lightship "Planet" moored in Liverpool's Canning Dock
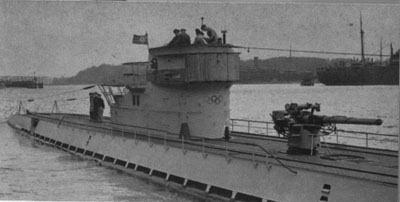
U534 whilst still in service
(Photograph - www.scaleshipyard.com)
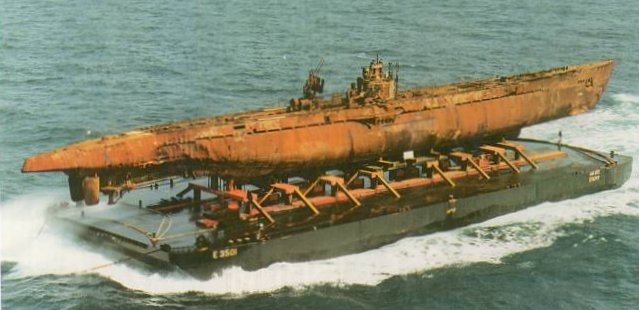
U534 aboard a barge in the English Channel
(Photograph - www.submerged.co.uk)
In 1993, Karsten Ree, an eminent Danish publisher and businessman organised the raising of “U534” from the seabed near Elsinor and the subsequent delivery to the Historic Warships Collection at Birkenhead. The “U534” is the only German U-boat to be raised from the seabed after being sunk by the Allies during World War Two. “U534” was raised in 1996 and brought to the Historic Warships site on a barge. She was then lifted from the barge onto dry land, cleaned and prepared for visitors. A local company donated materials for the reconstruction of the conning tower that was destroyed when she was sunk and another local firm donated a special coating for the steelwork to preserve it and to blend the new conning tower with the existing “rusty looking” steelwork.
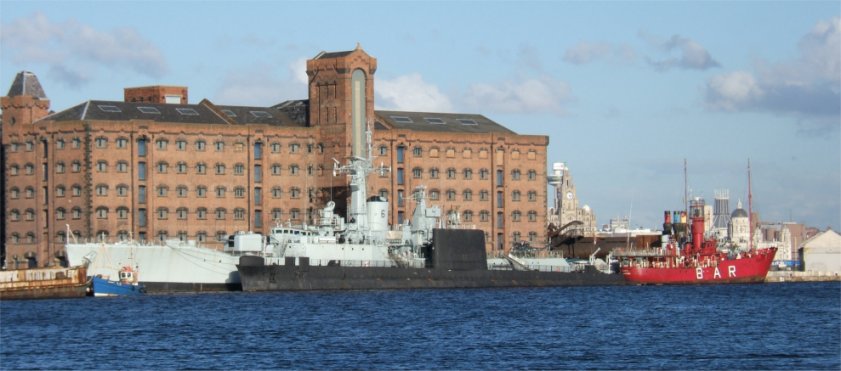
U534 in it's original location besides Spiller's Mills
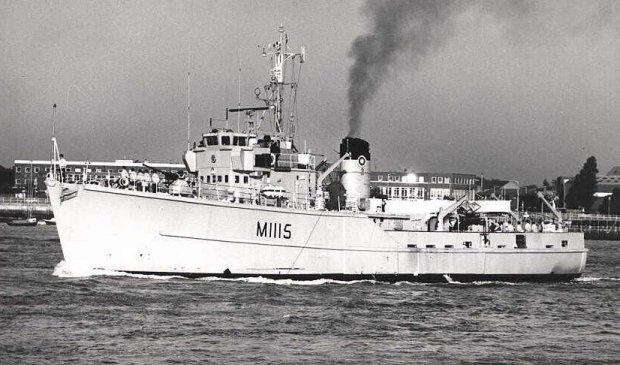
HMS Bronington whilst still in service
(Photograph - www.ggpht.com)
“HMS Bronington”, is a minesweeper built in 1954. She one of the last survivors of the Royal Navy’s “Ton” class of wooden minesweepers and minehunters… the last vessels built for the Royal Navy to have a wooden hull. Her hull was constructed from timber (Mahogany) so that there was no steel present to trigger the magnetic sensors on mines, and so, explode the mine when there were steel-hulled vessels in the proximity. She saw service around the coasts of Britain and Scandinavia, and was commanded by HRH Prince Charles… The Prince of Wales between February and December 1976. After she was decommissioned she was moored at Trafford Wharf in Manchester Docks, adjacent to the Imperial War Museum – North until July 2002 when she was acquired by the Historic Warships Trust and sailed down the Manchester Ship Canal to her new home in Wallasey Docks. Prince Charles returned to HMS Bronington on 10th March 2003 to officially open it to the public after undergoing some restoration work and repainting.
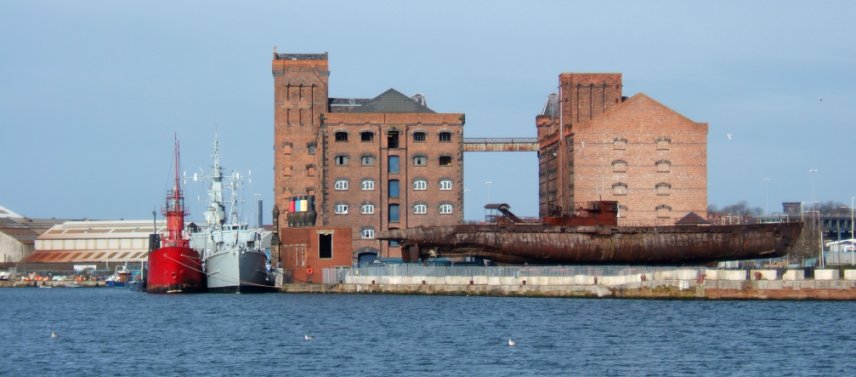
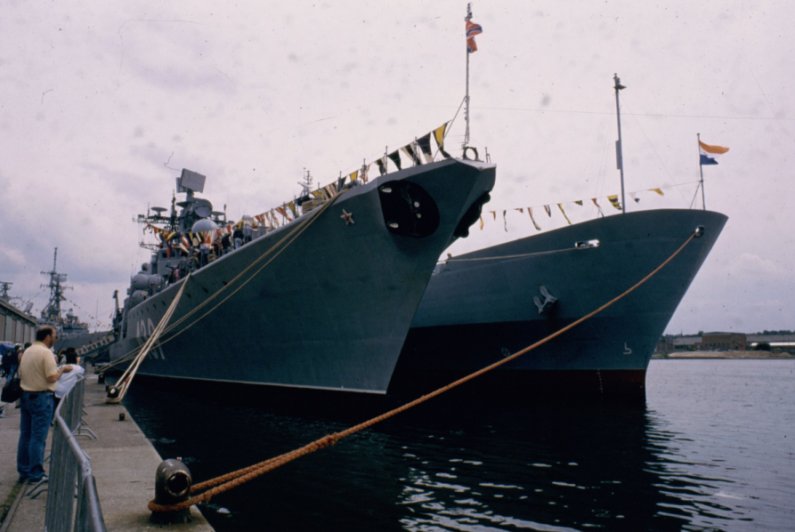
The Historic Warships Collection prior to it being disbanded
The Historic Warships Trust went into liquidation in February 2006 and due to the site required for the adjacent Spillers Flourmill conversion to a housing development the ships were moved to Cavendish Quay temporarily, until a new permanent home could be found. The U534 was loaded onto special bogies and moved a couple of hundred metres down to Mortar Mill Quay. A shock announcement that H.M.S. Onyx had been sold and was to be moved to Barrow-in-Furness came at the beginning of June 2006 and it looked as though this heralded the break-up of the collection. This turned out to be correct. HMS Plymouth was subsequently moored in Vittoria Dock until it was sold for scrap. This took place at a Turkish scrap yard in 2014. H.M.S. Bronington was towed to Cavendish Wharf where it has rotted beyond repair and is scheduled for scrapping as well. LCT 7074 had sunk at the small craft moorings adjacent to the Spillers Flour Mills development and was raised in 2014 then transported to the National Museum of the Royal Navy where it is undergoing restoration.
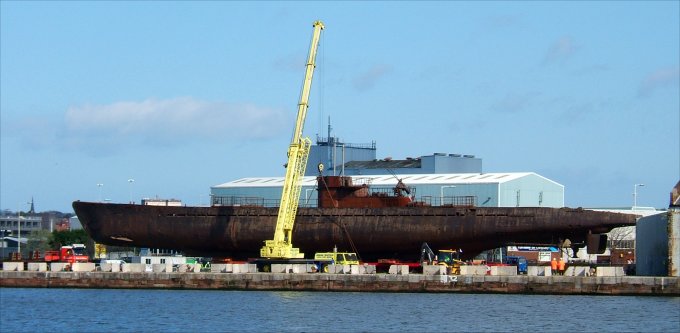
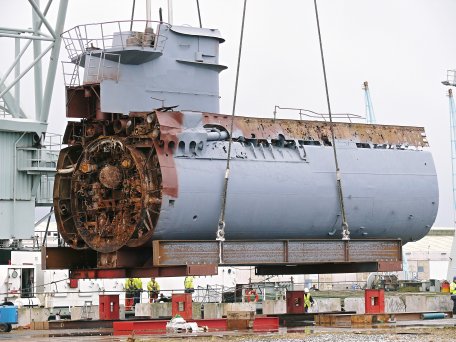
U534 being prepared for separation into five sections
At the beginning of February 2008 work commence to cut "U534" into five pieces and move it onto a specially prepared display and appreciation area next to Woodside Ferry Terminal as a tourist attraction. It is sad that the U-boat had to be cut-up but unfortunately this is the only financially viable way of transporting it to its new location.
The Mortar Mill Quay Warehouse adjacent to the Tower Road/Dock Road roundabout and U534's temporary home was demolished at the same time. By the 8th March 2008, the cutting-up of U534 was completed and it was awaiting the "Mersey Mammoth" floating crane to lift the sections from the quayside and transport them to Woodside Ferry.
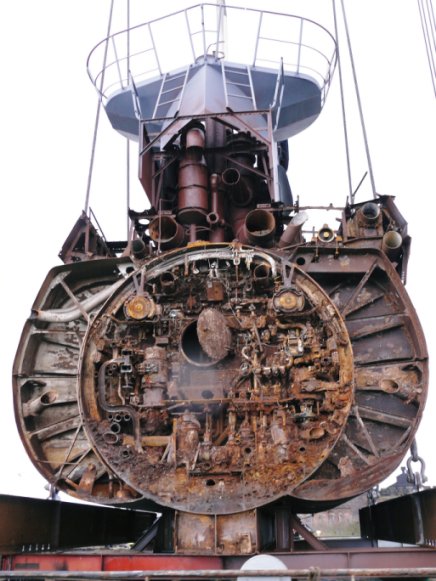
The cross-section of U534
(Photograph - James M Wood Collection)
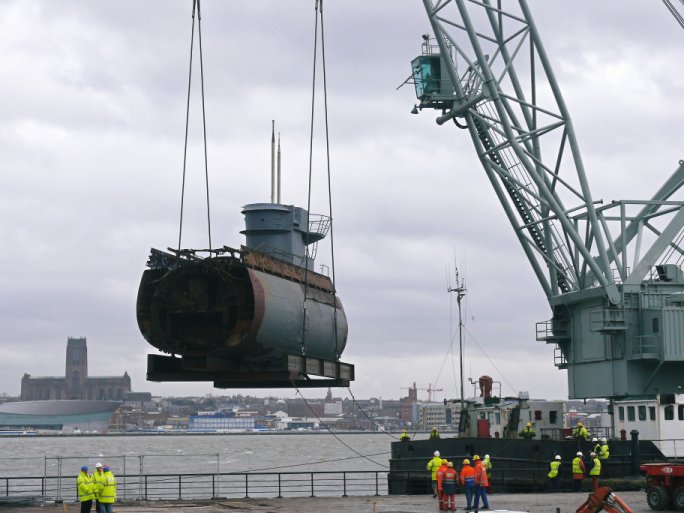
The centre section of U534 being lifted by the "Mammoth" floating crane
(Photograph - James M Wood Collection)
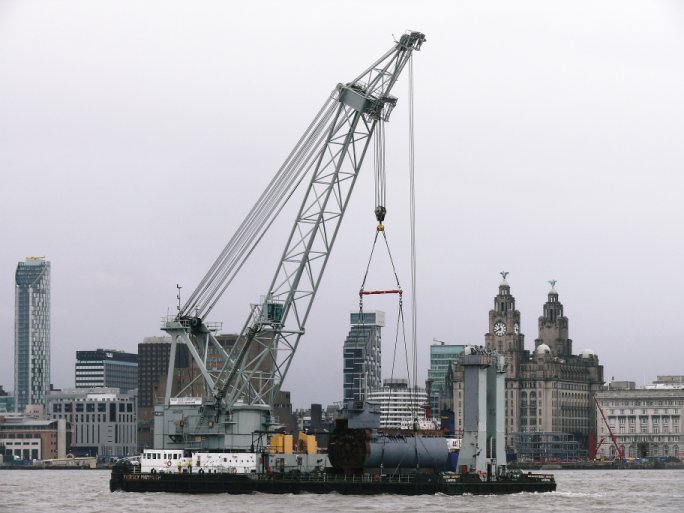
The "Mammoth" mid-river with the centre section of U534 on board
(Photograph - James M Wood Collection)
The first section to be moved was the centre section containing the conning tower. It was lifted from the quayside on Monday the 10th March and delivered to it's new home on the same day. The other four sections followed shortly afterwards. During the initial inspection of the U Boat, two M4 Enigma cipher (coding) devices were discovered as well as other artefacts relating to WW2 naval warfare. These are part of a display in the new appreciation centre at Woodside which opened during in February 2009.
The first section of U534 being lowered onto the quayside at Woodside
(Photograph - James M Wood Collection)
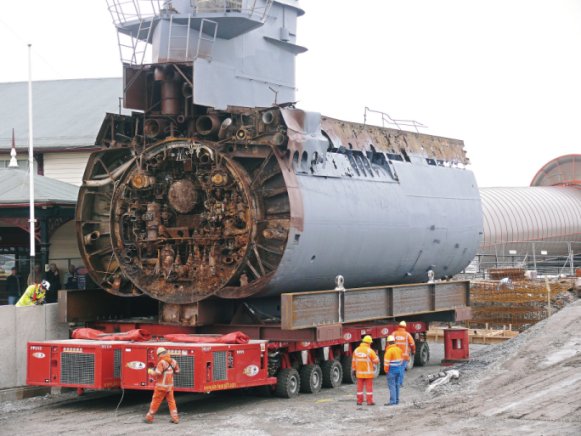
The centre section of U534 being manoeuvred into position on a remote controlled bogie
(Photograph - James M Wood Collection)
Although the “Planet” light ship was not technically part of the collection it had become an “adopted” member. It had been up for sale for a long time and a buyer was found shortly after the collection was broken-up. It was moved to the end of the East/Great Float, the location of a small ship fitter’s yard. Here it was refitted, modified externally and repainted before, on the 13th September 2006, it was towed to its new mooring over the river in the Albert Dock complex. Here it is to be a multi-media training studio where students from LIPA (Liverpool Institute for Performing Arts) will learn radio broadcasting, sound mixing and other multi-media based crafts. Unfortunately, British Waterways (who manage the Albert Dock complex" did not consider the "Planet" a suitable resident in the complex and it was moved to Salthouse Dock until a more suitable mooring can be found.
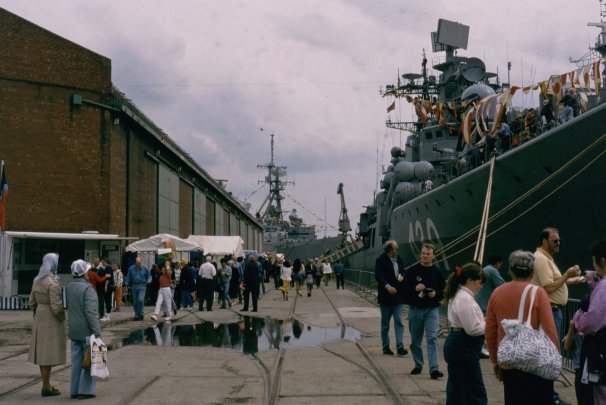
Visiting warships usually attract hundreds, if not thousands of visitors
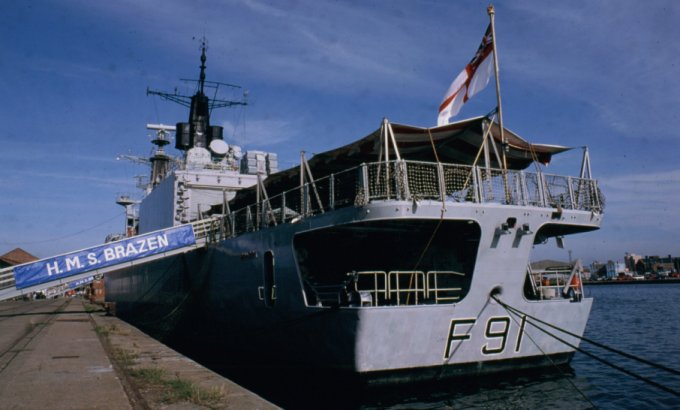
Visitors were given the opportunity to go aboard many of the ships like HMS Brazen pictured above

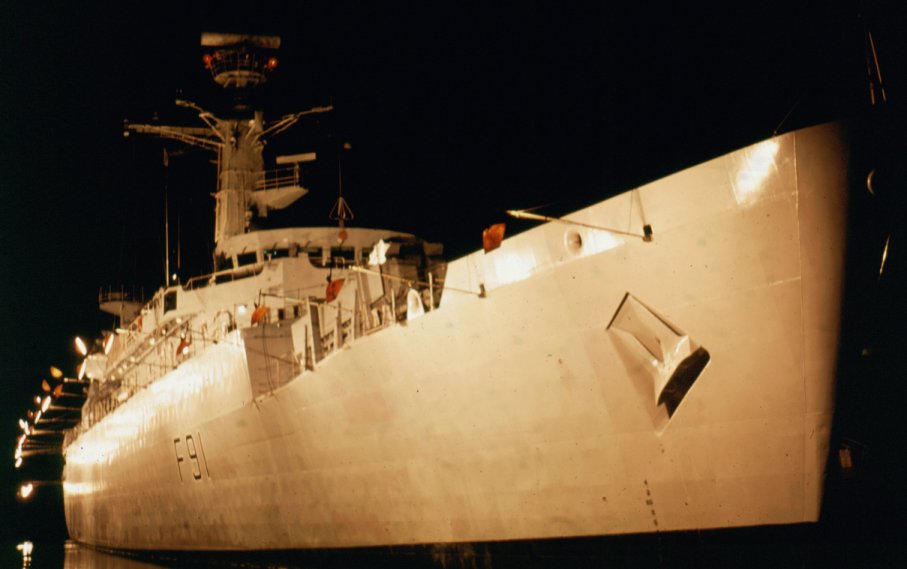
As an added bonus many of the ships were floodlit at night presenting photographers with many photo opportunities
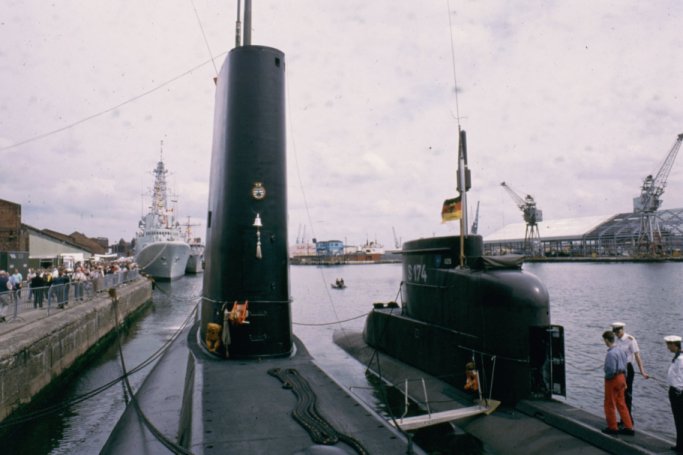
Visitors were also given the opportunity to board a submarine and see what they are like inside
Warships from all over the world took part in this visit... like the Russian one seen here
As well as the resident Historic Warships, there have been many Royal Naval visitors over the years. During the mid-1980's there was a visit from various fighting ships and submarines including HMS Brazen. RFA (Royal Fleet Auxiliary) Sir Galahad also passed through the docks when visiting the Bidston Dry Docks in 2005. Cammell Lairds have recently been awarded contracts to refit many naval ships and their appearance in both Wallasey Pool and the main shipyard location adjacent to Birkenhead Priory is a regular occurrence.
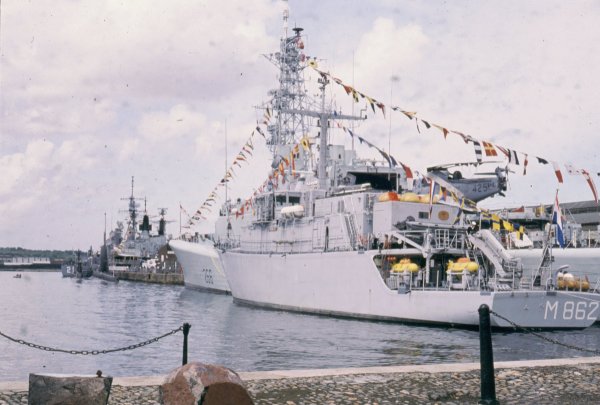
M862 Zierikszee is a member of the Netherlands Navy
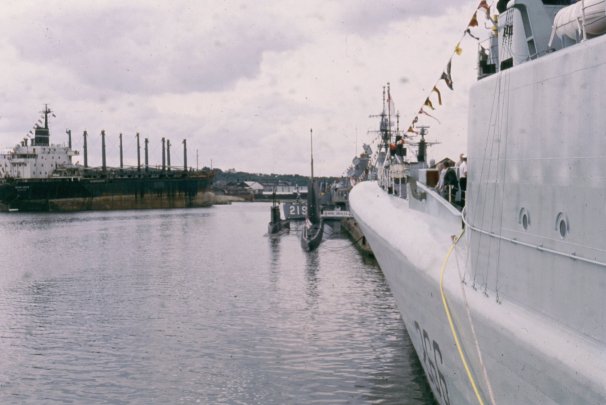
Cargo ships rub shoulders with their military cousins

On another occasion RFA Sir Galahad entered the docks en-route to Bidston Dry Docks
Adjacent to where the Historic Warships collection was kept are what remains of the old Spiller’s Flourmills complex. At one time there were barge wharves running between the mill buildings where barges were loaded with flour and pulled by tugs as far as Manchester along the Ship Canal. The barge docks are now in-filled but their locations can still be traced by following the bollards used for mooring the barges. Some of the mill buildings and adjacent warehouses have been demolished due to fire or redundancy and the remainder are being converted into residential apartments. The sites of the demolished buildings are now a hard standing for timber, steel and other commodities waiting to be loaded onto ships. On the other side of the Dock Road is the now closed Stone Manganese Bronze Company who produced large propellers for ships built at Cammell Lairds and many other ship builders all over the world. Next door to Stone Manganese is McKenna’s Building. This colourful piece of architecture is one of the last remaining dock buildings in the area.
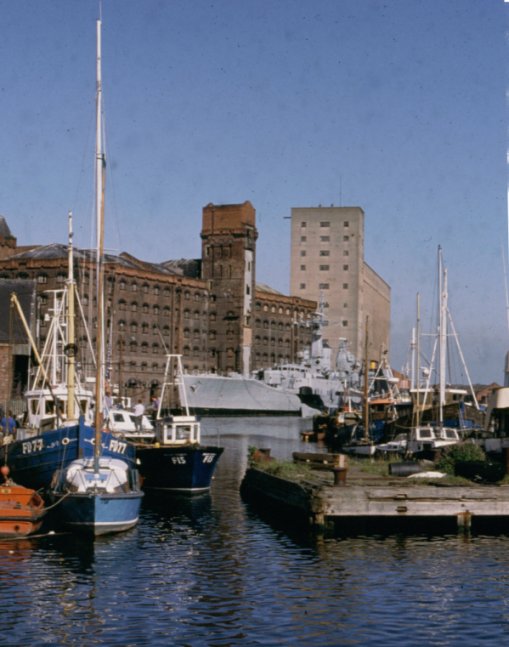
Small craft moorings adjacent to the Historic Warships site in East Float
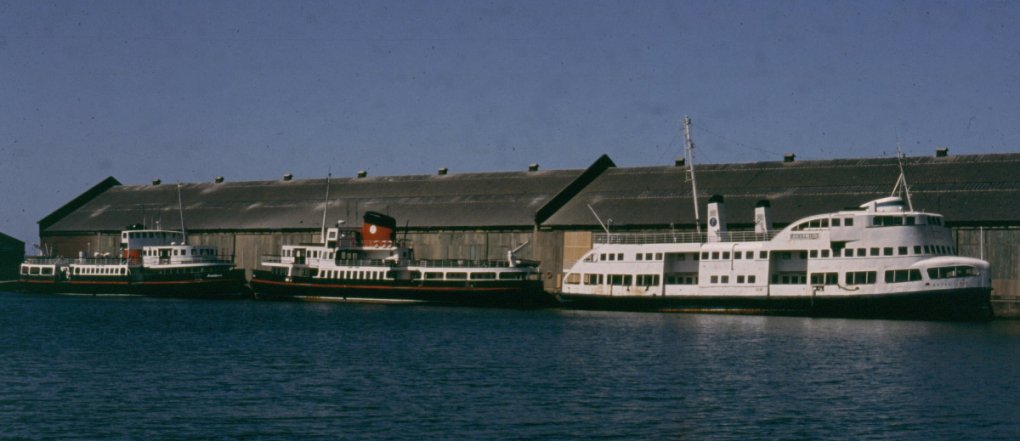
Mersey Ferry boats "Woodchurch", "Overchurch" and "Royal Iris" moored in the East Float in 1987
A little further upstream on the East Float, immediately after the small craft private moorings and adjacent to Duke Street Bridge, the Mersey Ferries have their main moorings for craft not in service or undergoing maintenance. It is not uncommon to see two of the craft not in service moored “breasted up” to each other. On occasions such as Christmas Day when the ferries are not in service, all three craft can be seen moored together. When the craft are moored in this way it illustrates the similarities in their size and design. Opposite the ferry boat mooring berths is a small pier, which was also once a mooring for small craft such as fishing boats and pleasure craft.
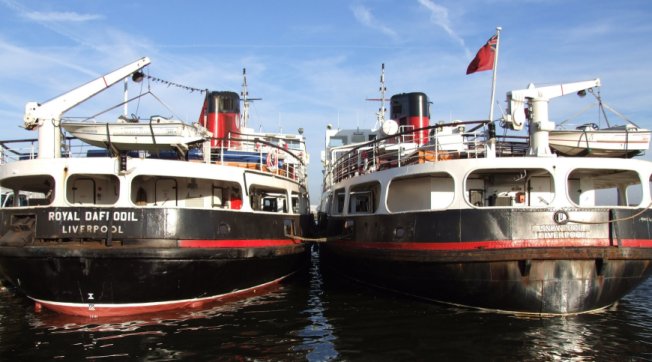
The Mersey Ferryboats "Royal Daffodil" and "Snowdrop" moored at Duke Street Bridge
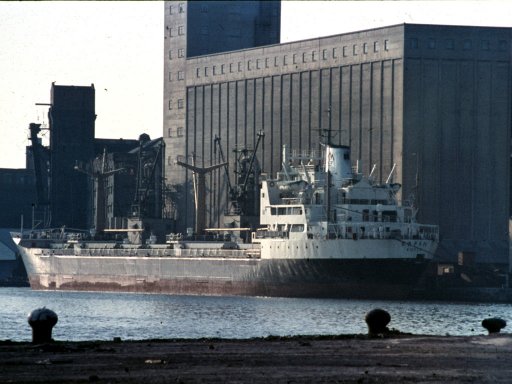
Small craft jetty on the East Float with Spiller's Mills in the background
The original Duke Street Bridge was a swing bridge which was replaced with today's “bascule” type bridge in 1929. It separates the East Float dock to the West Float dock and is the second connection between Wallasey and Birkenhead.
The original Duke Street bridge from the Wallasey side of the Pool
The original Duke Street Bridge viewed from the Birkenhead side of the Pool
The location of Duke Street Bridge whilst removed for refurbishment
Duke Street Bridge foundations whilst the bridge was removed for refurbishment
It was refurbished in 1991 complete with new foundations and machinery. Throughout the period that it was out of commission, traffic chaos ensued, especially during the rush hour as one of the main routes to and from Wallasey was over the bridge. Traffic had to be re-routed over the Four Bridges or “Penny Bridge” routes. On the Birkenhead side on the boundary of the dock estate was located a traffic island where a policeman was located during daylight hours directing traffic at the Duke Street/Corporation Street junction.
Duke Street Bridge after refurbishment
The photograph below shows locomotives from the Vulcan Foundries in Newton le Willows at Cavendish Wharf/Gilbrook Basin, adjacent to the Rank Ocean Flour Mills being loaded onto a ship for export.... probably South Africa.
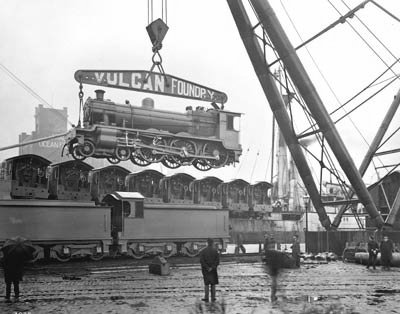
Railway locomotives being lifted onto a ship for export at Cavendish Wharf/Gilbrook Basin
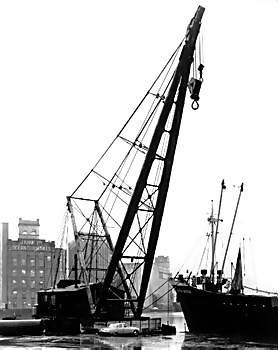
The large 150 ton crane at Cavendish Wharf/Gilbrook Basin featured in the railway locomotive photograph
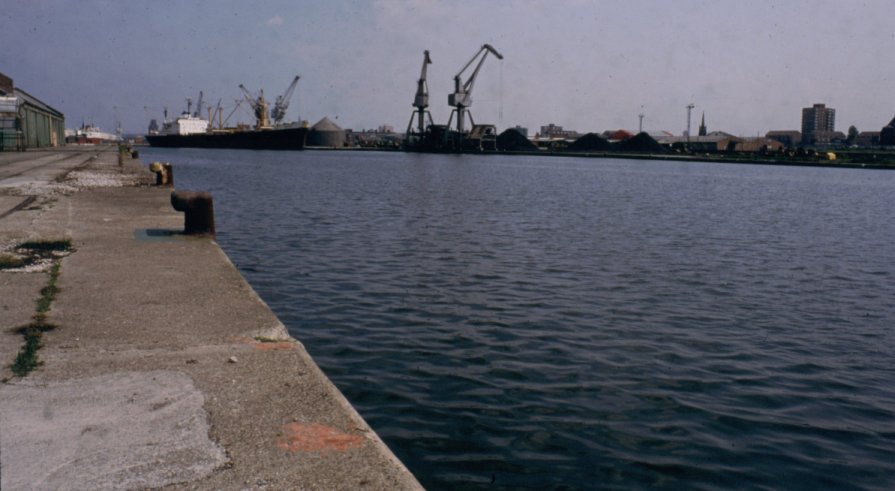
Cheshire's Quay on the West Float with Cavendish Wharf/Gillbrook Basin and Swan-Necked Cranes in the background
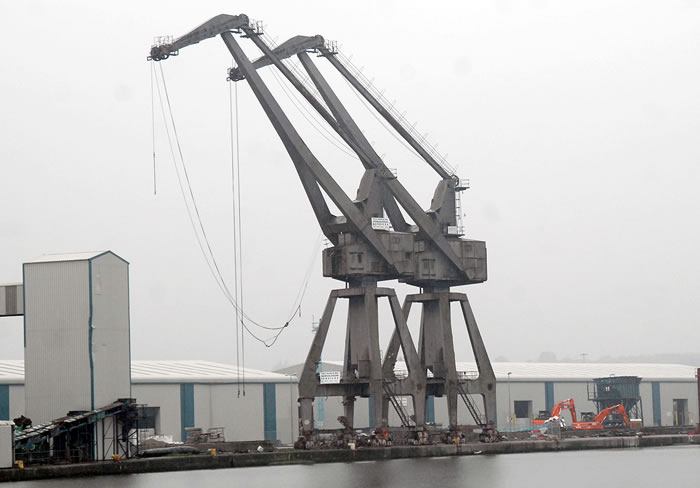
A closer view of the "Swan-Necked" Cranes before demolition
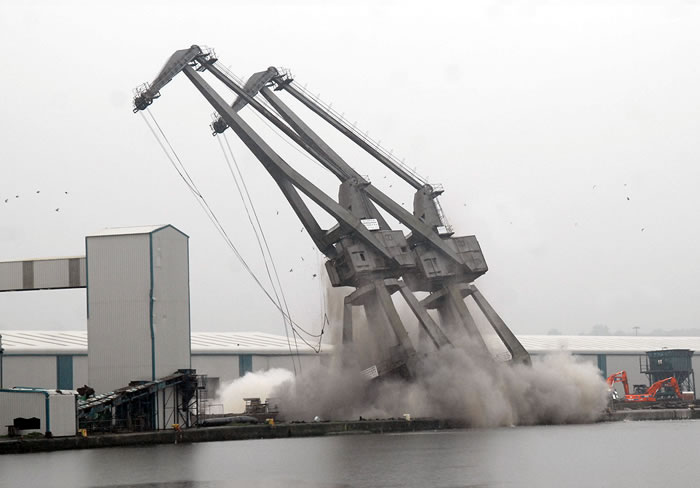
Demolition of the "Swan-Necked" Cranes
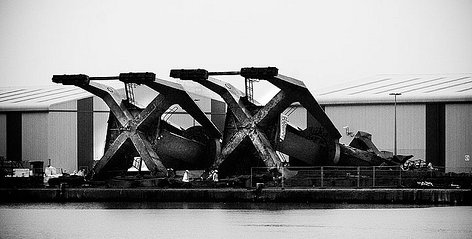
Remains of the demolished "Swan-Necked" Cranes
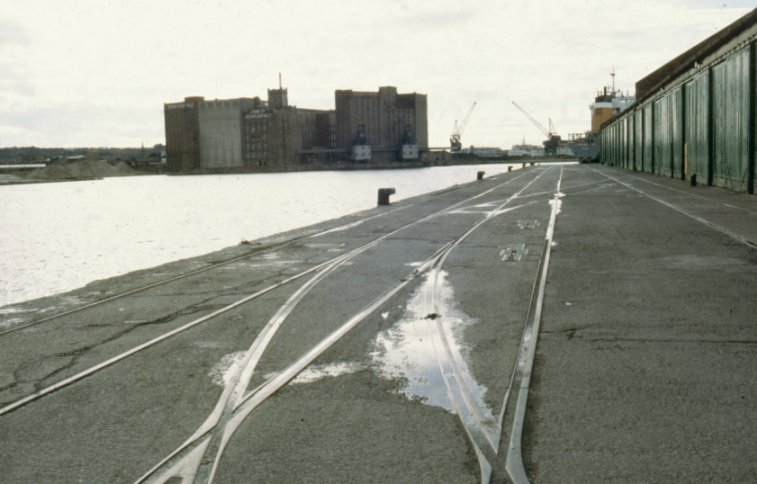
Cheshire's Quay looking towards Beyer and Peacock's dry docks in 1987
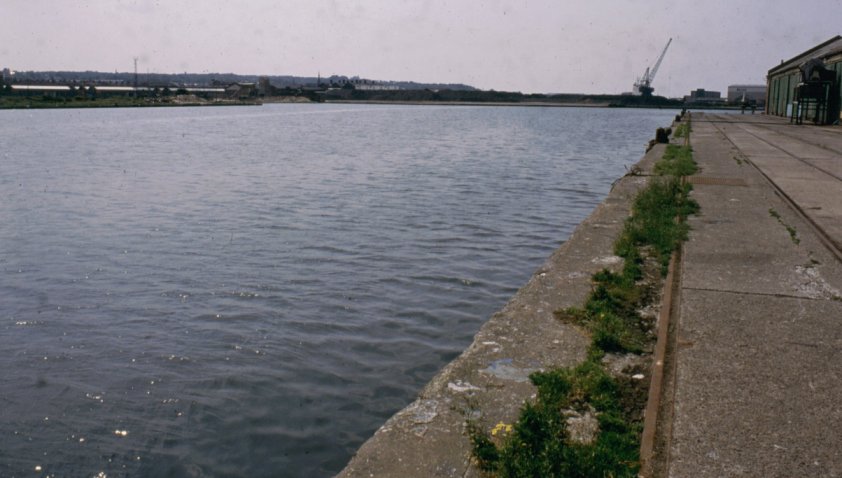
The same location fifteen years later... note absence of the Rank Flour Mills
Immediately after the Duke Street Bridge, on the Birkenhead side of the West Float was located a pair of “Swan Neck” cranes serving loading/unloading berths for various commodities ranging from bulk powders to newsprint. These cranes were local landmarks for many years until they were demolished on Sunday the 27th April 2008. The warehouses on the opposite side of the docks have been leased for purposes not connected with the docks. The docks curve around the right and on the left is derelict land once the location of yet more flour mills... this time belonging to Ranks in the shape of their "Ocean Mills"
Rank Flour Mills as seen from the Penny Bridge
Next to this area were originally two large dry docks owned by Beyer and Peacock. The first dock has been filled-in leaving the second dock the only dry dock in the system. Beyer and Peacock were bought-out by Cammell Laird and when they went bankrupt in 2001 were bought by a company resurrecting the “Western Ship Repairers” name. The original Western Ship Repairers were located between the Cammell Laird shipyard and the Birkenhead Woodside Ferry, now landscaped and accommodating luxury housing development known as Priory Wharf. The company has since obtained the Cammell Lairds name and is now using this name here and at the shipyard on the banks of the Mersey adjacent to Birkenhead Priory.
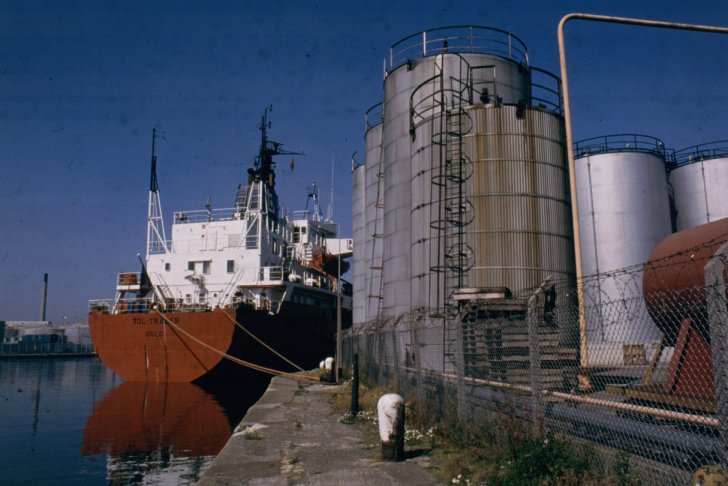
United Molasses Berths now operated by Tate and Lyle sugar refiners
Opposite the dry dock are the molasses berths originally owned by United Molasses but now operated by Tate and Lyle the sugar refiners. Syrups and edible oils are transhipped to the adjacent processing works and dispatched all over the North West. There was another oil processing plant adjacent to the “Penny Bridge” only the oil processed there is of the mineral variety for lubricating all kinds of machinery and vehicles. Mobil Oil had a presence on this site for many years and refines raw products before distributing them all over the country. In 2003, Mobil Oil closed their oil processing plant and sold the site to Western Ship Repairers... now Cammell Lairds.
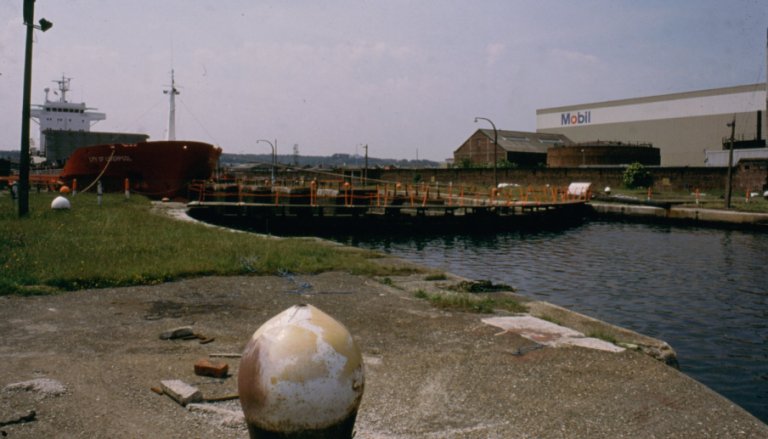
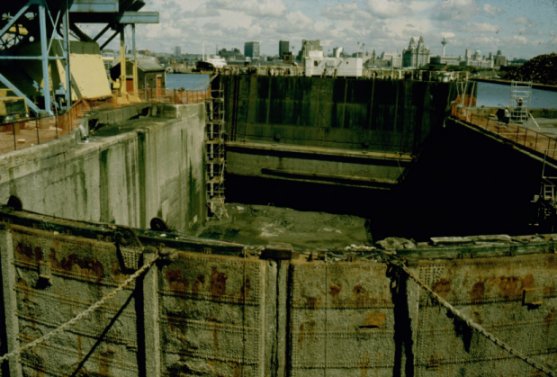
The Bidston Dry Dock entrance gates with the disused Mobil Oil Plant on the right
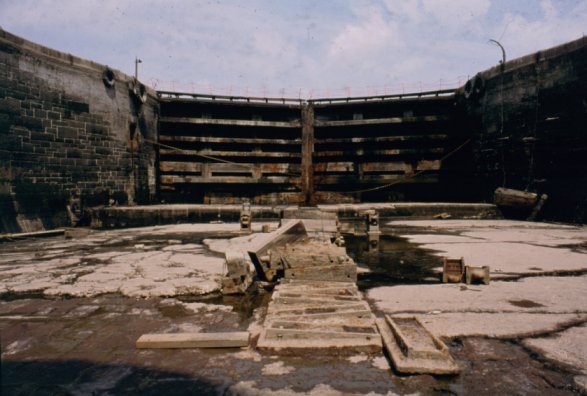
The dry-dock entrance lock gates seen from the floor of Bidston Dry Dock
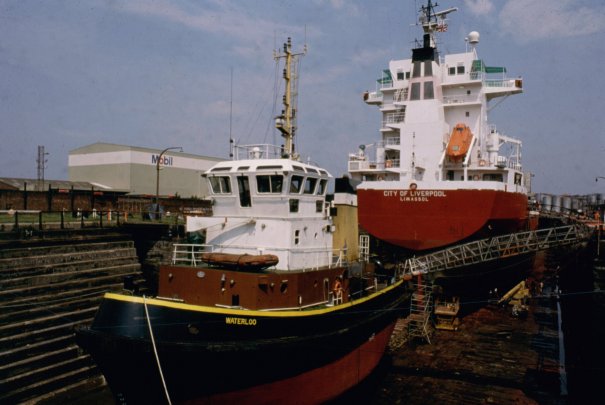
MV "City of Liverpool" and the tug "Waterloo" sharing the dry dock
"I hope it doesn't slip!"
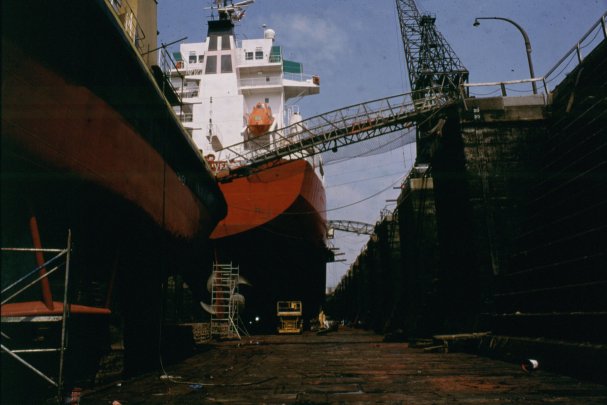
The size of a modern merchant ship has to be seen out of the water to be appreciated

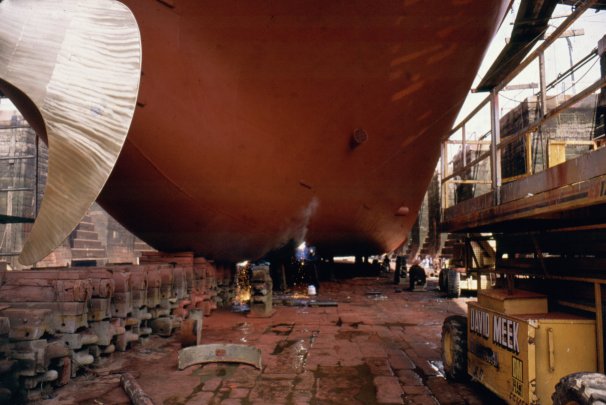
The large variable pitch propeller belonging to MV "City of Liverpool"
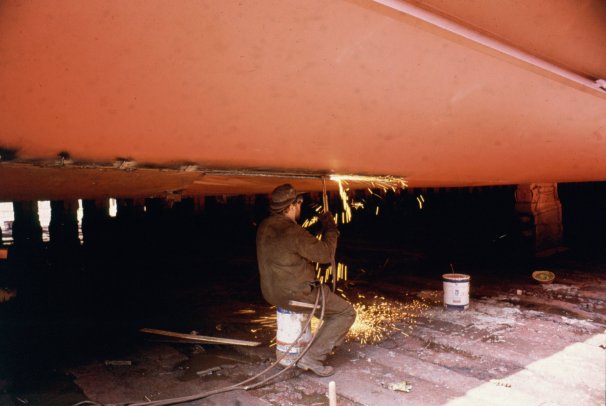
Repair work on the Dry Dock floor
At the side of the Mobil Oil plant is a small loading wharf. It is no longer in use but at the far end of it, the River Birkett runs into the docks system after being culvetted from behind the British Rail Motor Traction Workshops.

The Steam Packet Company's "Seacat" awaiting admission into Bidston Dry Dock
Adjacent to the Poulton or "Penny" Bridge is situated the Liverpool Victoria Rowing Club. This club was founded in 1884 and was originally located on what is now Bidston Dock where they had constructed a boathouse. The original boathouse was demolished and rebuilt during the winter of 1921/22. In 1930 Bidston Dock, which was then the only part of Wallasey Pool that had not been developed was converted into a working Dock. The club was relocated to the Birkenhead side of the Great Float where they built a two storey boat house. This lasted until 1990 when it was burnt down by vandals. Mersey Docks and Harbour Company came to the rescue and donated the shell of today's headquarters located on the Wallasey side of the Great Float opposite the old Mobil Oil Company factory. Over the years this building has been outfitted with many facilities which was officially opened by Sir Steve Redgrave in April 2004.
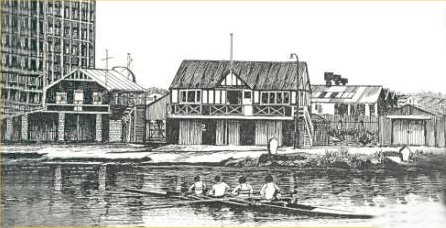
An engraving depicting Liverpool Victoria Rowing Club's old Clubhouse on the Great Float
(Courtesy of Liverpool Victoria Rowing Club)
Looking towards the Penny (Poulton) Bridge and Bidston Dock from the dry docks
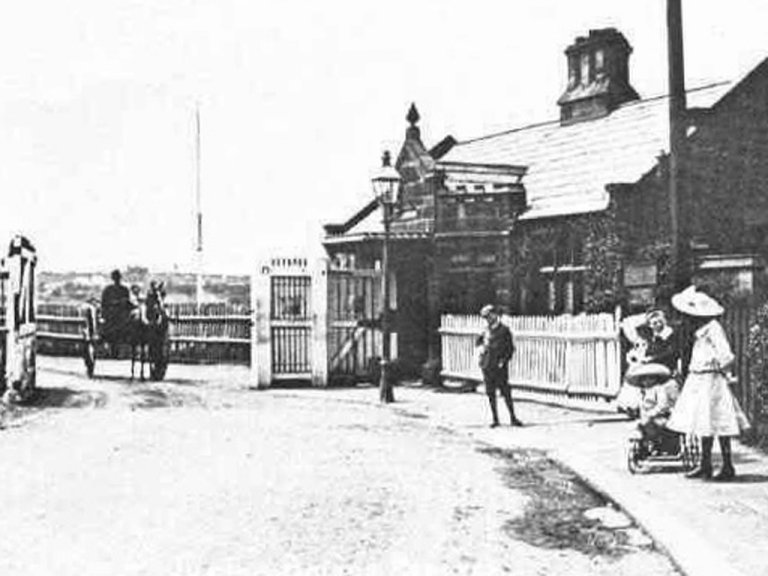
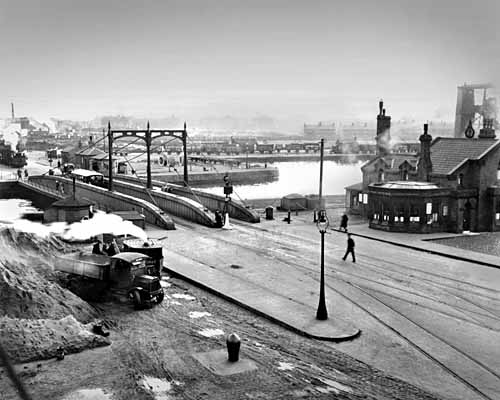
First "Penny" Bridge and Toll House
(Photograph - James M Wood Collection)
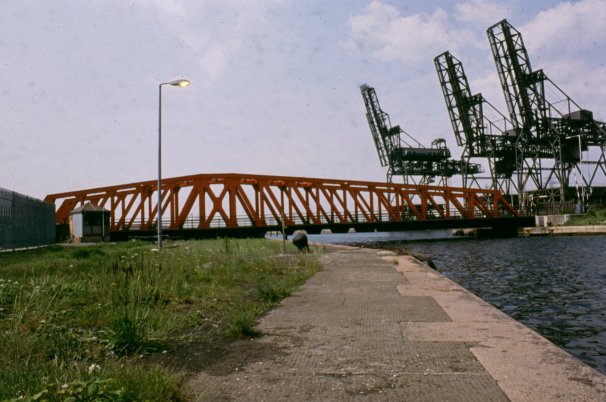
There has been a bridge on the site of the “Penny” or Poulton (to give it the official name) Bridge for many years. The original wooden bridge was replaced with a steel swing bridge which was prone to sticking in hot weather due to expansion of the structure and was replaced in 1994. The new bridge was built at Cammell Lairds Shipyard and floated to site on a barge before being lifted into position by the giant “Mersey Mammoth” floating crane.

The second "Penny" Bridge prior to replacement
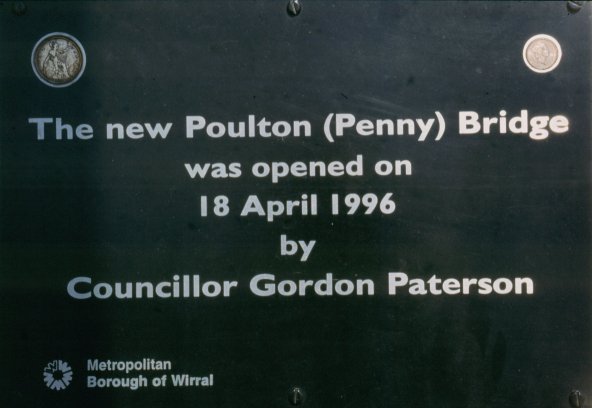
Plaque commemorating the opening of the new bridge

The third Penny Bridge opened in 1996

The new Penny Bridge prior to in-filling of Bidston Dock
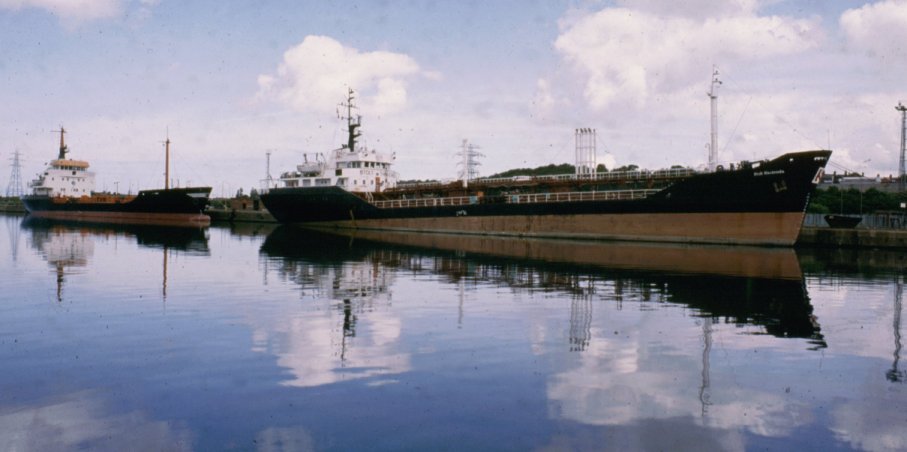
Bidston Dock was the unloading point for many commodities such as iron ore for the John Sumner’s Steel Works at Connah's Quay, Deeside and coal for Fiddlers Ferry Power Station on the banks of the River Mersey between Runcorn and Warrington. When these trades dried-up the dock fell into disuse and the large cranes used for unloading were dismantled. On occasion, ships would be laid-up at Bidston Dock whilst awaiting overhauls or new owners. An interesting fact concerning Bidston Dock is that the last steam train from the Pool was pulled by a “9F 2-10-0” (Evening Star Class - the last class of main line steam locomotives built in England) pulling a rake of trucks containing coal to Fiddler’s Ferry Power Station in 1966.
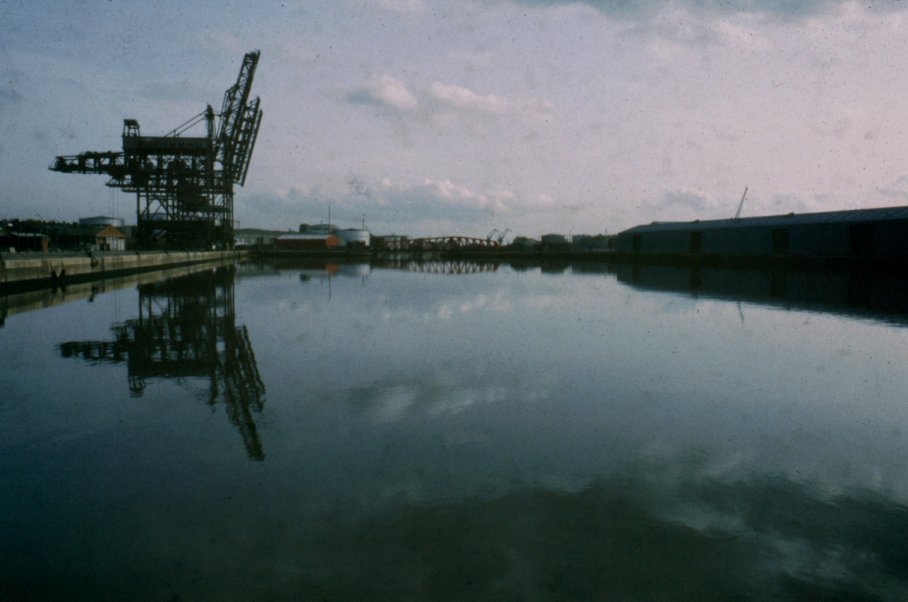
Bidston Dock prior to demolition of the gantry cranes and in-filling
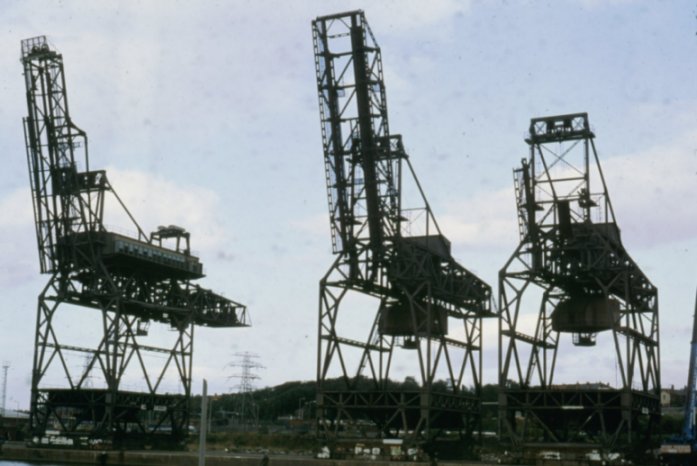
The gantry cranes at Bidston Dock
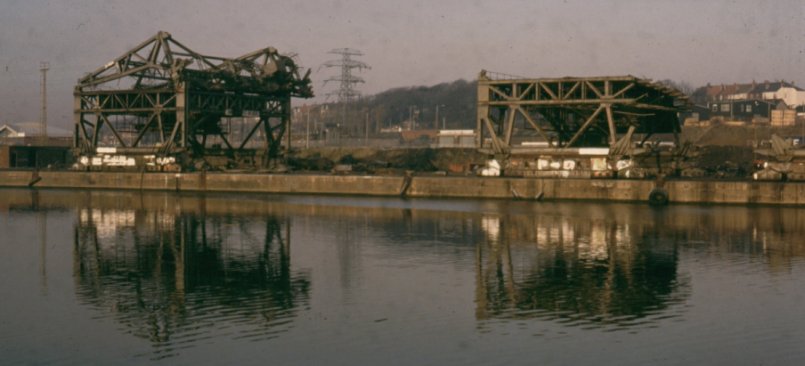
Demolition of the gantry cranes
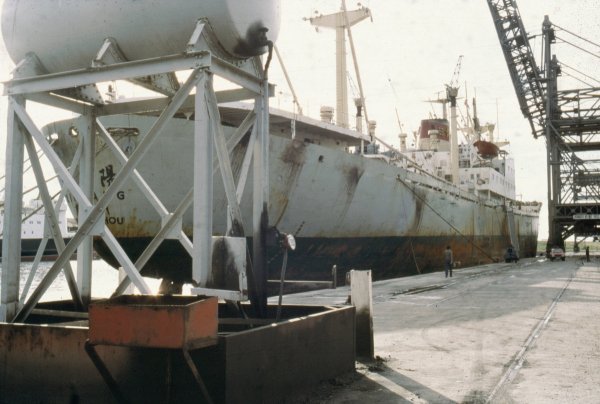
Ships unloading timber at Bidston Dock...
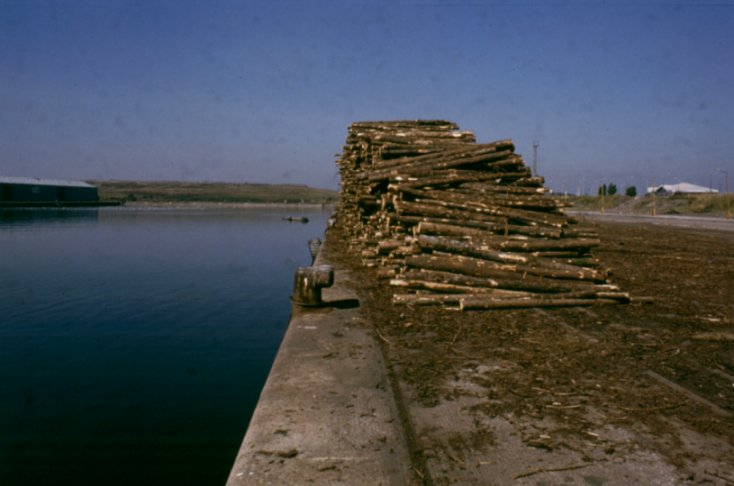
... and the subsequent cargo awaiting collection
Bidston Dock was in-filled during the spring of 2002 and the swing bridge at location of the “Penny Bridge” was swung for the last time in January 2003 to facilitate in-filling beneath it. Most probably it will be too long before the bridge is removed, the in-fill used as a foundation for a widened Poulton Bridge Road and the site of Bidston Dock redeveloped.
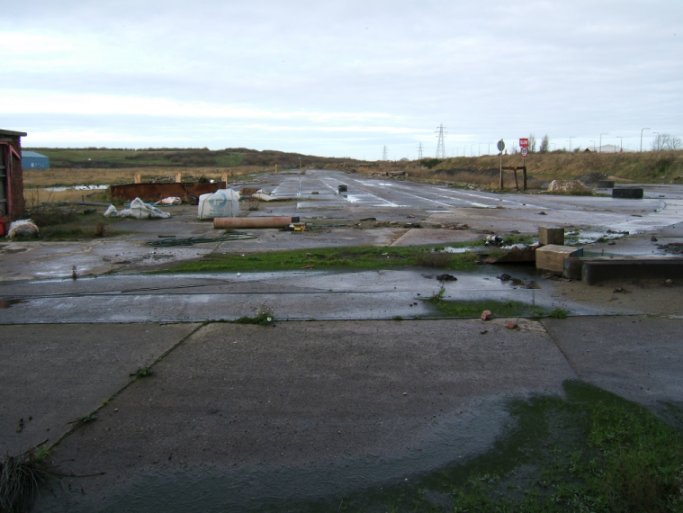
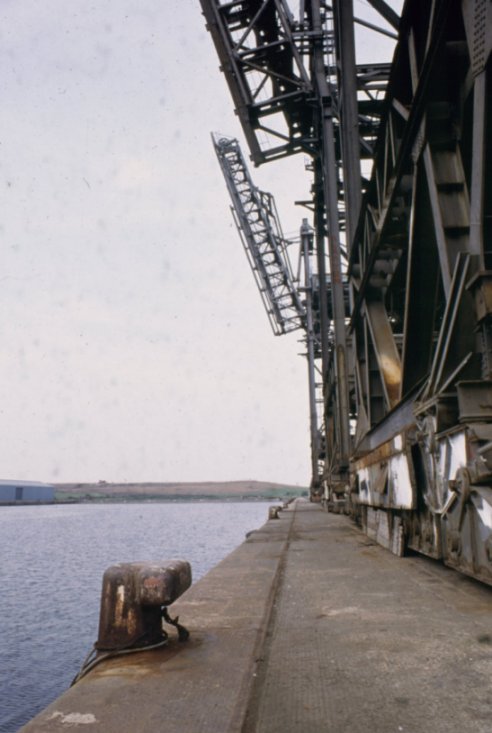
Bidston Dock quayside beside the in-filled dock
Bidston Dock after in-filling
At the far end of where the Bidston Dock used to be is a wall separating what is known locally as the “Overflow” from the location of the dock. Craft have not been able to use this small area of water which is part of the original Wallasey Pool for well over a hundred years but is connected by a culvert to the main dock system beneath the in-filling of Bidston Dock. It is used mainly by anglers trying to lure the unwary fish of which, reputedly, there are many.
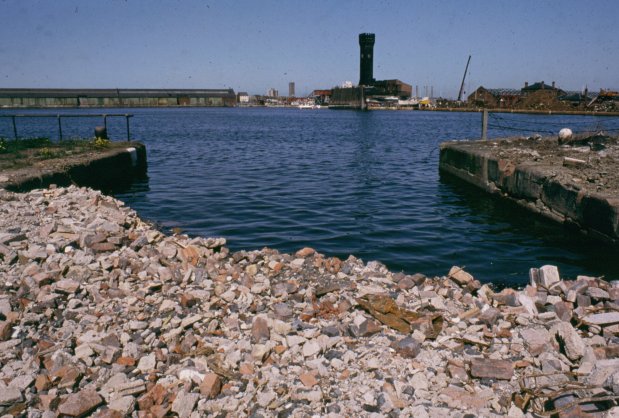
The now isolated "Overflow"... the only remaining part of Wallasey Pool not developed
The way across the head of the peninsula to the sea is now barred by the landfill tip at Bidston Moss (now a nature reserve), although the River Birkett circum-navigates the large man-made mound and winds its way behind Leasowe where there is a confluence with the River Fender. The Birkett springs from the ground and feeds a lake in the nature reserve behind Leasowe Lighthouse.
This aerial view of the docks shows the drained Bidston Moss with the "Overflow" in the centre
The character of the Wallasey and Birkenhead Docks System has changed over the last forty years from a busy, bustling port to a more laid-back, semi-derelict area. I can remember, in years gone by, being held-up when the bridges were “off” to allow large ocean-going cargo ships to pass or for trains rumbling along tracks set into the centre of the road disrupting the traffic. These days it is a rare treat (a sentiment not shared by all commuters) to watch a ship passing beneath one of the bridges even if they due usually coincide with rush hour. At one time I looked upon the passage of these ships as a nuisance, now they are a pleasant reminder of how things were in days gone by.
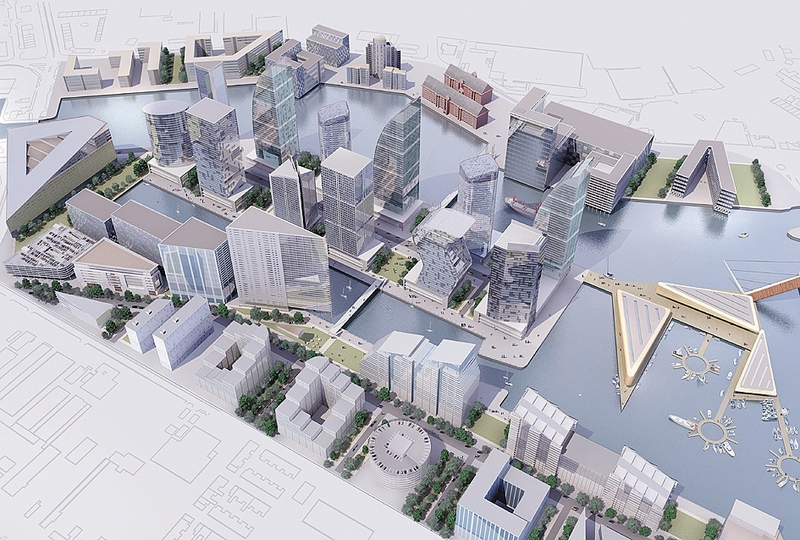
A computerised impression of how the Wallasey Pool Regeneration Scheme might look with Vittoria Dock in the centre
(CGI - Peel Holdings)
On the 22nd September 2005, the Mersey Docks and Harbour Company was acquired by Peel Holdings… the company that owns the Manchester Ship Canal, the Bridgewater Canal, Manchester Docks, Liverpool John Lennon Airport and the Trafford Centre, to name just a few of their assets. The day to day running of the dock’s bridges and locks is undertaken by British Waterways who also own and run Liverpool’s South Dock system. Twelve months after acquisition, in September 2006, the company announced a long-term investment and development programme for the Wallasey and Birkenhead Docks area. The plan envisages a waterfront as imposing as that of Liverpool’s. This would include building new business premises as well as leisure and residential developments. No doubt the development will be well documented and photographed taking place but it will not be an overnight transformation as the time scale to completion is over twenty years. The area was previously well photographed and we will watch with interest the developments that replace some of our much-loved landmarks.
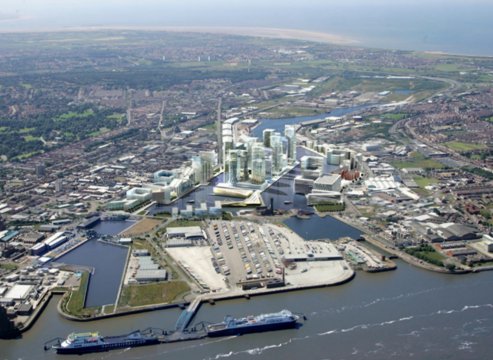
Another computerised impression of how the Regeneration Scheme might look as seen from the river
(CGI - Peel Holdings)
Updated 11/05/2017