Two-Way & Citizens’ Band Radio
Protocol & Information
A Web Page by Cyril J Wood
![]()
![]()
Walkie-Talkie (HT) and Citizen Band (CB) radios are a useful tool that can be used for communication in many situations where it is impractical, impossible, unsuitable or inappropriate to use a mobile or landline telephone. As well as the more obvious (and historic) use by road users CB radios are also used by many other types of user including security, industrial and those traveling on canals and inland waterways. In the latter instance, they can be used to give or receive directions at locks and swing/lift bridges or warn other boaters of on-coming traffic when approaching a blind bend, lock or bridge.
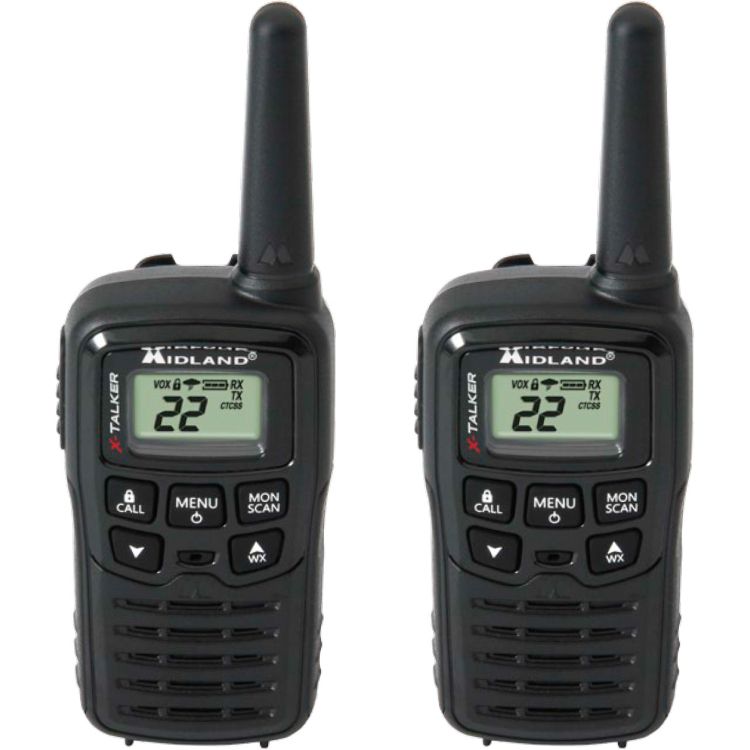
Typical budget walkie-talkie radios
In certain marine circumstances such as on rivers and for communication with traffic co-ordinators, river pilots, dock administration, lock/bridge operators, other marine traffic, etc. communication can be via VHF radio which requires specialist equipment and a license to operate. Specific channels are used for particular purposes, including for emergencies, ship-to-shore communications etc. Various courses are offered by institutions such as the Royal Yachting Association to teach potential users how to use this type of equipment and to qualify for an SRC (Short Range Certificate) prior to being able to use them.
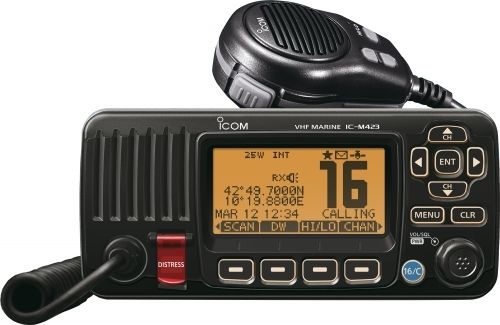
Typical marine VHF two-way radio transceiver
Two-way walkie-talkie radios or HT (Hand-held Transceivers) modulate in FM, usually transmit on the 400-500mhz UHF spectrum or the 27mhz VHF band. CB walkie-talkies are available, but less popular due to the propagation characteristics of the 27 MHz band and the general bulkiness of the equipment involved. UK Business VHF Radios use frequencies from 136 - 174MHz. There are some units that use the "Part 15" 49 MHz band (shared with PMSE - Programme Making and Special Events devices, cordless phones, baby monitors, and other LPDs – Low Power Devices) as well as the "Part 15" 900 MHz band. The units in these bands do not require licenses as long as they adhere to FCC Part 15 power output rules.
For more information on the frequencies used by various types or radio communication equipment refer to the Frequency Charts section of this web page or the Ofcom Website at https://www.ofcom.org.uk.
CB (Citizens’ Band) Radio Protocol
Introduction
CB radios are a useful tool to use when traveling and can also serve as an excellent means of two-way communication. Historically they were primarily used by truck drivers for updates on traffic conditions and other information useful for truck drivers but today they have wider applications. It is important to remember that whether using a CB radio for work or play, certain etiquette should be followed. Some channels are used specifically for emergencies (9) or logging-on and basic information (19 and 14).
Emergency Channels
Channel 9 on a CB radio is considered an emergency channel. This channel is used to contact other users to relay a message to the emergency services and should not be used for any other purpose.
Breaking In
When using a CB Radio, you don’t just start talking. You should ask permission to join a channel or begin a conversation. This is done by saying "break" or "breaker" followed by the channel number that you are on. Channel 19 is the most common, logging-on or basic information gathering channel. If you want to ask a question or report a traffic condition, you begin by saying "break one nine" and waiting for someone to answer with a phrase such as "go ahead, breaker."
Switching Channels
To avoid "taking over" a channel with your conversation, you should switch to a less-used channel if you intend to hold an extended dialogue. Through use, you will find which channels are less frequented out of the 40 CB channels that are generally available. Simply tell the person you are conversing with to switch to another mutually agreed channel that has less traffic on it.
Common Courtesies
Use common sense when speaking on a CB radio. These are public access channels. Avoid the use of swearing and profanity. Do not speak over other users' conversations. It is important to remember that truck drivers are the most frequent CB users and that they have a culture of their own. Respect their jobs and their place on the air waves.
Roger Beep
Some transceivers possess the ability to transmit a “beep” known as a Roger Beep (usually a 1khz audio signal) when the transmit key is released. This informs other users that you have stopped transmitting and you are awaiting a reply.
CB Language/Phraseology
| Affirmative | - | Yes (avoid yeah, yup, etc.) |
|
Negative |
- |
No (avoid nah, nope, etc.) |
| Reading You Five/Loud and Clear |
- |
Good signal strength 5 by 5 (see Q Codes section) |
| Over |
- |
Transmission finished. I and am waiting for your reply (Short for "Over to you") |
| Out |
- |
Communication is over. I have finished talking to you and do not expect a reply. The channel is available for others to use |
| Clear |
- |
I have finished talking to you and will be turning my radio off |
| Roger or Roger that | - | Information received and understood |
| Copy or Copy that | - |
Mostly used to acknowledge received information. (May also mean repeat back to me the information I just gave you or in Maritime terminology "I heard that as well" – originated from Morse Code meaning copied down on paper) |
| Wilco | - | Will comply (after receiving new directions/instructions) |
| Send your traffic | - | Send your transmission |
| Say again | - | Please repeat your last message |
| Break | - |
Signals a pause during a long transmission to open the channel for other transmissions, especially for allowing any potential emergency traffic to get through |
| Break-Break | - | Signals to all listeners on the frequency, the message to follow is priority |
| Go ahead |
- |
Resume transmission |
| Stand-by | - | Transmission has been acknowledged, but I am unable to respond right now |
| Handle | - | User name or nick-name used on air |
In addition to plain language there exists the Ten Code. This code consists of pre-determined numbered messages. The code emanated from the United States and older readers may remember a TV series called "Highway Patrol" in which actor Broderick Crawford's catch phrase was "Ten four". Due to a lack of standardisation amongst various states and users its use is not recommended and the use of plain language has superseded it. It remains popular with American truck drivers though. The Ten Code below is the CB variant and is not to be confused with the version used by Law Enforcement and Security officers. Its use is not encouraged in the United Kingdom as it is not very popular, however, I have included it below for reference purposes.
|
Frequently Used Ten Codes |
||
|
10-0 |
- |
Caution |
|
10-1 |
- |
Unable to copy - poor reception (see Q Codes section) |
|
10-2 |
- |
Receiving well (see Q Codes section) |
|
10-3 |
- |
Stop transmitting |
|
10-4 |
- |
I acknowledge/affirmative/message received |
|
10-5 |
- |
Relay message |
|
10-6 |
- |
Busy, stand by |
|
10-7 |
- |
Out of service, leaving air (going off the air) |
|
10-8 |
- |
In service, subject to call (back on the air) |
|
10-9 |
- |
Repeat message/say again |
|
10-10 |
- |
Transmission completed, standing by (listening) |
|
10-11 |
- |
Talking too rapidly |
|
10-20 |
- |
Advise of location/where are you? |
|
10-21 |
- |
Call by telephone |
|
10-33 |
- |
Emergency: all units stand by |
|
10-36 |
- |
What is the correct time? |
|
10-51 |
- |
I'm headed your way (I'm 51 to you) |
|
Full Ten Code Listing |
||
|
10-0 |
- |
Caution |
|
10-1 |
- |
Unable to copy - poor reception (see Q Codes section) |
|
10-2 |
- |
Receiving well (see Q Codes section) |
|
10-3 |
- |
Stop transmitting |
|
10-4 |
- |
I acknowledge/affirmative/message received |
|
10-5 |
- |
Relay message |
|
10-6 |
- |
Busy, stand by |
|
10-7 |
- |
Out of service, leaving air (going off the air) |
|
10-8 |
- |
In Service, subject to call (back on the air) |
|
10-9 |
- |
Repeat message/say again |
|
10-10 |
- |
Transmission completed, standing by (listening) |
|
10-11 |
- |
Talking too rapidly |
|
10-12 |
- |
Visitor(s) present |
|
10-13 |
- |
Advise weather/road conditions |
|
10-14 |
- |
Message/information |
|
10-15 |
- |
Message delivered |
|
10-16 |
- |
Make pickup at... |
|
10-17 |
- |
Urgent business |
|
10-18 |
- |
Anything for me/us? |
|
10-19 |
- |
Nothing for you/us, return to base |
|
10-20 |
- |
Advise of location/where are you? |
|
10-21 |
- |
Call by telephone |
|
10-22 |
- |
Report in person to… |
|
10-23 |
- |
Stand by |
|
10-24 |
- |
Completed last assignment |
|
10-25 |
- |
Can you contact…? |
|
10-26 |
- |
Disregard last information/cancel last message/ignore |
|
10-27 |
- |
I am moving to channel… |
|
10-28 |
- |
Identify your station |
|
10-29 |
- |
Time is up for contact |
|
10-30 |
- |
Does not conform to FCC rules |
|
10-31 |
- |
Pick-up |
|
10-32 |
- |
I will give you a radio check |
|
10-33 |
- |
Emergency: all units stand by emergency traffic at this station |
|
10-34 |
- |
Trouble at this station, help needed |
|
10-35 |
- |
Confidential information |
|
10-36 |
- |
What is the correct time? |
|
10-37 |
- |
Breakdown truck required at… |
|
10-38 |
- |
Ambulance needed at… |
|
10-39 |
- |
Your message was delivered |
|
10-40 |
- |
Do not divulge location |
|
10-41 |
- |
Please tune to channel… |
|
10-42 |
- |
RTI (Road Traffic Incident) at… |
|
10-43 |
- |
Traffic congestion at… |
|
10-44 |
- |
I have a message for you (or…) |
|
10-45 |
- |
All units within range please report |
|
10-46 |
- |
Assistance required |
|
10-47 |
- |
Emergency road works at… |
|
10-48 |
- |
Traffic light repairs at… |
|
10-49 |
- |
Traffic lights out at… |
|
10-50 |
- |
Break channel |
|
10-51 |
- |
I'm headed your way (I'm 51 to you) |
|
10-52 |
- |
Ambulance required |
|
10-53 |
- |
Road blocked at… |
|
10-54 |
- |
Animals on road |
|
10-55 |
- |
n/a |
|
10-56 |
- |
n/a |
|
10-57 |
- |
n/a |
|
10-58 |
- |
n/a |
|
10-59 |
- |
n/a |
|
10-60 |
- |
What is your next message number? |
|
10-61 |
- |
Stand by for message on channel … |
|
10-62 |
- |
Unable to copy, use telephone |
|
10-62sl |
- |
Unable to copy on AM, use lower sideband (not an official code) |
|
10-62su |
- |
Unable to copy on AM, use upper sideband (not an official code) |
|
10-63 |
- |
Prepare to make written copy |
|
10-64 |
- |
Message for local delivery |
|
10-65 |
- |
Awaiting your next message/assignment |
|
10-66 |
- |
Clear/cancellation |
|
10-67 |
- |
All units comply |
|
10-68 |
- |
Delivery information |
|
10-69 |
- |
Message received |
|
10-70 |
- |
Fire at… |
|
10-71 |
- |
Proceed with transmission in sequence |
|
10-72 |
- |
Advise progress of fire |
|
10-73 |
- |
Speed trap at… |
|
10-74 |
- |
Negative |
|
10-75 |
- |
You are causing interference |
|
10-76 |
- |
En-route to… |
|
10-77 |
- |
Negative contact |
|
10-78 |
- |
Need assistance |
|
10-79 |
- |
n/a |
|
10-80 |
- |
n/a |
|
10-81 |
- |
n/a |
|
10-82 |
- |
n/a |
|
10-83 |
- |
n/a |
|
10-84 |
- |
My telephone number is… |
|
10-85 |
- |
My address is… |
|
10-86 |
- |
n/a |
|
10-87 |
- |
n/a |
|
10-88 |
- |
n/a |
|
10-89 |
- |
n/a |
|
10-90 |
- |
n/a |
|
10-91 |
- |
Talk closer to the microphone |
|
10-92 |
- |
Your transmitter is out of adjustment/faulty |
|
10-93 |
- |
Check my frequency on this channel |
|
10-94 |
- |
Please give me a long count |
|
10-95 |
- |
Transmit dead carrier for five seconds |
|
10-96 |
- |
n/a |
|
10-97 |
- |
Test signal |
|
10-98 |
- |
n/a |
|
10-99 |
- |
Mission completed, all units secure |
|
10-100 |
- |
Need to go to bathroom/toilet |
|
10-200 |
- |
Police needed at… |
If you ever need to use a two-way radio in a real emergency, it is vital that you are clearly understood. To do this it is important to understand the differences between a mobile telephone and a two-way radio. Two-way radios are not like a mobile telephone. Mobile/cell phones are what is known as "full-duplex" which means you can speak and listen at the same time. Most two-way radios are "simplex" which means you cannot hear anyone else whilst you have the Transmit/PTT (Push-To-Talk) button pressed. It is extremely important to take turns speaking. To help with this, standard radio procedures have been created.
The single most important mistake people make is failing to identify themselves. There may be several people using the same channel as you, so it’s important to know who you are directing your transmission to. To call someone, say the name of the person you want to call, followed by the words "This is," then say your name and "Over." Example: "Susan, This is John, Over.” It is important to say the name of the person you want to contact before saying your name, as this will get their attention, and they will listen to the rest of your message. The word "Over" leaves no doubt about whose turn it is to talk and avoids any confusion. It is important to say "Over", so they know when you have finished speaking. Some radios beep when you have finished transmitting, in which case you wouldn't need to say "Over", but it is still a good practice. It is basic "Radio Etiquette" to establish contact and make sure that you have the other person's attention before you start your message. If you hear someone calling you, acknowledge his or her call by saying, "Go Ahead" or "Stand By" This lets the caller know that you have heard them. Other users may use the initial contact message the other way around. For example... "John calling Susan over." It makes little difference which initial contact message you use so long as the person receiving can understand your message. Also remember, it may take someone a while to get to their radio and respond. Be patient in waiting for a reply.
Because only one person can talk at a time, it is just as important to listen on a two-way radio as it is to speak! When your business is finished, the person who started the conversation should end it by saying their name and the word "Out," which leaves no mistake that contact has ended. Always release the Transmit/PTT button whenever you stop speaking. If you forget and keep it pushed down while you are trying to think of something to say, the radio continues to transmit, making your battery run down faster and making "dead air" so that nobody else can speak or be heard. In the least sense, it is impolite. In an emergency, it could prevent someone with vital information from getting through. For example if they have an emergency, additional information or simply want to join in the conversation. Leave a second or two between "hand-offs" to give others a chance to break in. It is always best to speak in short simple phrases on the radio and toss the conversion back and forth with the word "Over." Don't speak immediately when you press the Transmit/PTT button, especially with digital radios which among all their benefits, have slightly longer delay from when the Transmit/PTT button is pressed to when they are ready to transmit speech. Wait 2-3 seconds. If you speak as soon you press the Transmit/PTT button, it can chop off the first syllable or word, making you hard to understand. If that word doesn't make it, you will just have to say it again and run down your batteries faster.
Radio User’s Phraseology and Language
|
Go ahead |
- |
Resume transmission |
|
Say again |
- |
Re-transmit your message |
|
Stand-by |
- |
Transmission has been acknowledged but I am unable to respond |
|
Roger/Roger that |
- |
Message received and understood |
|
Affirmative |
- |
Yes (avoid yeah, yup, etc.) |
|
Negative |
- |
No (avoid nah, nope, etc.) |
|
Over |
- |
Transmission finished/completed |
|
Out |
- |
Communication is over and the channel is available for others |
Standard Alphabets
Words used to spell out letters over the radio to avoid confusion over pronunciation.
Name Based Alphabet
|
A – Adam |
F – Frank |
K – King |
P – Paul |
U – Union |
Z - Zebra |
|
B – Boy |
G – George |
L – Lincoln |
Q – Queen |
V – Victor |
|
|
C – Charles |
H – Henry |
M – Mary |
R – Robert |
W – William |
|
|
D – David |
I – Ida |
N – Nora |
S – Sam |
X - X-ray |
|
|
E – Edward |
J – John |
O – Ocean |
T – Tom |
Y – Young |
Standard NATO Alphabet
|
A - Alpha |
F - Foxtrot |
K - Kilo |
P - Papa |
U - Uniform |
Z - Zulu |
|
B - Bravo |
G - Golf |
L - Lima |
Q - Quebec |
V - Victor |
|
|
C - Charlie |
H - Hotel |
M - Mike |
R - Romeo |
W - Whiskey |
|
|
D - Delta |
I - India |
N - November |
S - Sierra |
X - X-ray |
|
|
E - Echo |
J - Juliet |
O - Oscar |
T – Tango |
Y - Yankee |
Five Signal Strength Codes (Q Codes)
|
Report |
Readability |
Signal Strength |
|
1 |
Unreadable |
Scarcely perceptible |
|
2 |
Readable now and then |
Weak |
|
3 |
Readable but with difficulty |
Fairly good |
|
4 |
Readable |
Good |
|
5 |
Perfectly readable |
Very good |
· Stay off the radio unless absolutely necessary.
Be brief and to the point.
· Engage your brain before your mouth.
· Think about what you are going to say and how best to make yourself understood.
· Listen before you begin your transmission to ensure that the channel is clear.
· Wait a full second after you press the Transmit/PTT button before you begin to speak. This will insure the beginning of your message is heard.
· Speak across the microphone rather than into it to improve intelligibility. Use a natural speaking voice. The only way to overcome loud ambient noise is to shield the microphone from the wind, point it away from the source of noise or wait until the noise abates.
· You should be aware that any portable radio is much less effective when worn on your belt, because your body absorbs part of the radio signal. This is more noticeable with low-powered radios.
· Unless you are within a quarter of a mile from the person you are talking to, hold the radio vertically, at face level, with its antenna in the clear. Also be aware, that you will lose more than half of your range if you use the radio inside a metal vehicle/boat or inside a steel reinforced building when the metalwork acts as a Faraday Cage blocking radio waves.
· Do not shout into the radio.... it only distorts your transmission.
· Do not turn the volume all the way up... it drains the battery and causes distortion. It also has no effect on outgoing transmission volume.
Sample Dialog
Below is a sample dialog that puts these standards to use.
Adam: “Mike, this is Adam. Over”
Mike: “Adam, this is Mike, Stand By. Over”
Mike: “Adam, this is Mike, Go Ahead. Over”
Adam: “Mike, there is a fire at 123 King Street. Over”
Mike: “Adam, this is Mike, confirming a fire at 123 King Street. The fire department will be notified. Over”
Adam: “Mike, this is Adam, address is confirmed, thanks for the help. Over and Out”
Group/Team Use
If you are in a group, there should be one channel agreed for communication between you and other members of the group. For more than one group, there should be a channel assigned to communicate with a nominated group member monitoring an “access” channel as well as the assigned channel. This may require the nominated member to use multiple handsets or transceivers.
Some types of transceivers possess the ability to encode transmissions and decode received messages using CTCSS or DCS encoding/decoding circuitry. CTCSS stands for Continuous Tone Coded Squelch System and is usually found on analogue radio sets. DCS stands for Digitally Coded Squelch and is usually found on digital radio sets. These codes are also often referred to as CDCSS, PL, DPL, Privacy codes or the 38 codes. They all have the same function and work in a similar way. This encoding is a way of allowing groups of users of walkie-talkie two-way radios on the same channel to avoid hearing messages from other nearby users.
When using a CTCSS equipped radio, a CTCSS sub-audible tone is transmitted along with the regular voice audio by the transmitting radio. The receiving radio, set to the same CTCSS tone, will only receive audio if it contains that sub-tone. Interference from other users on the same frequency is therefore rejected (unless they are also on the same sub-tone).
DCS works the same, apart
from it being digital instead. It stands for Digitally Coded Squelch. It sends a
number repeatedly encoded in digital as you speak, in the low frequencies so you
do not hear it. If someone else transmits on the channel with a different or no
DCS, the radio will not un-mute. If they transmit with the same DCS as you, then
your transceiver
will un-mute. DCS is newer than CTCSS, and has more combinations.
Some manufacturers call
these processes Privacy tones or Privacy codes or even act like they are
different channels, and advertise that the
transceiver
has, for example, 968 channel combinations which is misleading as the encoding
does not provide additional channels but only encodes existing/available
channels. CTCSS and DCS encoding doesn't stop anyone from listening to you, they
just stop you from hearing other people. If someone has a
transceiver
with no CTCSS and DCS on, they will be able to hear everyone on the channel,
including people using CTCSS and DCS. Also, CTCSS and DCS encoding does not make
additional channels.
If someone is on the same channel with a different code, then it is not a different channel just a different encoding of the same channel. If you stand next to them and both transmit at the same time, your radios will interfere with each other as they will be trying to use the same channel at the same time.
Morse Code
Since the dawn of radio (and visual, non-verbal) communications one code has stood the test of time... Morse Code. This is a non-vocal form of communication that relies on a series of dots and dashes to represent alphabetical characters and numbers. As technology has progressed its popularity has been superseded but it still has a place in radio communication. The most commonly known Morse Code phrase is S O S (Save Our Souls) and is represented by the following combination of dots and dashes · · · ▬ ▬ ▬ · · · A table containing the code is included below.
| A | · ▬ |
S |
· · · |
| B | ▬ · · · | T | ▬ |
| C | ▬ · ▬ · | U | · · ▬ |
| D | ▬ · · | V | · · · ▬ |
| E | · | W | · ▬ ▬ |
| F | · · ▬ · | X | ▬ · · ▬ |
| G | ▬ ▬ · | Y | ▬ · ▬ ▬ ▬ |
| H | · · · · | Z | ▬ ▬ · · |
| I | · · | 1 | · ▬ ▬ ▬ ▬ |
| J | · ▬ ▬ ▬ | 2 | · · ▬ ▬ ▬ |
| K | ▬ · ▬ | 3 | · · · ▬ ▬ |
| L | · ▬ · · | 4 | · · · · ▬ |
| M | ▬ ▬ | 5 | · · · · · |
| N | ▬ · | 6 | ▬ · · · · |
| O | ▬ ▬ ▬ | 7 | ▬ ▬ · · · |
| P | · ▬ ▬ · | 8 | ▬ ▬ ▬ · · |
| Q | ▬ ▬ · ▬ | 9 | ▬ ▬ ▬ ▬ · |
| R | · ▬ · | 0 | ▬ ▬ ▬ ▬ ▬ |
This section deals with the installation and more technical aspects of mobile two-way and CB transceivers rather than the portable walkie-talkie variety. These units have very few connections and are easy to install. They require a power supply (usually 12 volt DC or 240 volt transformer/rectifier), an antenna connection, microphone connection and an optional extension loudspeaker connection. Some transceiver units may have an additional connection for a signal strength or field strength meter but these functions may also be accomplished by an SWR meter.
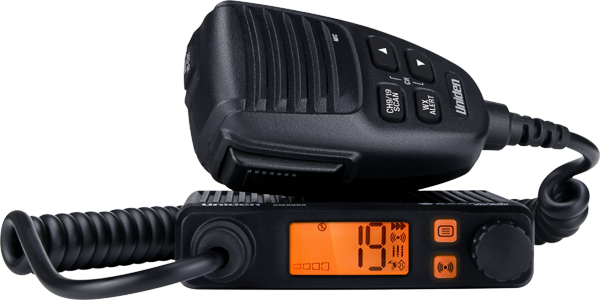
A modern compact CB radio transceiver
The electrical connections are straight forward but the electrical polarity of the vehicle/vessel (positive/negative earth) must be observed if a fixed aerial is connected to the electrically conductive bodywork/superstructure and the transceiver unit is suitably protected with a correctly rated fuse. Mobile 12 volt transceiver units may also be used as a base (non-mobile) station provided that a suitable mains power supply is used.
Rear view of a CB radio showing the antenna and external loudspeaker connections
Antennas or aerials come in a few different types… fixed, whip, mag-mount, integral ground plane to name but a few. If a fixed antenna is used the vehicle/vessel polarity must be observed as previously mentioned. There must be a good electrical connection or bonding to a metal surface to provide the ground plane which is the electrical reference for the antenna that allows signal propagation (transmit). Magnetic mount (or mag-mount for short) antennas use the magnetic steel mount as the ground plane which is suitably insulated against electrical contact with the metal to which it is placed on. Some antennas such as the “Super Bazooka” possess an integral ground plane (usually a metal tube that forms the lower section of the antenna) which is especially recommended if the antenna is being mounted on a timber or GRP (Glass Reinforced Plastic) surface. However a steel plate approximately one foot square may also be used provided that the antenna has a good electrical connection (or bonding) to the plate.
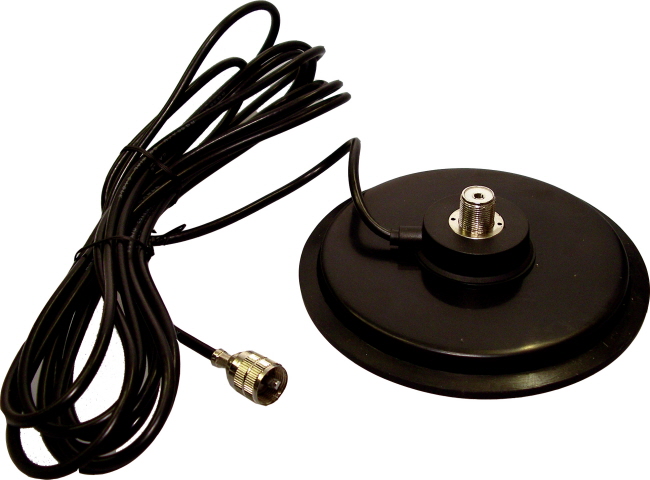
Antenna mag mount and lead... the whip antenna screws into the centre connection

A Super Bazooka type antenna with integral ground plane
If a new installation or the antenna is being changed it must be calibrated using a SWR (Standing Wave Ratio) meter to match the transceiver to the antenna’s impedance (see Adjusting SWR on a CB Radio Transceiver below). The antennas are usually matched to the radio unit by varying the length of the antenna but some types such as a “Super Bazooka” may only have their SWR adjusted by an SWR meter only due to the way they are constructed possessing no means of height adjustment.
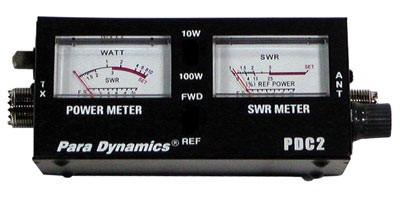
This SWR meter features a dual display for power and SWR
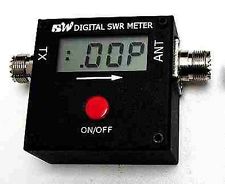
A new development is the digital SWR meter
Microphones are connected to the transceiver by either a four or six pin plug depending upon the features offered by the microphone handset. They usually have a button that is depressed when wishing to transmit although different handsets may include additional functions such as channel up/down, etc. It is best to wait for a second after depressing the transmit button before speaking in case the message is “clipped” due to the transceiver unit taking a fraction of a second to change from receiving to transmitting mode.
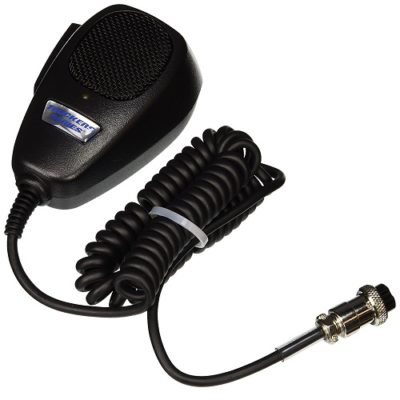
A typical CB PTT (Push To Talk) microphone and lead
If the transceiver unit is mounted remotely from where the user is located an extension loudspeaker may be required in order to hear an incoming message as the loudspeakers in transceiver units are quite small and depending upon where the transceiver unit is installed it may not be possible to hear incoming transmissions. An extension microphone lead may also be beneficial in these circumstances.
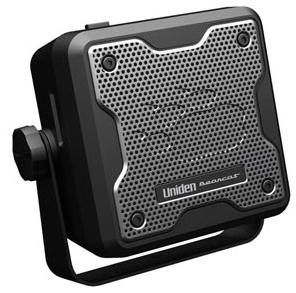
A CB extension loudspeaker... this example is water resistant
Introduction
These instructions are specifically for the DF2462 SWR Meter but they may be used with other meters with suitable interpretation for alternative switching and meter reading configurations.
When connecting an antenna to a transceiver such as a CB radio the impedance of the antenna needs to be matched to that of the transceiver to ensure the lowest Standing Wave Ratio between the output of the transceiver and the output of the antenna. To accomplish this a SWR meter is required to be connected between the transceiver and the antenna. The SWR meter compares the relevant outputs and indicates the ratio between them on a meter (usually analogue) using the bridge method. Quite often the meter doubles up as a power meter to measure the transmitted output in watts. This function is usually selected by a switch on the front of the unit and may be accompanied by a range switch that alters the sensitivity of the meter from five watts to one hundred watts.
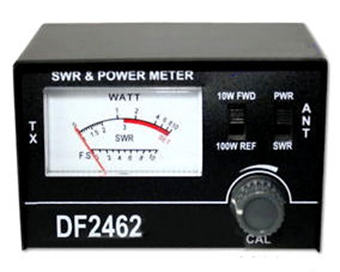
SWR meter front panel and controls
The SWR meter is usually accompanied by a patch lead. This is basically a short lead that takes the place of the antenna lead and connects the transceiver’s antenna output to the input socket on the SWR meter marked “TX” or “TRANS” (“Transmit” or “Xmit” on other units). The antenna lead is connected to the output side of the SWR meter marked “Ant” (“Antenna” or “Output” on other units). Ensure that any connections that made or changed are done so whilst the transceiver is switched off.
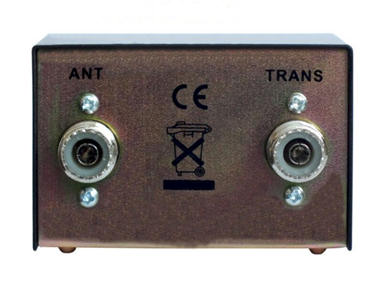
SWR rear and connections
There are two switches on the front panel marked FWD/REF and PWR/SWR. The First switch doubles up as a power meter range selector (10 watt/100 watt) when the meter is in PWR (Power) mode. If the switches on other units are different then the individual SWR meter’s instructions should be consulted. Beneath the switches is a rotary knob that is used during the calibration and setting process.
Using the SWR meter
With the transceiver switched on and set to channel one and the SWR meter set to “FWD” press the transmit (key up) button on the microphone. Whilst keeping the transmit button pressed adjust the set knob on the meter so that the meter needle swings to the set position. When this point is reached move the selector switch to the “Ref” or “Reference” position. The needle then indicates the SWR reading on channel 1. Note and record the reading then release the transmit button on the microphone. Repeat the process on channels 19 and 40.
Interpreting the Readings
If the readings on the various channels are below 2 the unit can be used safely. If the SWR readings on all channels is above 2 but not in the red zone (normally over 3) there could be a problem with the coaxial cable (poor quality, wrong length, poor ground-plane, etc.) or cable connections (poor connections, bad contacts, etc.) or an ungrounded antenna mount. If the SWR reading is in the red zone there is probably a short in the antenna cable or connections or the antenna stud is incorrectly fitted. In this instance the unit should not be used as the transmitter could be severely damaged.
If the SWR reading on channel one is higher than it is on channel 40 then the antenna is physically too short and needs to be lengthened.
If the SWR reading on channel 40 is higher than it is on channel one then the antenna is too long and requires shortening or alternatively the conductor length requires shortening and the readings repeated.
Once completed the settings should stay unaltered unless the antenna is changed or the antenna lead is shortened/lengthened.
If the unit is being used as a power meter with the FWD/REF switch set to 10 watts and the PWR/SWR switch set to PWR, when transmitting the deflection of the needle indicates power output on top of the upper scale. The lower scale (FS or Field Strength) indicates field strength when in transmit mode when used with an appropriate load or dummy antenna.
Footnote
The SWR Meter can be left connected permanently but with the PWR/SWR selector switch set to PWR when the unit will then function as a power meter. If this is the case it may be beneficial to set the FWD/REF switch to the 10 watt setting to ensure that the meter registers in an appropriate range as CB radio transceivers have a maximum power output of 5 watts.
Please note: there may be a slight signal degradation if the SWR meter is left connected to the radio unit permanently but this may only be noticeable on long range transmission or reception.
UK (PMR446) and US (FRS & GMRS) Walkie-Talkie Frequencies
|
Channel |
UK Frequency (MHZ) |
US Frequency (MHZ) |
|
1 |
446.00625 |
462.5625 |
|
2 |
446.01875 |
462.5875 |
|
3 |
446.03125 |
462.6125 |
|
4 |
446.04375 |
462.6375 |
|
5 |
446.05625 |
462.6625 |
|
6 |
446.06875 |
462.6875 |
|
7 |
446.08125 |
462.7125 |
|
8 |
446.09375 |
467.5625 |
|
9 |
|
467.5875 |
|
10 |
|
467.6125 |
|
11 |
|
467.6375 |
|
12 |
|
467.6625 |
|
13 |
|
467.6875 |
|
14 |
|
467.7125 |
|
15 |
|
462.550 |
|
16 |
|
462.575 |
|
17 |
|
462.600 |
|
18 |
|
462.625 |
|
19 |
|
462.650 |
|
20 |
|
462.675 |
|
21 |
|
462.700 |
|
22 |
|
462.725 |
Within the UHF band lie the eight "licence-free" (PMR446) channels which are listed above. PMR446 is a European Union standard for radios approved for use in the UK and the European Union. They have 8 channels at frequency 446mhz, and a maximum range of around 2 miles in open country. No PMR446 radio can have more than 500mw of transmission power, so all makes and models effectively have the same maximum range. PMR446 equipment is not approved for use in the U.S.A or Canada.
Please note that the use of American FRS and GMRS walkie-talkies in the United Kingdom is not legal, and could cause interference to licenced radio users. FRS has 14 channels, numbered 1-14 below. GMRS uses the same channels as FRS 1-7, and then adds a further 7 channels numbered 15-22 below. There are many "combination" FRS/GMRS walkie-talkies on the market that have all 22 of the channels listed above.
Citizen Band Channels and Frequencies
|
Channel Number |
UK Band Frequency (Mhz) |
EU/CEPT Band Frequency (Mhz) |
|
1 |
27.60125 |
26.9650 |
|
2 |
27.61125 |
26.9750 |
|
3 |
27.62125 |
26.9850 |
|
4 |
27.63125 |
27.0050 |
|
5 |
27.64125 |
27.0150 |
|
6 |
27.65125 |
27.0250 |
|
7 |
27.66125 |
27.0350 |
|
8 |
27.67125 |
27.0550 |
|
9 |
27.68125 |
27.0650 |
|
10 |
27.69125 |
27.0750 |
|
11 |
27.70125 |
27.0850 |
|
12 |
27.71125 |
27.1050 |
|
13 |
27.72125 |
27.1150 |
|
14 |
27.73125 |
27.1250 |
|
15 |
27.74125 |
27.1350 |
|
16 |
27.75125 |
27.1550 |
|
17 |
27.76125 |
27.1650 |
|
18 |
27.77125 |
27.1750 |
|
19 |
27.78125 |
27.1850 |
|
20 |
27.79125 |
27.2050 |
|
21 |
27.80125 |
27.2150 |
|
22 |
27.81125 |
27.2250 |
|
23 |
27.82125 |
27.2550 |
|
24 |
27.83125 |
27.2350 |
|
25 |
27.84125 |
27.2450 |
|
26 |
27.85125 |
27.2650 |
|
27 |
27.86125 |
27.2750 |
|
28 |
27.87125 |
27.2850 |
|
29 |
27.88125 |
27.2950 |
|
30 |
27.89125 |
27.3050 |
|
31 |
27.90125 |
27.3150 |
|
32 |
27.91125 |
27.3250 |
|
33 |
27.92125 |
27.3350 |
|
34 |
27.93125 |
27.3450 |
|
35 |
27.94125 |
27.3550 |
|
36 |
27.95125 |
27.3650 |
|
37 |
27.96125 |
27.3750 |
|
38 |
27.97125 |
27.3850 |
|
39 |
27.98125 |
27.3950 |
|
40 |
27.99125 |
27.4050 |
Marine VHF Channels
|
Channel |
International |
United States |
US Channel |
|
1 |
156.050 / 160.050 |
156.050 |
1A |
|
5 |
156.250 / 160.850 |
156.250 |
5A |
|
7 |
156.350 / 160.950 |
156.350 |
7A |
|
18 |
156.900 / 161.500 |
156.900 |
18A |
|
19 |
156.950 / 161.550 |
156.900 |
19A |
|
20 |
157.000 / 161.600 |
157.000 |
20A |
|
21 |
157.050 / 161.650 |
157.050 |
21A |
|
22 |
157.100 / 161.700 |
157.100 |
22A |
|
23 |
157.150 / 161.750 |
157.150 |
23A |
|
63 |
156.175 / 160.775 |
156.175 |
63A |
|
64 |
156.225 / 160.825 |
156.225 |
64A |
|
65 |
156.275 / 160.875 |
156.275 |
65A |
|
66 |
156.325 / 160.925 |
156.325 |
66A |
|
78 |
156.925 / 161.525 |
156.925 |
78A |
|
79 |
156.975 / 161.575 |
156.975 |
79A |
|
80 |
157.025 / 161.625 |
157.025 |
80A |
|
81 |
157.075 / 161.675 |
157.075 |
81A |
|
82 |
157.125 / 161.725 |
157.125 |
82A |
|
83 |
157.175 / 161.775 |
157.175 |
83A |
LPD (Low Power Device) Frequencies
|
Channel |
Frequency |
Channel |
Frequency |
Channel |
Frequency |
|
1 |
433.075 |
24 |
433.650 |
47 |
434.225 |
|
2 |
433.100 |
25 |
433.675 |
48 |
434.250 |
|
3 |
433.125 |
26 |
433.700 |
49 |
434.275 |
|
4 |
433.150 |
27 |
433.725 |
50 |
434.300 |
|
5 |
433.175 |
28 |
433.750 |
51 |
434.325 |
|
6 |
433.200 |
29 |
433.775 |
52 |
434.350 |
|
7 |
433.225 |
30 |
433.800 |
53 |
434.375 |
|
8 |
433.250 |
31 |
433.825 |
54 |
434.400 |
|
9 |
433.275 |
32 |
433.850 |
55 |
434.425 |
|
10 |
433.300 |
33 |
433.875 |
56 |
434.450 |
|
11 |
433.325 |
34 |
433.900 |
57 |
434.475 |
|
12 |
433.350 |
35 |
433.925 |
58 |
434.500 |
|
13 |
433.375 |
36 |
433.950 |
59 |
434.525 |
|
14 |
433.400 |
37 |
433.975 |
60 |
434.550 |
|
15 |
433.425 |
38 |
434.000 |
61 |
434.575 |
|
16 |
433.450 |
39 |
434.025 |
62 |
434.600 |
|
17 |
433.475 |
40 |
434.050 |
63 |
434.625 |
|
18 |
433.500 |
41 |
434.075 |
64 |
434.650 |
|
19 |
433.525 |
42 |
434.100 |
65 |
434.675 |
|
20 |
433.550 |
43 |
434.125 |
66 |
434.700 |
|
21 |
433.575 |
44 |
434.150 |
67 |
434.725 |
|
22 |
433.600 |
45 |
434.175 |
68 |
434.750 |
|
23 |
433.625 |
46 |
434.200 |
69 |
434.775 |
Click on the required section below to follow links
Wyre Heal - Wirral's Local History
![]()
|
|
|
|
Updated 18/06/2017